-
-
Download the latest version of Cura here.
-
Run through the setup wizard and install it onto your computer.
-
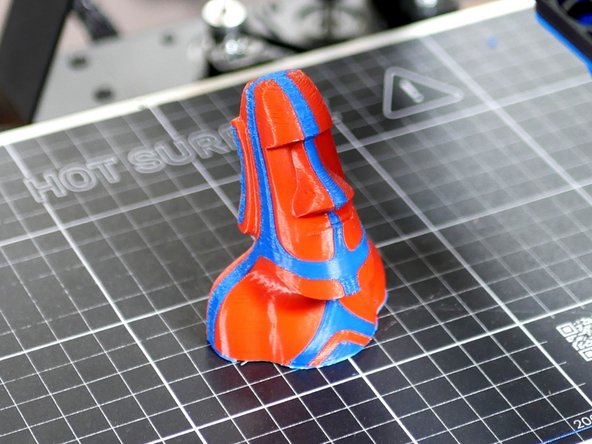
Also download the Moai test print, this will be your first dual print. Dual prints are two part, one for each filament.
-
-
-
-
-
Open up the Cura application.
-
Run through the startup wizard.
-
Click on "add a non-networked printer"
-
Scroll down to Makertech and select the AXIS 3d printer.
-
Then hit next.
-
-
-
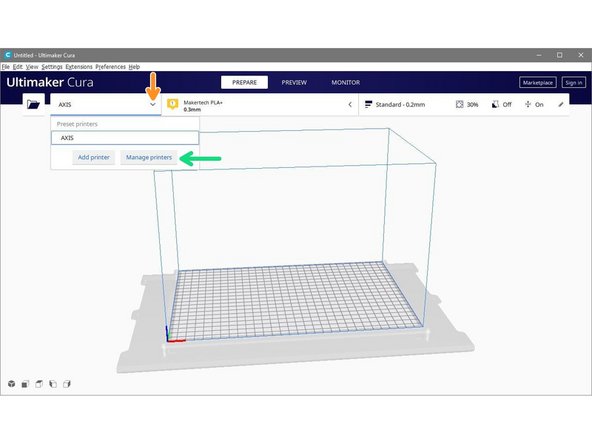
You can access Machine Settings by clicking the Arrow next to AXIS.
-
Then go to Manage printers.
-
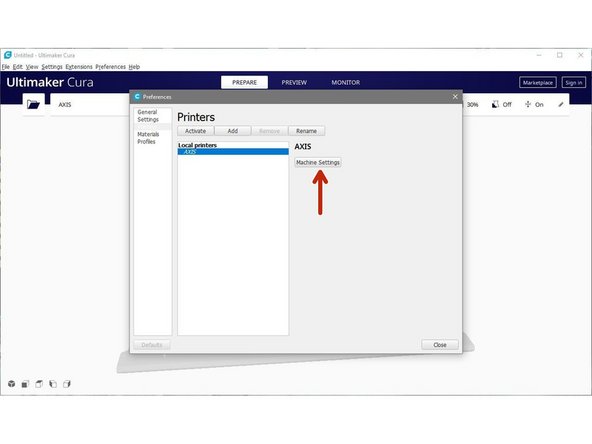
And then Machine Settings.
-
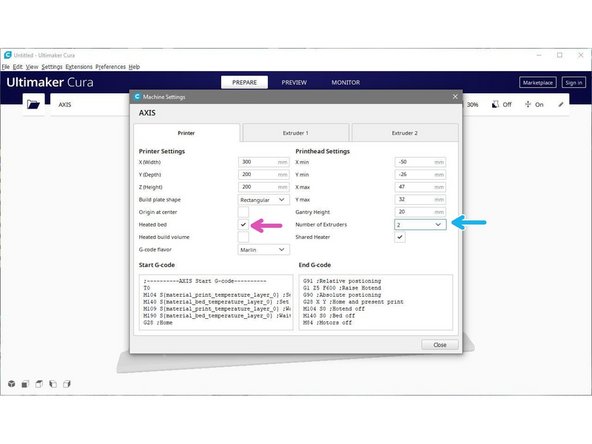
Set the number of extruders to 2.
-
If you have the heated bed installed make sure that this is also checked.
-
-
-
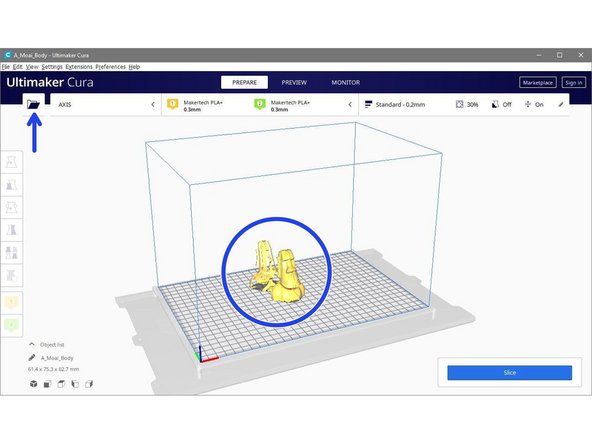
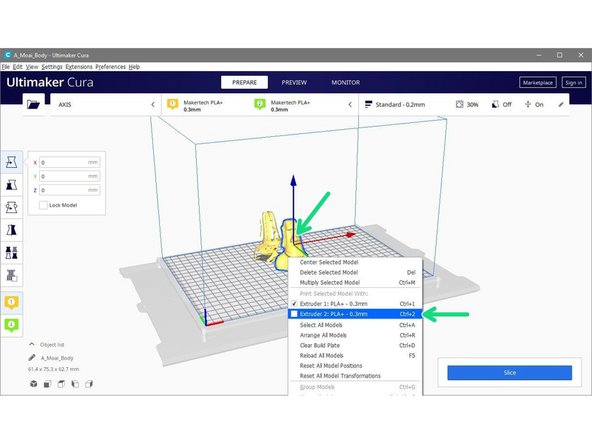
Right click on one of the models and set its extruder to Extruder 2.
-
This model will be printed with the second extruder material.
-
-
-
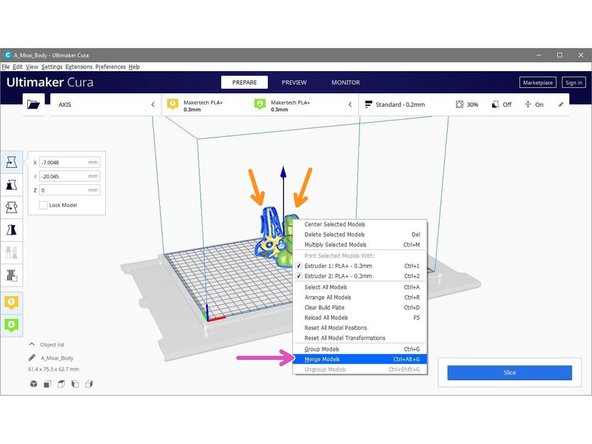
Select both models by pressing ctrl+a or by holding shift and clicking on both.
-
With both selected, right click on one and press "Merge Models".
-
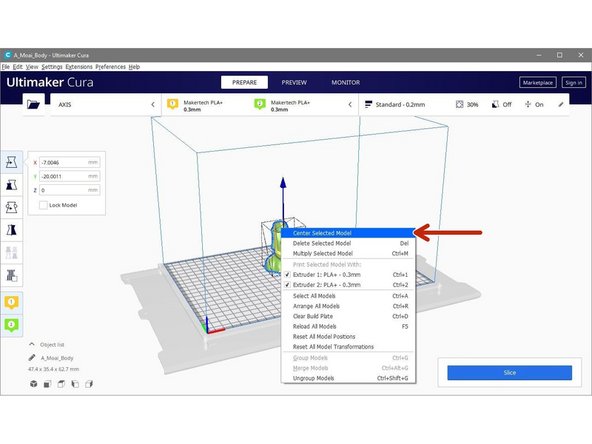
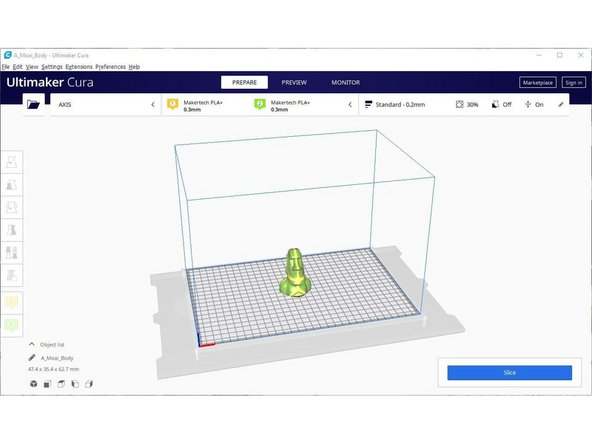
Right click on the merged single model and press "Center Selected Model".
-
-
-
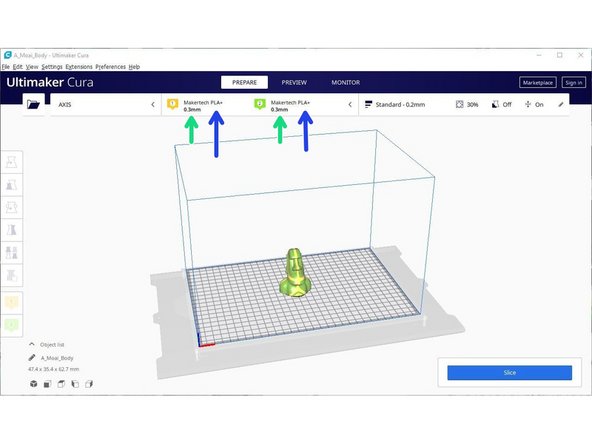
As the extruders share a single hotend, the two nozzles should always be the same size and match what you have installed.
-
Material can very, select what you are planning to print with. PLA+ is recommended for the first print.
-
-
-
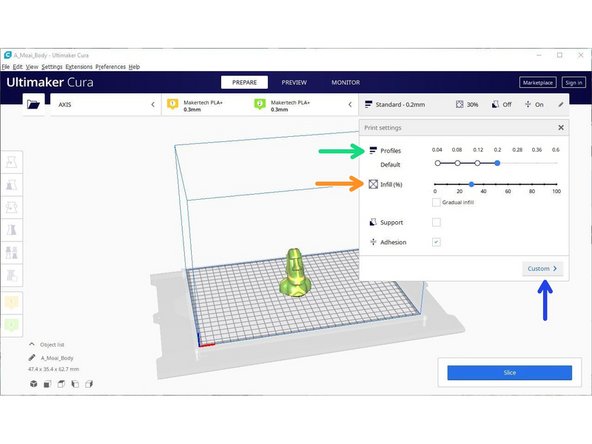
Leave setting as their defaults for the first print.
-
Profiles: Print profiles are default settings at different layer heights. The lower the number the more layers, hence more detail, but at the cost of greater print time.
-
Note, different nozzle sizes will have different layer height ranges.
-
Infill: This is the amount of material the printer will deposit inside the print. Between 20-30% is ideal in most cases.
-
Other options can also be tweaked by clicking custom. Hovering over an option will give you a description of its purpose.
-
You may find you need to adjust certain settings to get your printer working perfectly, we recommend posting in the forum for the best advise on this.
-
-
-
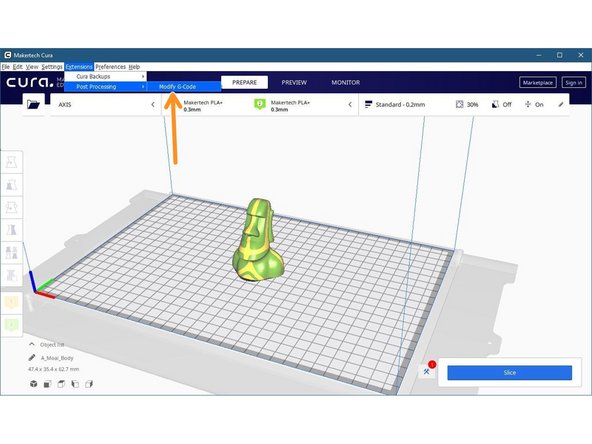
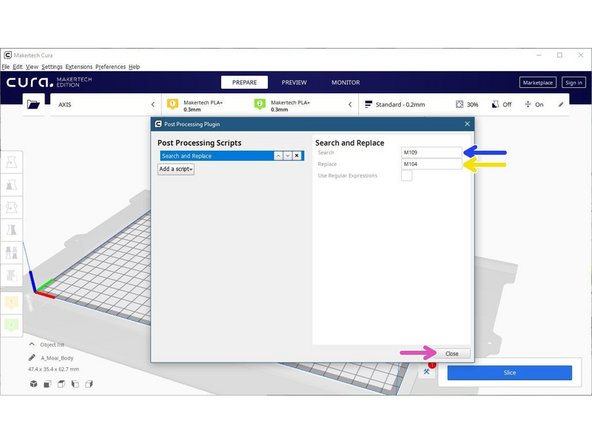
Go to Extension -> Post Processing -> Modify G-Code
-
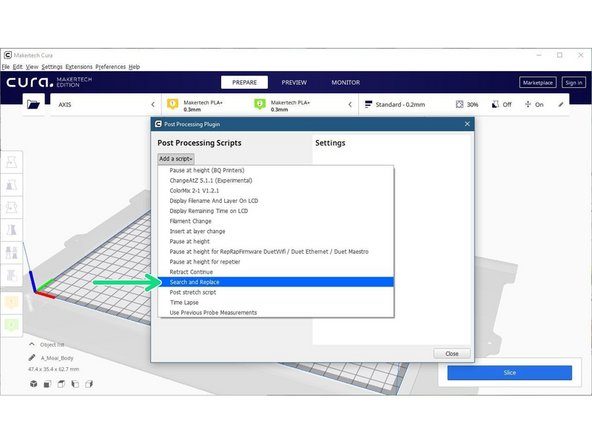
In the box that opens, go to Add a script -> Search and Replace
-
Enter these values into the Search/Replace boxes:
-
Search: M109
-
Replace: M104
-
Make sure that the M is upper case.
-
Hit close when done.
-
-
-
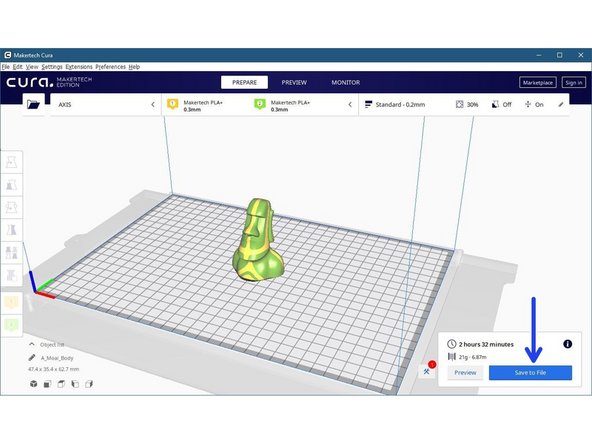
Hit slice and save the .gcode to either a folder or to the SD card if you have the LCD screen installed.
-
-
-
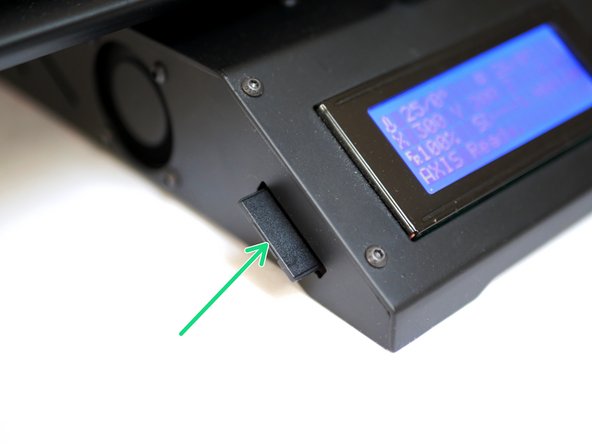
The most efficient way to print is via SD card, its self contained and doesn't rely on a computer connection.
-
After saving your .gcode to the SD card, slot it into the side of the Axis like shown.
-
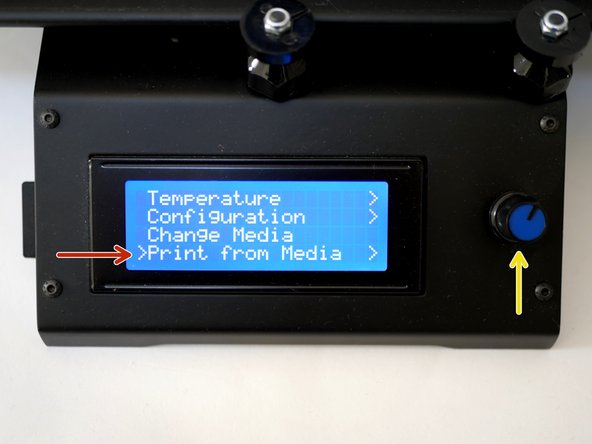
Click the turn wheel once and turn it clock wise to scroll to the bottom of the menu.
-
Click on "Print from Media"
-
Print the .gcode file.
-
-
-
To print via USB you will first need to connect the Axis to your printer via USB.
-
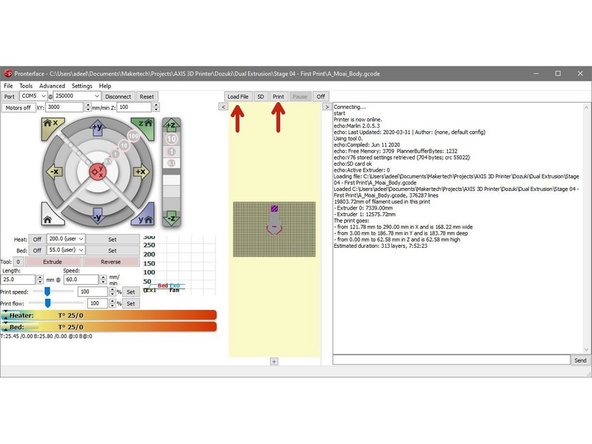
Open your saved .gcode in pronterface and hit print once it's loaded.
-
In case of an error pronterface should receive a message in it's terminal to help diagnose.
-
-
-
You should already have dialed in your z-offset from the single extrusion build, but here it is again:
-
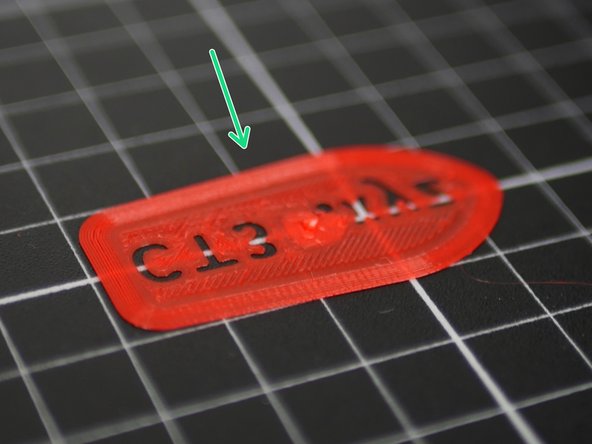
The most critical part of any print is its first layer, this is the contact point between the rest of the print and the print platform.
-
What we want is a happy medium like this.
-
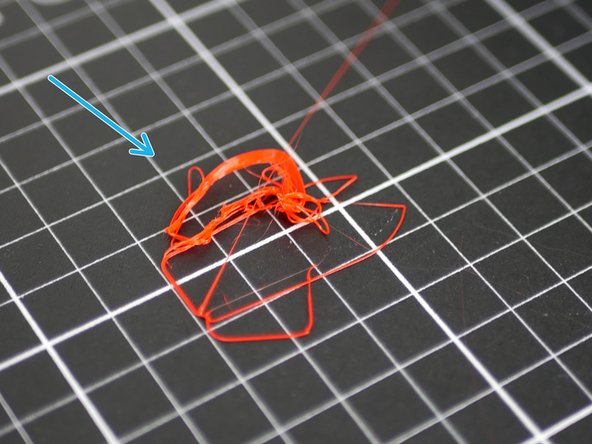
Too high - the first layer isn't sticking or the model has peeled off.
-
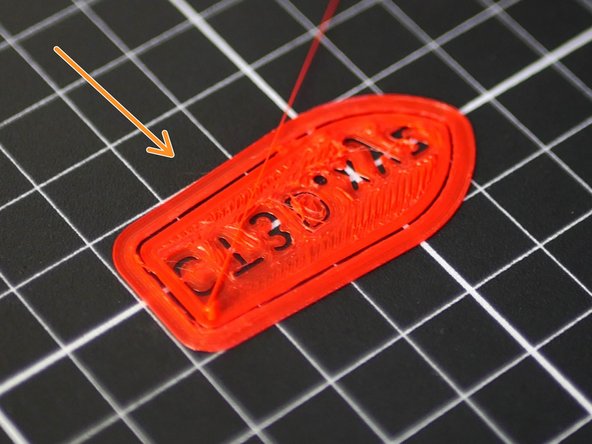
Too low - the nozzles is pressing the plastic down too much, or at worst digging into the bed.
-
If you find your first layer to be too low or high, stop the print and adjust the z-offset, as shown in next step.
-
-
-
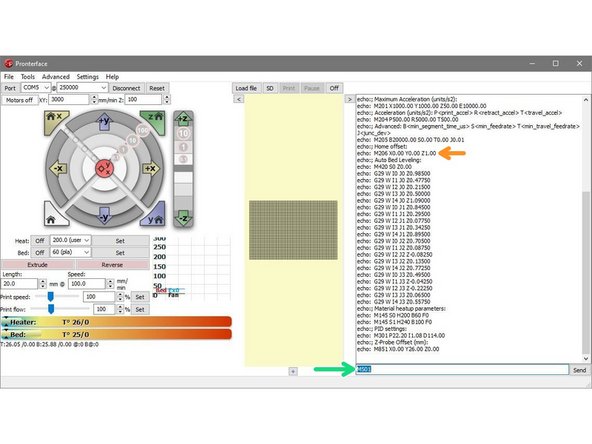
Connect the Axis to Pronterface.
-
Send M501 to check what your previous z-offset is set to.
-
In our case this was 1.0.
-
Fist layer too high, increase the Z-offset by 0.1mm.
-
First layer too low, decrease Z-offset by 0.1mm.
-
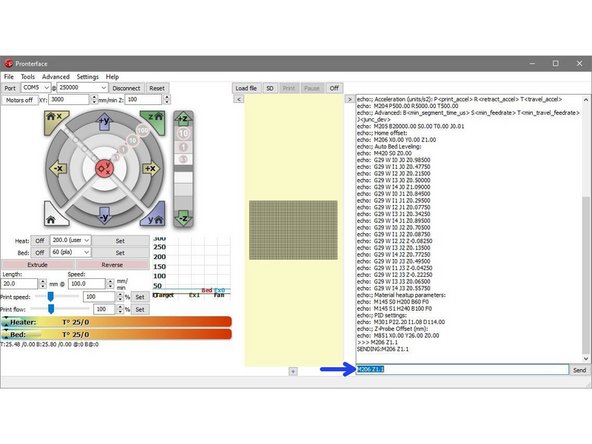
E.g. The first layer isn't sticking (it is too high) we will increase the Z-offset by 0.1mm to 1.1mm.
-
Enter M206 Z1.1 to set the new Z-offset.
-
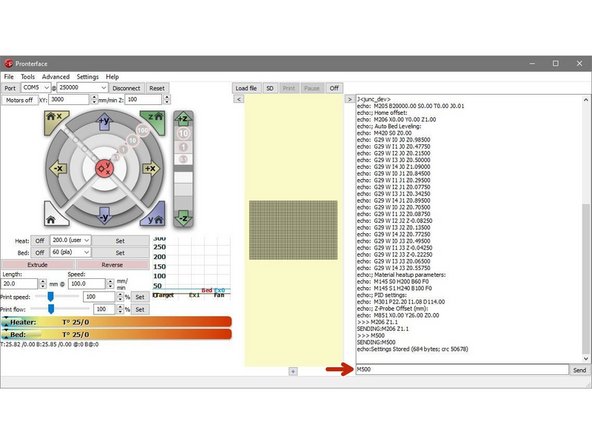
Enter M500 to save to printer memory.
-
-
-
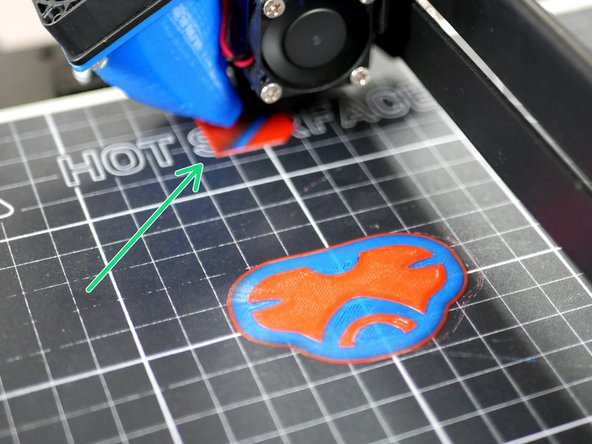
Once printing begins you will notice that when the Axis goes to switch extruders it will draw a square towards the back of the platform, this is the prime tower.
-
The prime tower will be present and in the same position in all dual prints.
-
-
-
Tips for Dual Extrusion:
-
Check your printing temperature, if set too high or too low it will cause excessive stringing that will block the splitter when the filament is being switched. Experiment with different temps to find the best results.
-
When printing with two different types of filament make sure that they are in a similar temperature range to each other. If printing PLA and ABS together remember that ABS prints at a higher temp, if the PLA temp is also not set high enough it won't be able to purge the high temp ABS from the nozzle when trying to switch.
-
To make the path for the filament easier to follow use a sharp craft knife to add a bezel to the inside edge of the PTFE tubes that the filament enters through. Check using a snipped of piece of filament that it can easily get through both side of the splitter from all angles.
-