
Parts
No parts specified.
-
-
Fasten onto the print head carriage two M3 x 20mm bolts.
-
M3 x 20mm bolts
-
M3 nyloc nut
-
-
-
Fix the carriage onto the gantry like shown.
-
Slot the bolts of the carriage into the long slit on the gantry. Make sure to match the orientation as shown.
-
Eccentric guide x1
-
Fixed guide x2
-
M4 x 30mm bolt
-
M4 nyloc nut
-
Secure the fixed guides firmly.
-
You should still be able to turn the eccentric guide by hand.
-
-
-
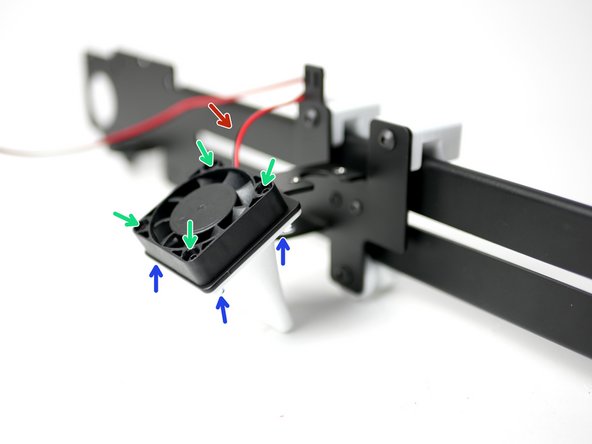
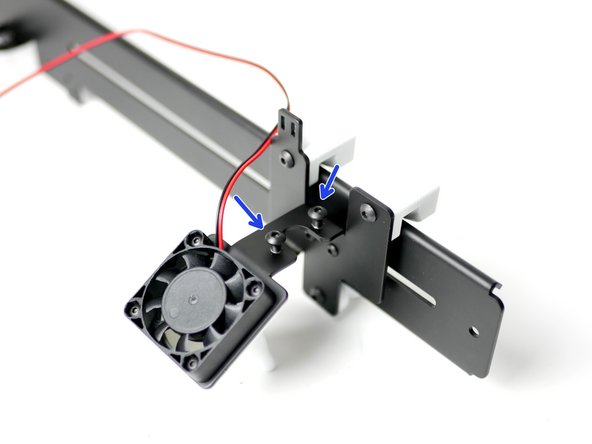
Install onto the print carriage the 40mm fan (with 1m cable).
-
Make sure the cable is off to the top left corner and that the fan is sticker side down.
-
Four M3x16mm bolts
-
Four M3 nyloc nuts
-
The fan shroud is something that can be printed and installed later.
I plan to use the axis to print with a bigger nozzle diameter than I have on my other printers (0.6-0.8) and after my first print with a 0.6mm nozzle I can say that the fan shroud is a must since with 0.36 layer height the layers dont cool and harden enough before the next layer prints on them. Maybe I have to adjust a minimum time for a layer and maximum speed? Is there an option in Cura, to assure that the layer is ready to be printed with the next layer?
-
-
-
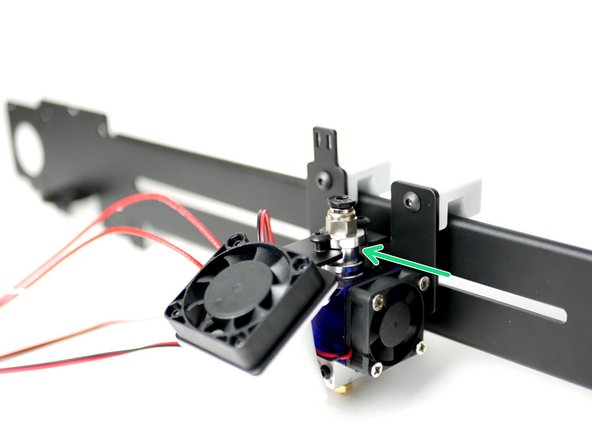
Begin by threading on two M4 x 8mm bolts onto the top of the tool carriage.
-
Two M4 x 8mm bolts
-
Slide the Hotend onto the carriage like shown and tighten the M4 bolts down onto it, clamping it in place.
-
As you tighten, the hotend may move, push the hotend into its slot to prevent as much of this as possible.
-
Make sure that the hotend is orientated like shown, with the cables coming out in the direction of the 40mm fan.
The coating applied also partially filled in the 4mm threads making the addition of the 4mm x 8mm bolts difficult. I used a 4mm tap to clear the coating.
-
-
-
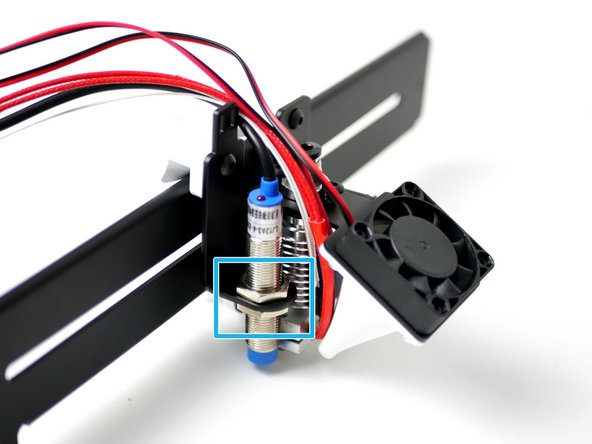
Fix the levelling probe onto the back of the tool carriage to complete the print head.
-
The bottom of the probe should be approx 1mm above the bottom of the hotend's nozzle.
-
-
-
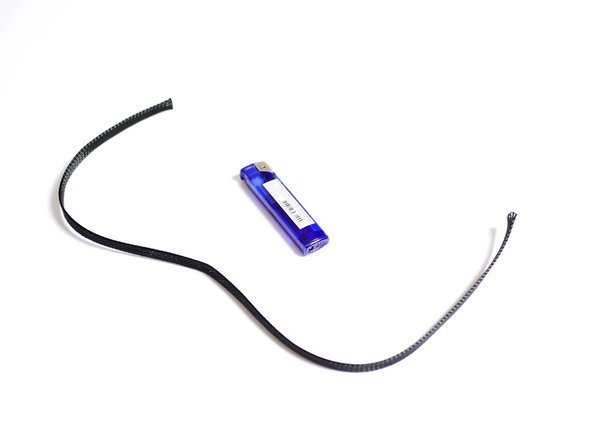
Cut 85CM of the braided cable sleeving.
-
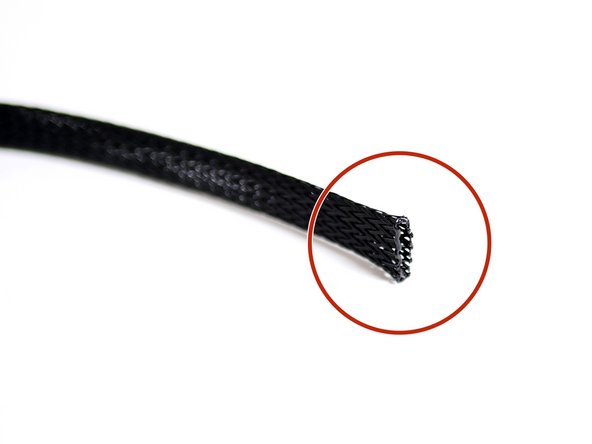
Melt the ends with a lighter to prevent fraying.
-
-
-
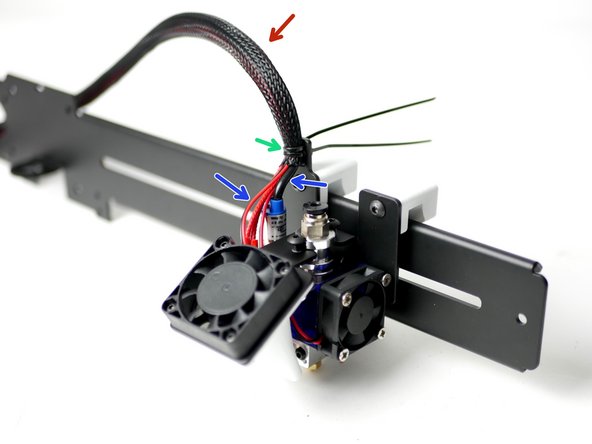
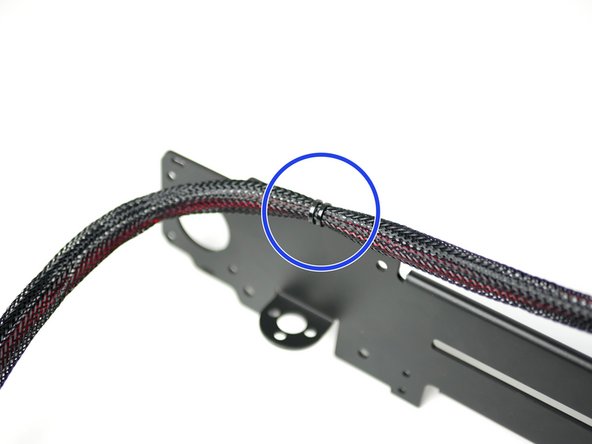
Slide the braided sleeving over the cables.
-
Create some relief/slack in the cables.
-
Tie the cables onto the carriage firmly with two cable ties.
-
-
-
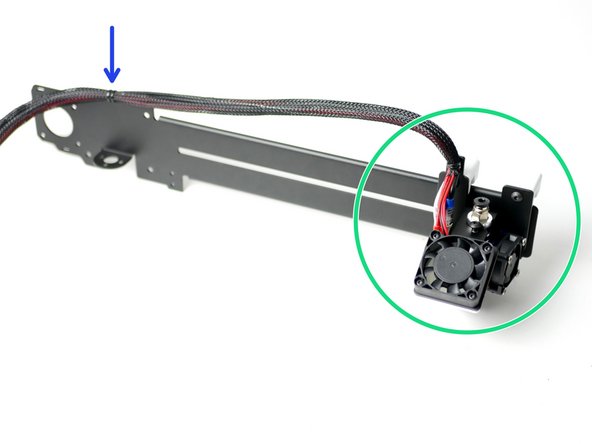
Push the print head out to the end of the gantry.
-
Cable tie the cables to the gantry.
-


Cancel: I did not complete this guide.
23 other people completed this guide.
