
Parts
No parts specified.
-
-
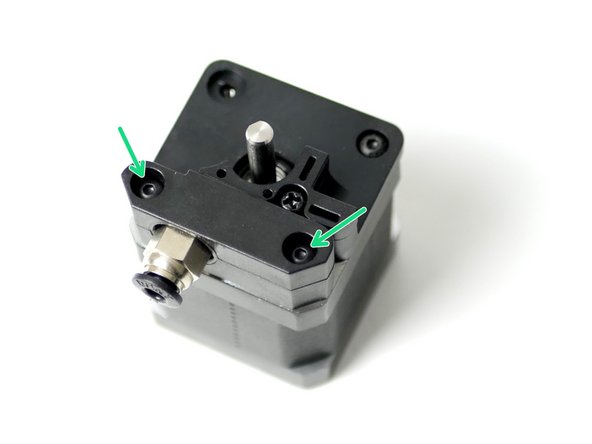
Fix the back plate to the motor face.
-
M3 x 6mm bolt
-
Match the orientation of the motors connector.
-
-
-
Fix the coupling mount to the face of the motor.
-
Coupling mount
-
M3 x 16mm bolt
-
-
-
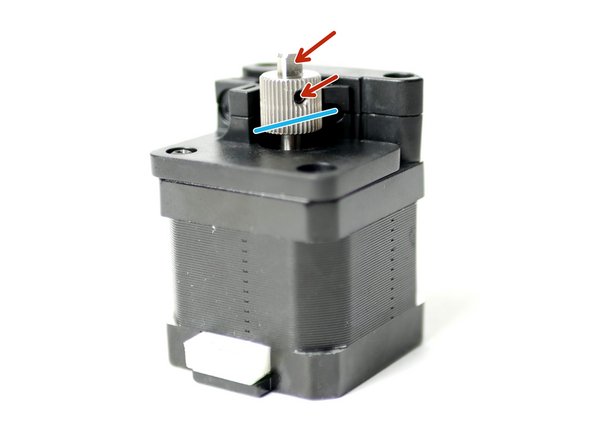
Align the drive gear so that it runs with the filaments path.
-
Filament path
-
Fix the Drive Gear to the shaft of the motor.
-
Tighten the set screw onto the flat of the shaft. Tighten firmly.
-
-
-
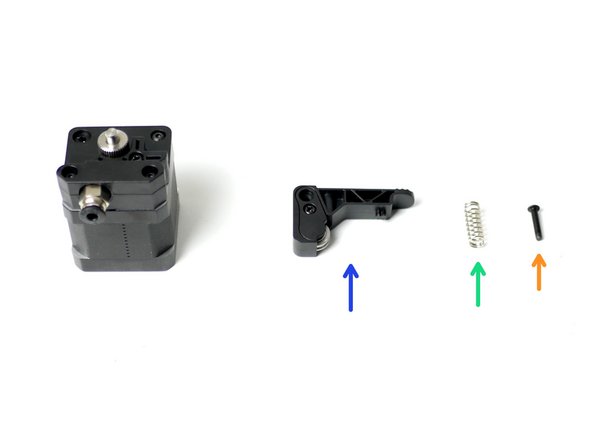
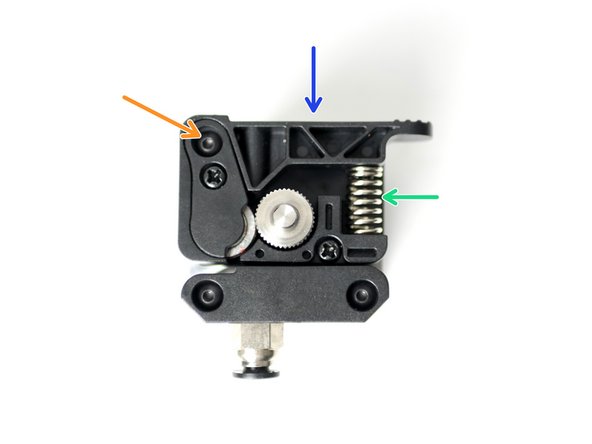
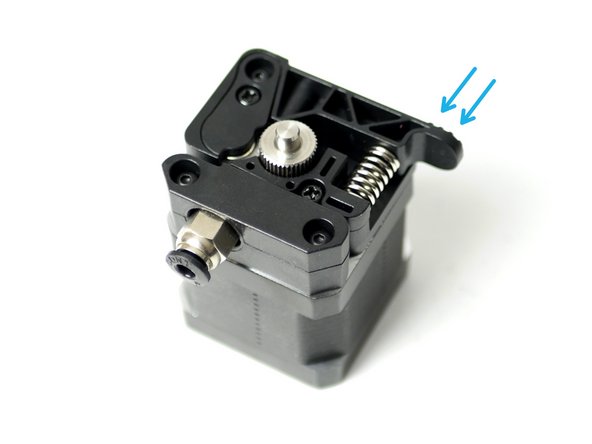
Take the Idler arm and attach it to the assembly.
-
Idler arm
-
Extruder Spring
-
M3 x 16mm bolt
-
Put the spring in place and hold the arm in position before dropping in the M3 x 16mm bolt.
-
Do not over tighten, the arm should still be able to swivel when pressure is applied.
-
-
-
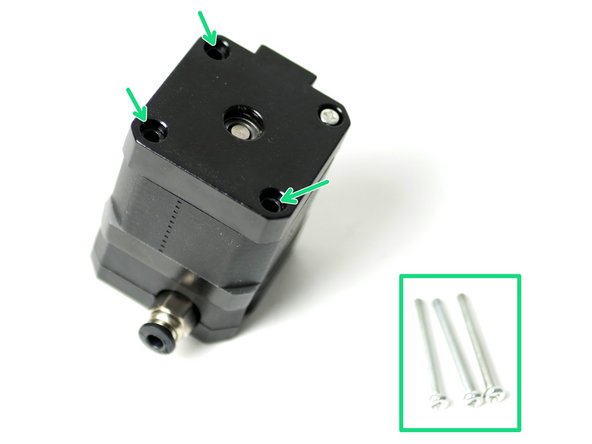
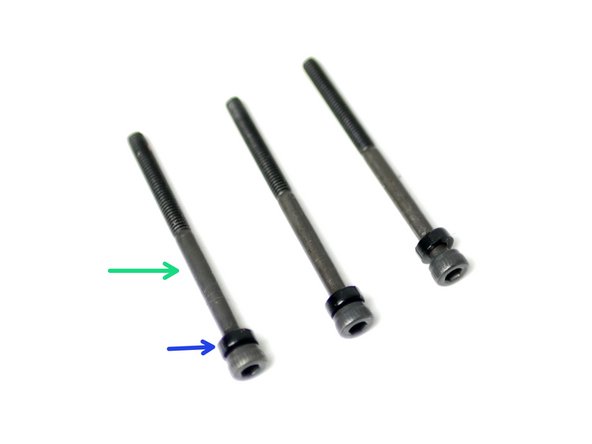
Take three M3 x 40mm bolts and slide onto each of them an M3x2mm spacer.
-
M3 x 40mm bolt
-
M3 x 2mm spacer
-
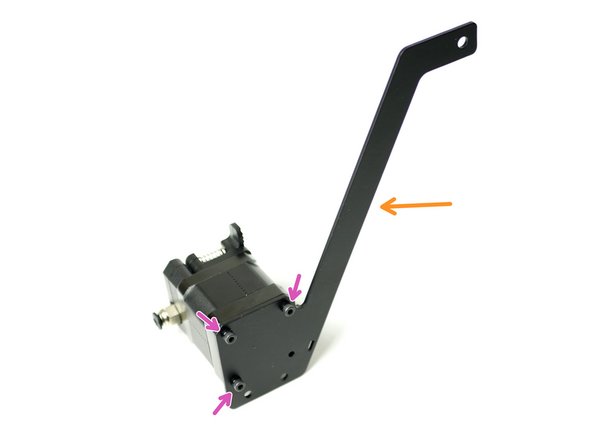
Fix these bolts onto the spool holder and fasten them into the back of the extruder motor, where the three bolts were removed in the previous step.
-
Spool Holder
-
M3 x 40mm bolt and spacer
-
Match the orientation of the spool holder shown.
-
-
-
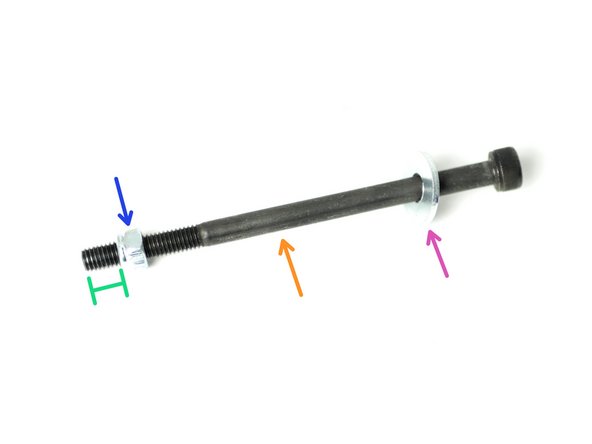
Create the spool holder arm:
-
M5 x 100mm bolt
-
M5 penny washer
-
M5 nyloc nut
-
Approx 1CM
-
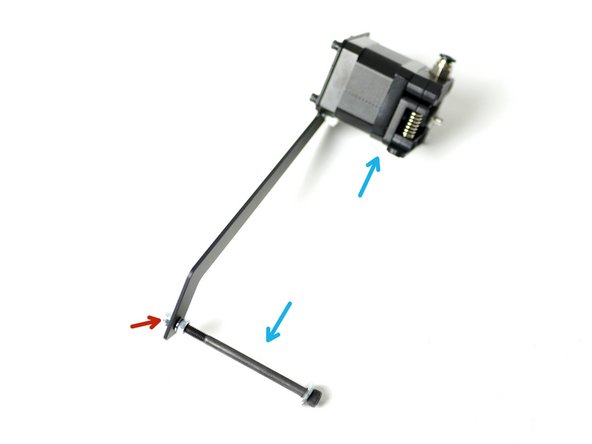
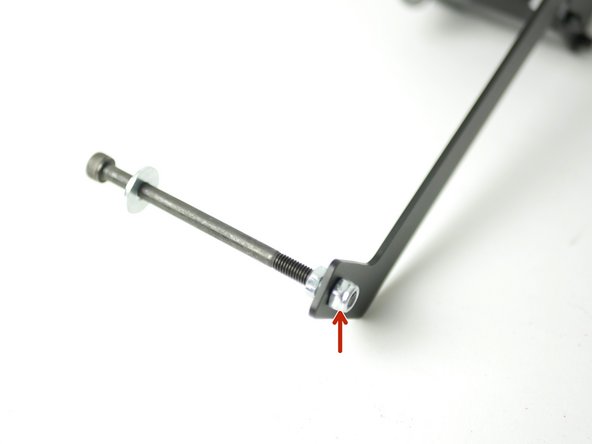
Fix the arm onto the spool holder bracket with another M5 nyloc nut.
-
Make sure that it is on the same side as the extruder.
-
-
-
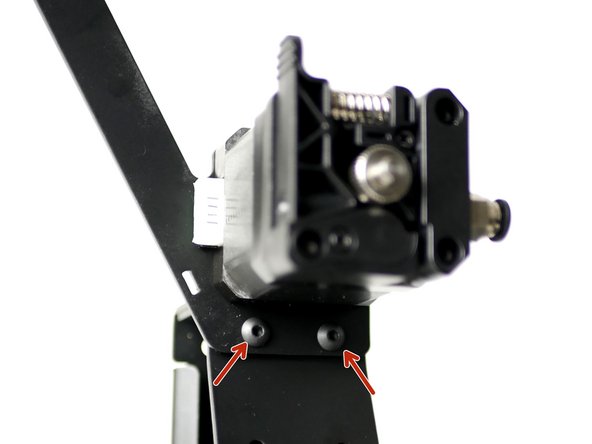
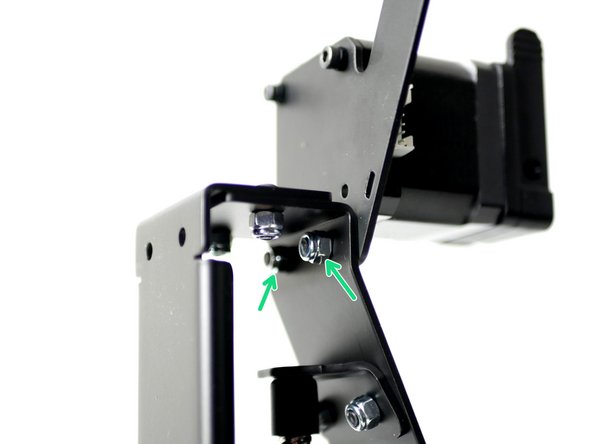
Mount the Extruder assembly onto the left the of the Z-pillar.
-
M4 x 10mm bolt
-
M4 nyloc nut
What is the Backer/Order No. on that form?
That should be your order number from the store or your backer number from the kickstarter. Please message us if you’re unsure - info@makertech3d.com.
I have the Dual Extrusion box with the Extruder components and motor, but no Spool Holder Bracket.
Apologies that the spool holder was missing. Please complete this form and we’ll it sent out asap.
Dual Extruder Instructions:
-
-
-
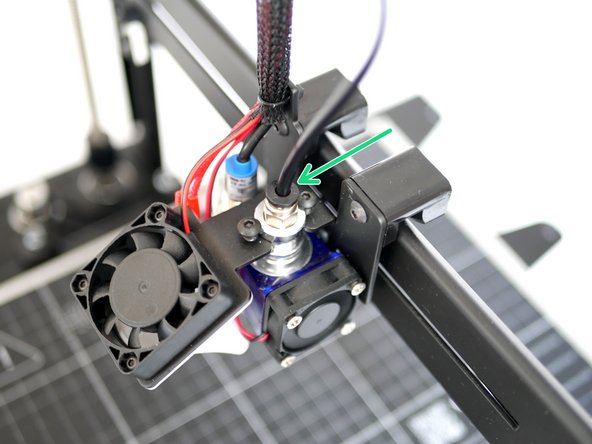
Insert one end of the PTFE tubing to the extruder.
-
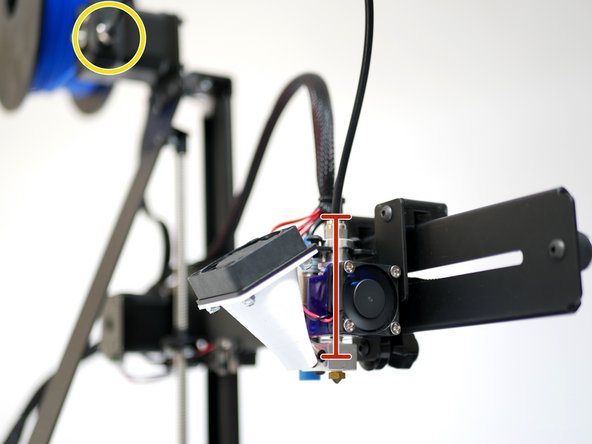
Insert the other end into the Hotend.
-
Make sure that it is fed all the way to the bottom of the hotend, this should be approximately 6CM.
-
Double check, as running filament through the hotend with the PTFE tube not all the way down will clog the Hotend.
-
If your hotend does get clogged you will have to disassemble it to remove the clogged plastic from the hotend throat.
My PTFE tubing (which is white) came with a threaded “bolt” attached to one end, which doesn’t appear to be able to be connected to either the extruder or the hotend. Why is this there, and how should I connect the PTEF tubing please?
Hi Aaron, that connector can be disregarded. The manufacturer included it but it is not used on the AXIS.
-


Cancel: I did not complete this guide.
18 other people completed this guide.

2 Comments
i have double extruder, where does the second one goes?
We’d recommend getting up and running with single extrusion first.
The dual extrusion guide is here: