-
-
Download the two part DSH calibration model here.
-
Open your preferred slicing software. We will be using CURA.
-
-
-
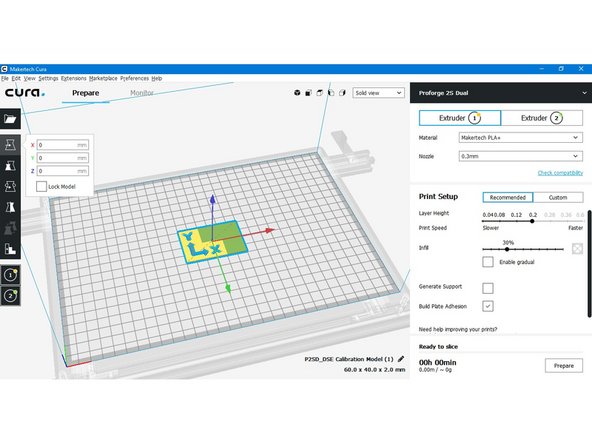
Load the included DSH Calibration Model model into CURA.
-
There are two files, you will need to load both.
-
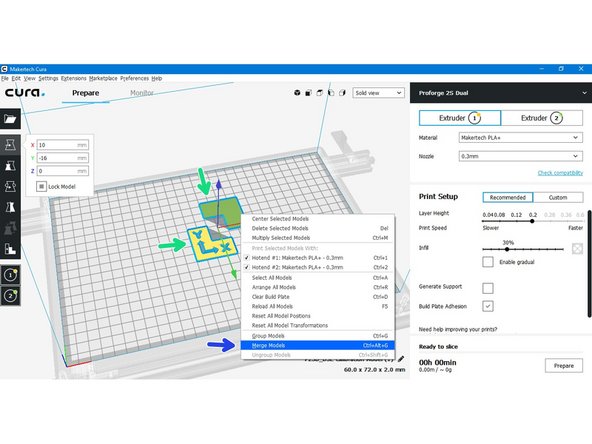
Align the models so that the arrows are in the direction of the axes.
-
Right click on this part of the model and choose Hotend #2.
-
-
-
Hold shift and select both parts of the model.
-
Right click on either model, click on Merge Models.
-
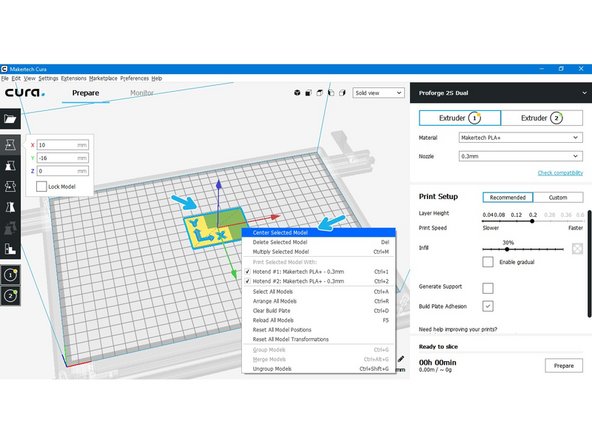
Right click on the single model and click on Center Selected Model.
-
-
-
Set the Hotends temperatures based on the materials you're loading into the Switching Hotend.
-
Remember that the low temp side is limited to 250C and the high temp side is limited to 400C.
-
-
-
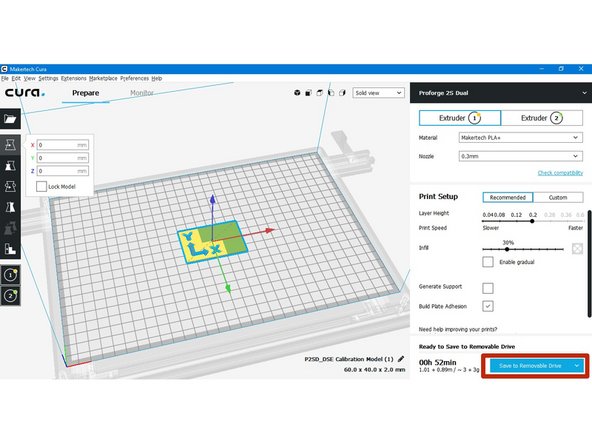
In Cura's Dual Extrusion setting, turn on the prime tower.
-
Set up as shown in the image.
-
-
-
Enter the following bits of g-code into the printer settings end g-code box for both extruders:
-
Extruder 1 End G-code:
-
G0 F20000 X{prime_tower_position_x} Y{prime_tower_position_y}
-
Extruder 2 End G-code:
-
G0 F20000 X{prime_tower_position_x} Y{prime_tower_position_y}
-
-
-
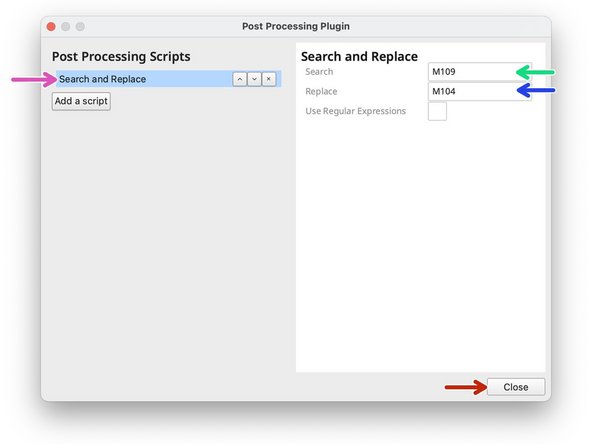
Go to Extension -> Post Processing -> Modify G-code
-
Click on search and replace.
-
Search for M109
-
Replace with M104
-
Hit close to save.
-
This script removes the waiting for temperature pauses between switches.
-
-
-
Hit prepare to slice the model.
-
Save it to an SD card.
-
-
-
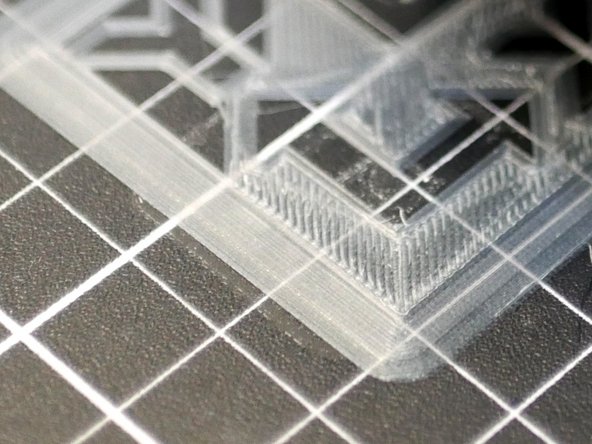
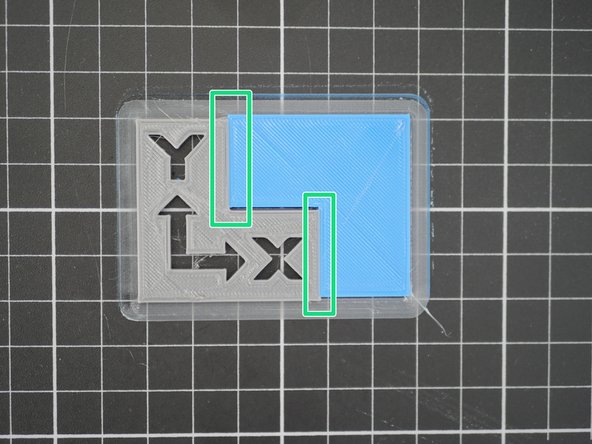
Check your first layer. It should look like this.
-
Adjust your hotend offset as required.
-
-
-
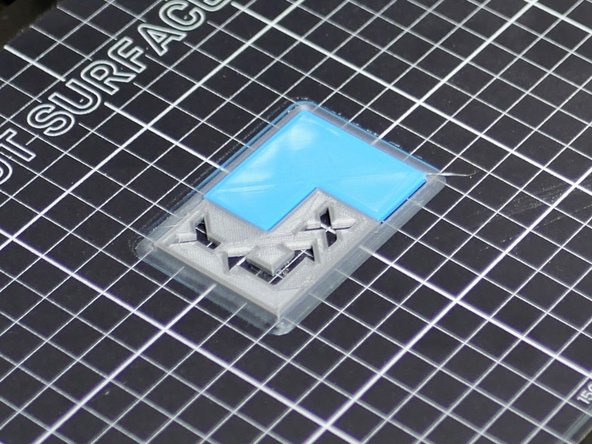
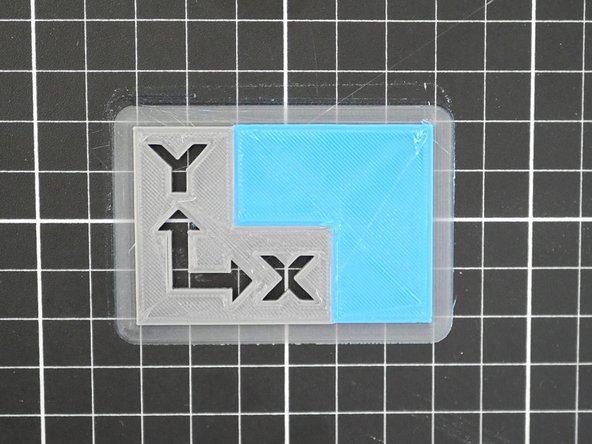
When finished, your calibration print should look similar to this. You may find that the two models may not be aligned perfectly.
-
We will fine tune this in the next step.
-
-
-
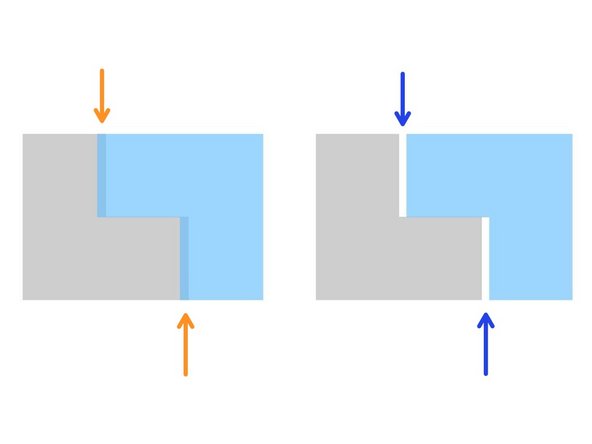
The calibration print should self align. The DSH is CNC machined to a high degree of precision. If you find gaps or overlaps in your print, we recommend first investigating that everything is OK mechanically.
-
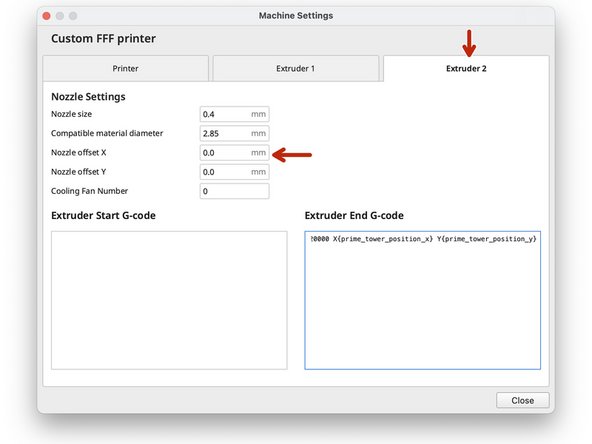
If everything is mechanically OK, then we will adjust the X/Y offsets in Cura with the aim of getting the two parts to line up.
-
Offsets are entered in Machine Settings under the Hotend #2 Tab.
-
-
-
Overlapping in X Direction:
-
Decrease/Negative X-Offset
-
Gap in X Direction:
-
Increase/Positive X-Offset
-
In our case the print was fine in the X-Direction, so we left our X-offset as 0.
-
For example, if there had been a gap of 0.25mm, our offset would have been 0.25mm.
-
An overlap of 0.25mm would have meant an offset of -0.25mm.
-
-
-
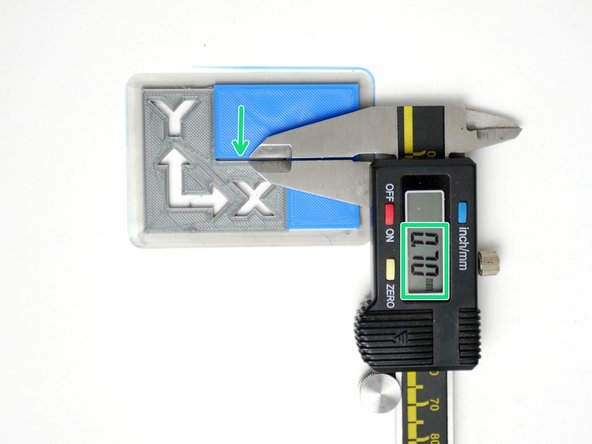
Overlapping in Y Direction:
-
Decrease/Negative X-Offset
-
Gap in Y Direction:
-
Increase/Positive X-Offset
-
In our case the print had a gap in the Y Direction, so we set our Y-offset to 0.7mm.
-
If there had been an overlap of 0.7mm, our offset would have been -0.7mm.
-
-
-
Re-slice the model in Cura and copy it onto the SD Card.
-
Congratulations! After printing the model again with the dialled in offsets you should have the DSE all setup.
-