
-
-
You will need to download the following:
-
-
-
Notepad ++ (Atom is a good alternative for Mac)
-
On windows you will also need 7zip to unpack the OctoPi file.
-
Newer versions of of these files/software's may have been released since the publishing of this guide but the steps outlined here should still remain valid.
-
-
-
Extract the OctoPi image using 7zip to convenient location on your computer.
-
Run Etcher
-
Point it to the .img file that you extracted.
-
Insert the Micro SD card into your computer.
-
Hit Flash! (Will take a while!)
-
On windows you may be asked to format the SD card after it's been flashed. Do not format the drive.
-
-
-
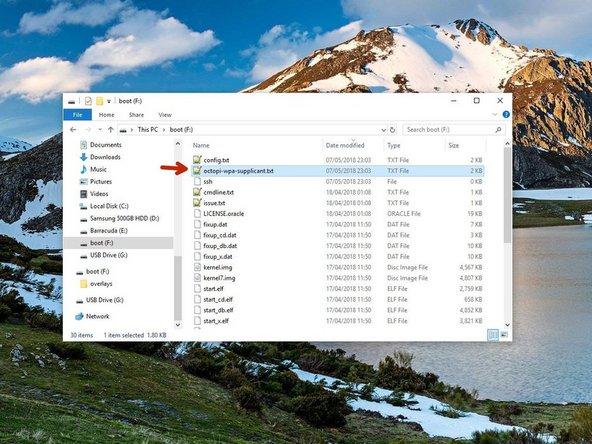
Navigate to the flashed SD card (you may have to remove and reinsert it) and open the file named octopi-wpa-supplicant.txt with Notepad++ or Atom.
-
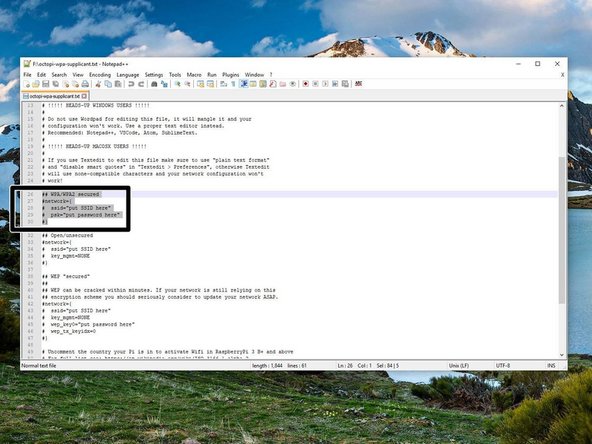
In the text editor read the instructions for the different WiFi configurations and choose the most appropriate for your network. For most this will be WPA/WPA2 security.
-
Remove the single # from the beginning of each line of your chosen configuration.
-
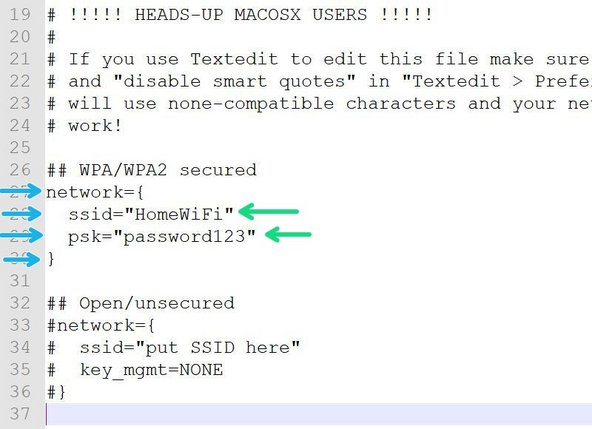
Type in your routers SSID as it’s broadcast and its password. Save and close the file.
-
Do not remove the inverted commas (" ").
-
-
-
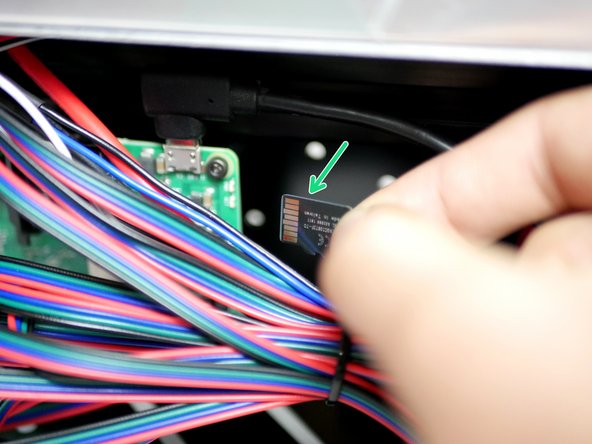
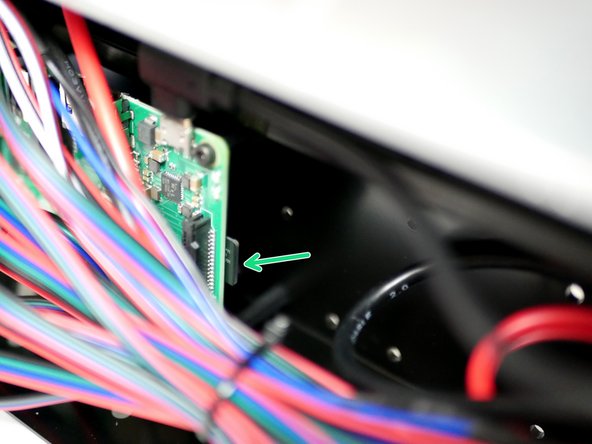
Insert the Micro SD card into the Raspberry Pi.
-
On the Pi 3 B+ it is inserted into the back of the board with the golden contacts facing up. You may find it easier to unscrew the board from the mounts to gain better access.
-
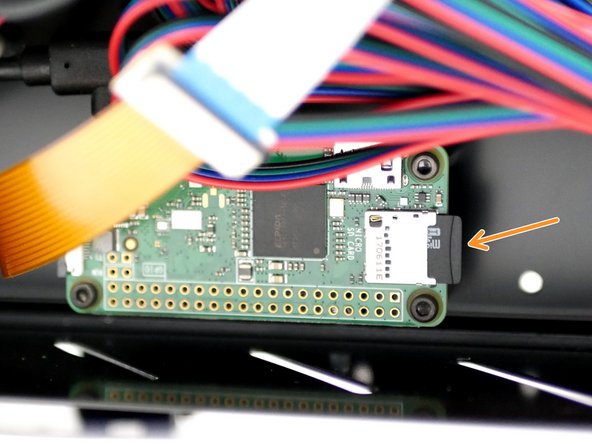
On the Pi Zero W it is inserted on the front.
-
Once the SD card is inserted power up the printer.
-
-
-
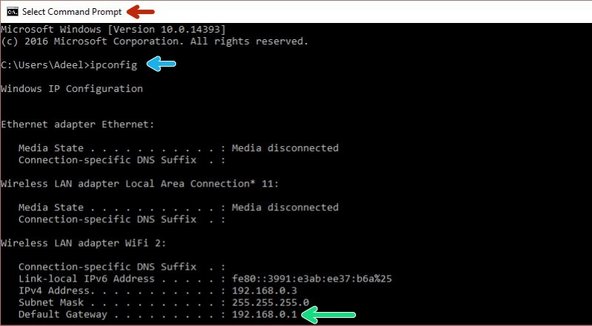
On your PC open command prompt.
-
Type ipconfig and hit return/enter.
-
Type the Default Gateway ip address into your browser.
-
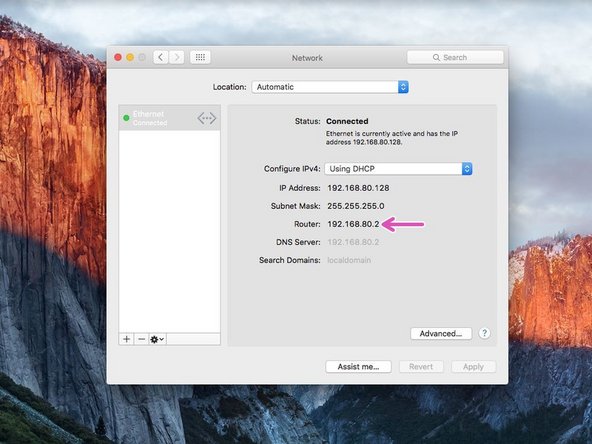
On Mac you can find the Default Gateway ip in system preferences -> Network -> Router.
-
-
-
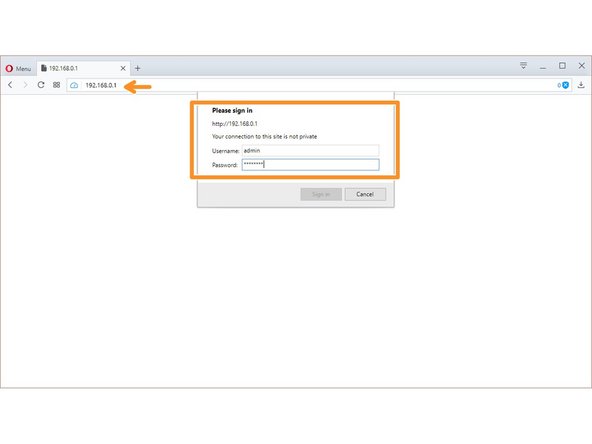
After entering the Default Gateway ip into your browser you will be prompted for a user name and password.
-
The username and password can be found on the back of your router.
-
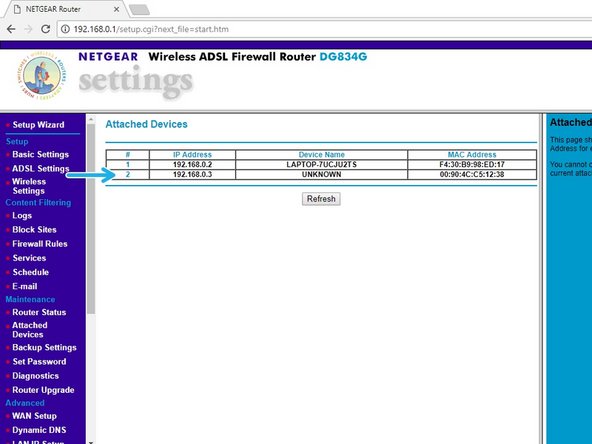
On the settings page (this will vary depending on your router) find the connected devices page and note the OctoPi's ip address.
-
Make sure you are connected to the same router that you connected the Raspberry Pi to.
-
If you find that your routers settings page isn't loading restart your router.
-
-
-
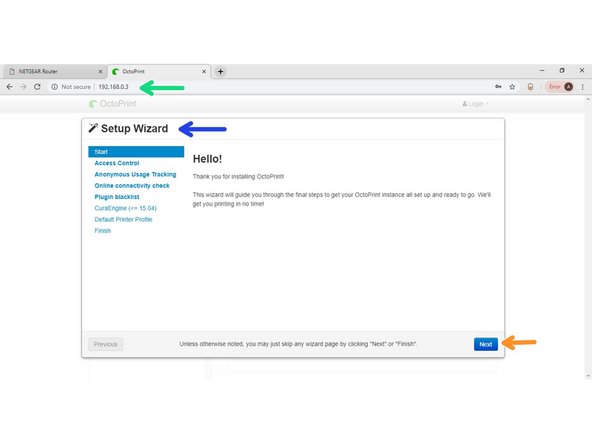
Type the ip address into your browser to load the OctoPrint interface.
-
An easier way to access the interface is by typing ''http://octopi.local'' if your computer supports bonjour - if you have iTunes installed you probably also have bonjour.
-
It may take a while for it to load from the first boot up, but once it does, you will be greeted with the setup wizard.
-
Click Next
-
-
-
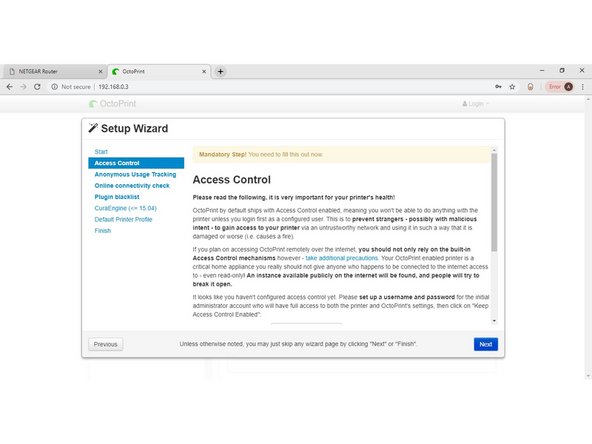
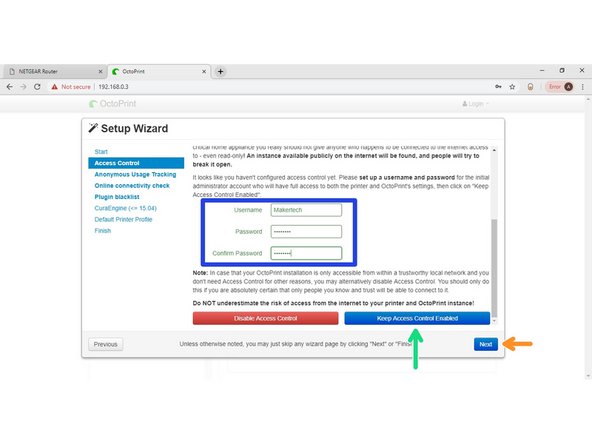
Create a Username and Password.
-
Click "Keep Access Control Enabled".
-
Click Next.
-
-
-
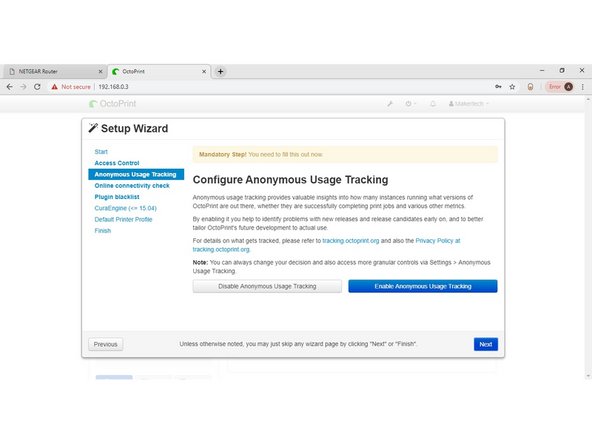
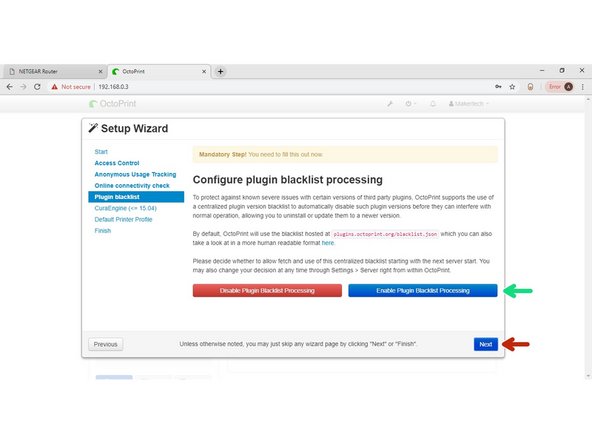
Read through the privacy policy info and decide whether you would like to enable the tracking.
-
-
-
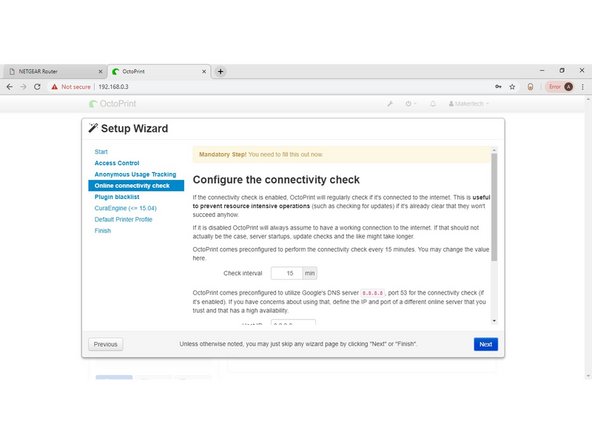
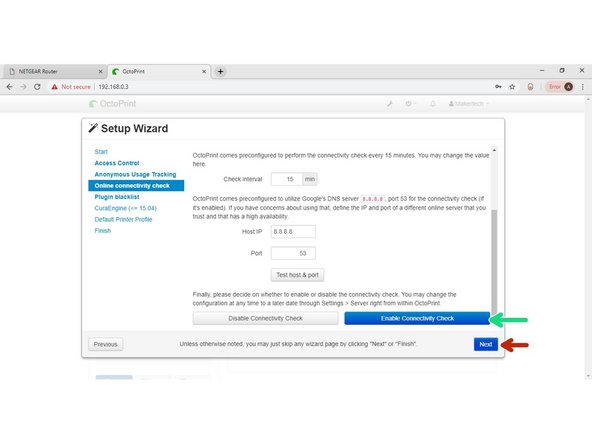
Leave the options here as default.
-
Click "Enable Connectivity Check".
-
Click Next.
-
-
-
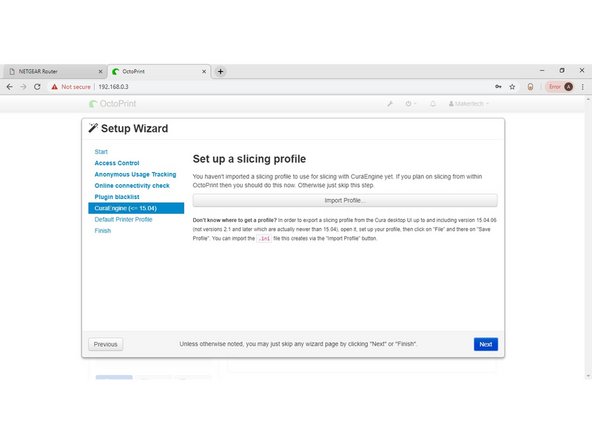
We recommend slicing files with the Makertech CURA Software and then uploading the gcode to octoprint rather than slicing inside octoprint.
-
Click Next.
-
-
-
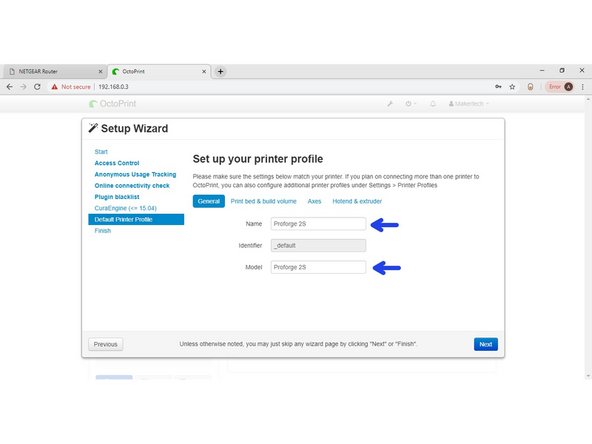
Appropriately name your Proforge:
-
Proforge 2
-
Proforge 2S
-
Proforge 2 Dual
-
Proofrge 2S Dual
-
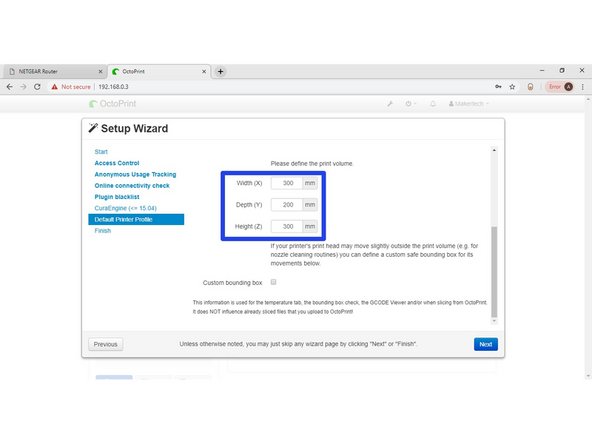
-
-
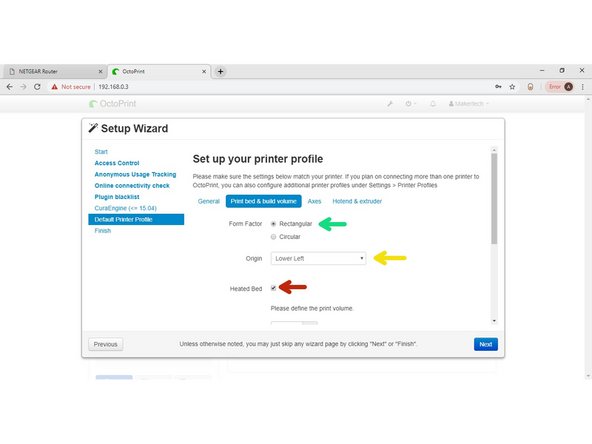
Form Factor: Rectangular
-
Origin: Lower Left
-
Heated Bed (Proforge 2S)
-
Width (X): 300
-
Depth (Y): 200
-
Height (Z): 300
-
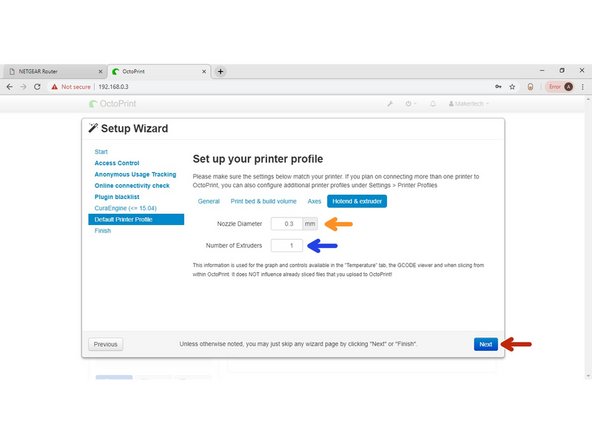
-
-
Nozzle Diameter: 0.3mm (default)
-
Number of Extruders: 1
-
Number of Extruders: 2 (For Dual Setup)
-
Leave offsets at 0.
-
Click Next.
-
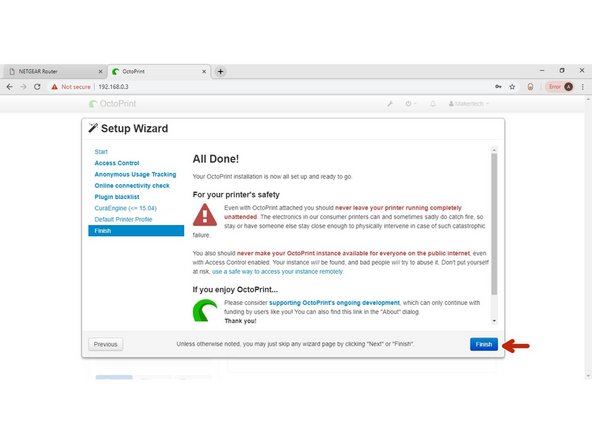
-
-
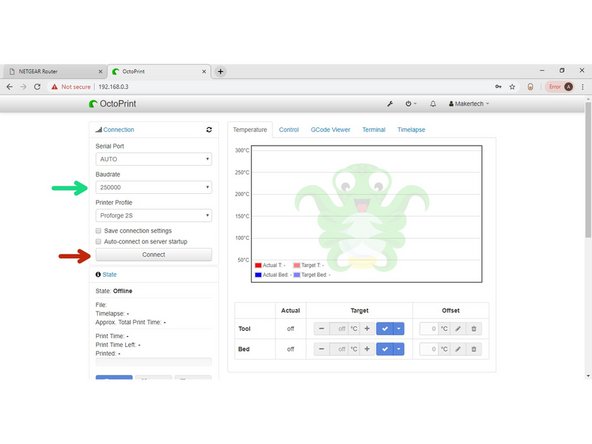
Set the Baudrate to 250000.
-
Click Connect
-
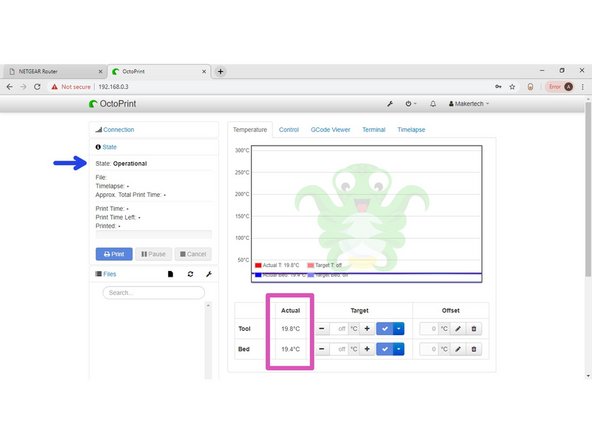
A successful connection should read:
-
State: Operational
-
Room Temperatures
-
-
-
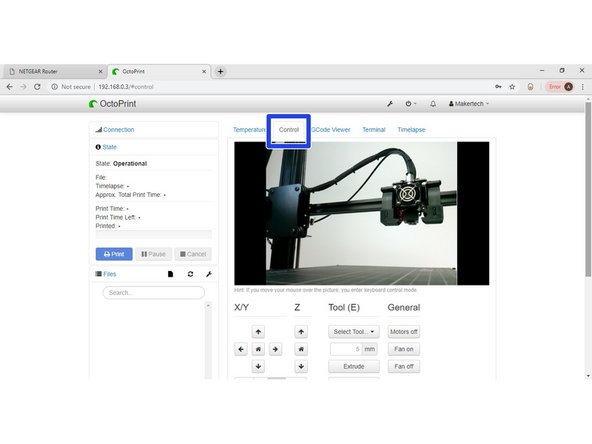
Under the Control Tab you should see a live feed from the Webcam.
-
If you don't get an image reboot the Proforge and reconnect to octoprint.
-
-
-
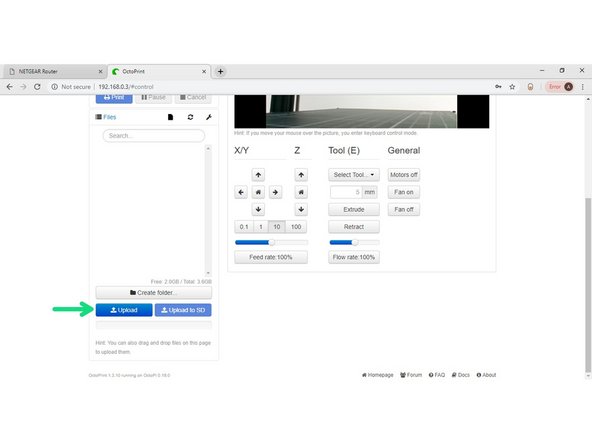
Use Makertech CURA Software to slice your models.
-
Click upload (or drag and drop) to send Gcode to OctoPrint for printing.
-
-
-
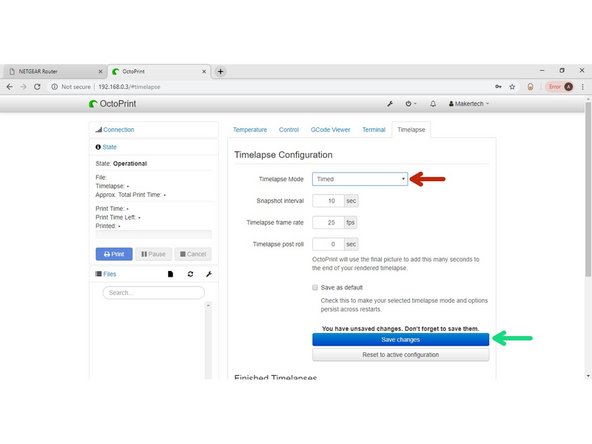
Before starting a print, set the time-lapse mode to either take a photo at a timed interval or at every Z-layer move.
-
Click save.
-
-
-
More information on the OctoPrint interface can be found at http://octoprint.org
-


Cancel: I did not complete this guide.
5 other people completed this guide.
