-
-
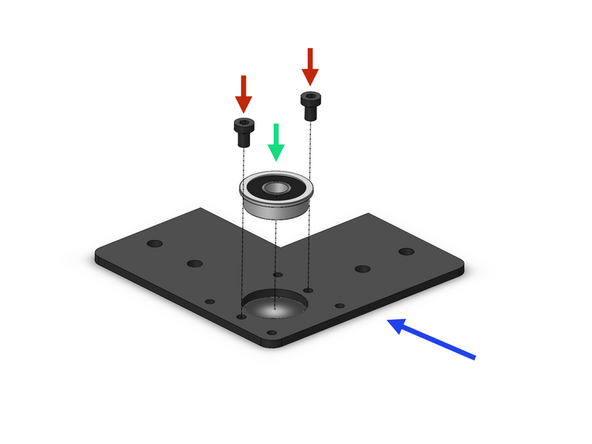
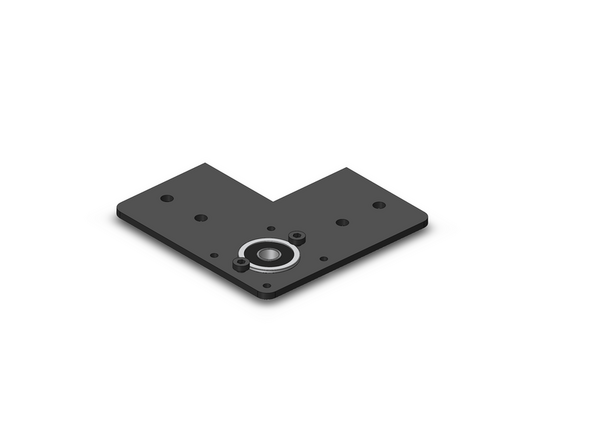
Prepare four z-motor brackets as shown.
-
Z-Motor Bracker
-
F608ZZ Bearing
-
M4 x 6mm
-
-
-
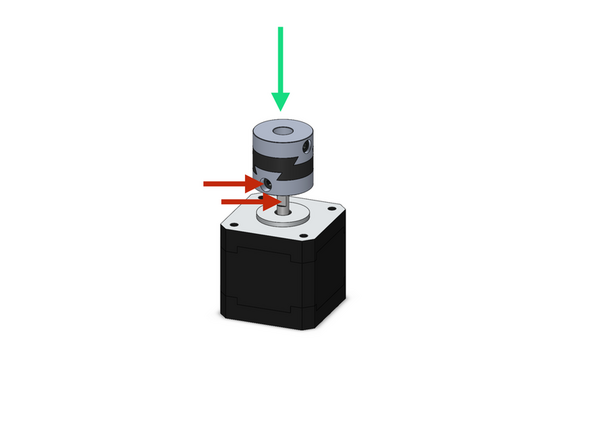
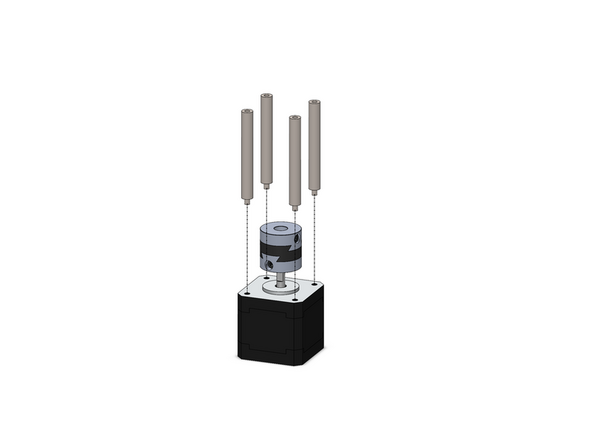
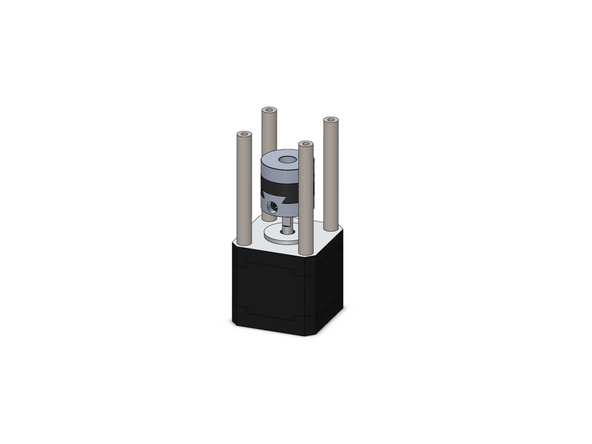
Secure onto the four z-motors an oldham coupling.
-
Secure the coupling to the flat of the motor shaft
-
Z-motors are the smaller NEMA 17 motors
-
Secure to the motors 4x M3x55mm stand-offs.
-
-
-
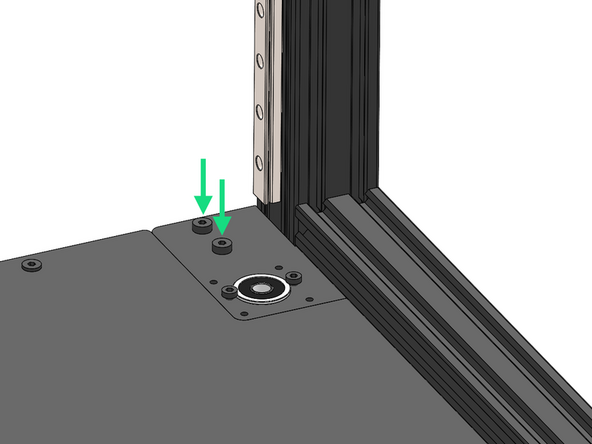
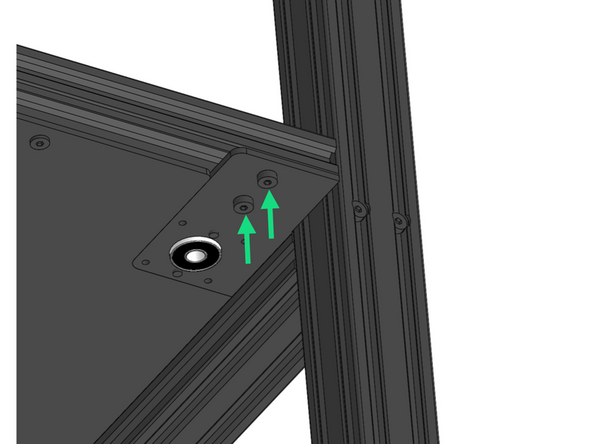
Secure the four z-bracket assemblies to the frame with M5x8mm bolts and M5 T-nuts.
-
Loosen the bolts holding the enclosure panel as the tolerance between it and these brackets is tight. Tighten again once brackets are secure.
-
-
-
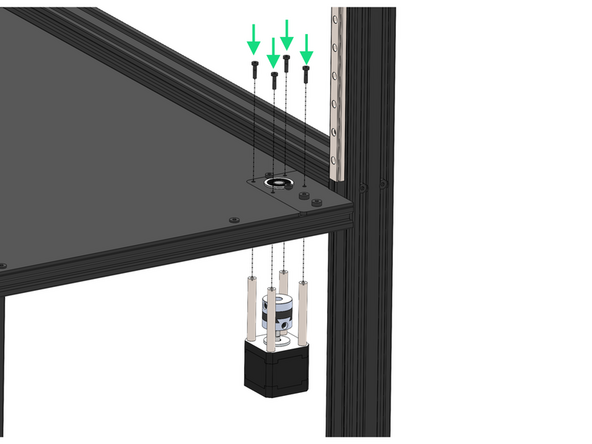
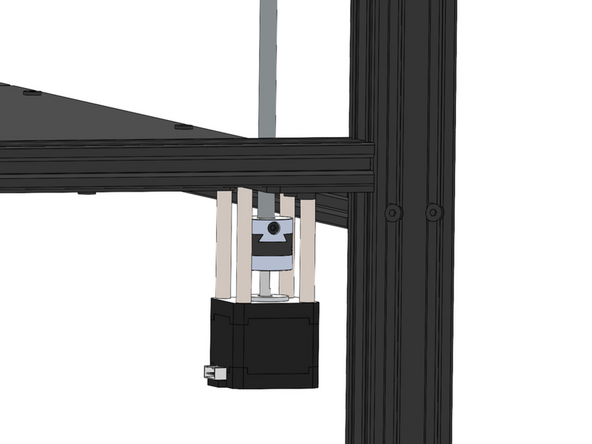
Fix the four z-motor assemblies to the brackets.
-
M3 x 12mm Bolt
-
Ensure the motors connectors face the rear of the machine.
-
-
-
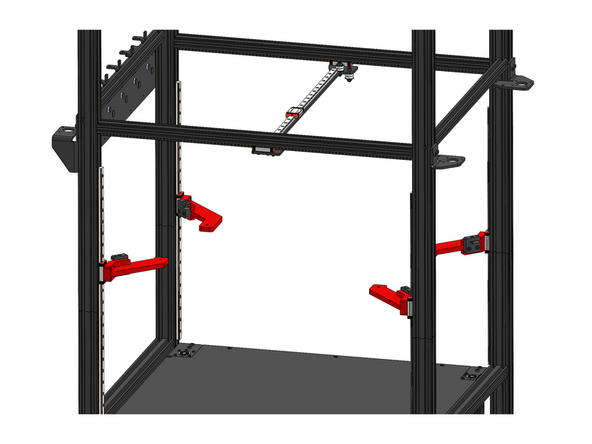
Fix to the rails the Z-carriages with 4 M3x16mm bolts.
-
Front Z-Carriage (Smaller)
-
Rear Z-Carriage
-
-
-
Fix a lead screw nut to each z-carriage.
-
Lead Screw Nut
-
M5 x 18mm Bolt
-
The set screw side of the nut should point upwards.
-
-
-
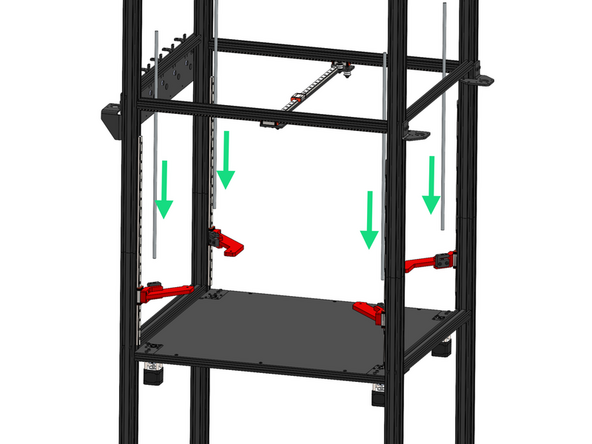
Thread the four lead screws through the nuts and down into the couplings.
-
Secure the lead screws to the couplings.
-
-
-
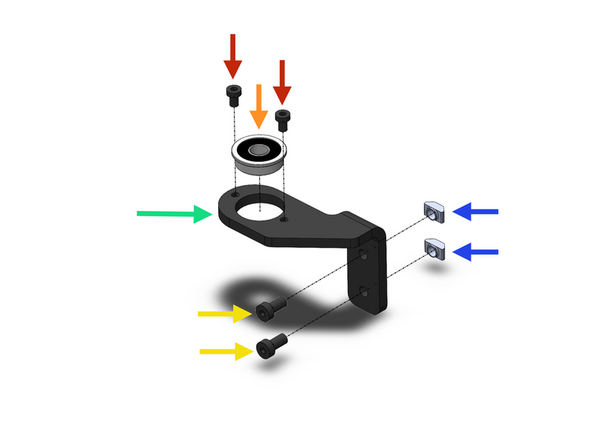
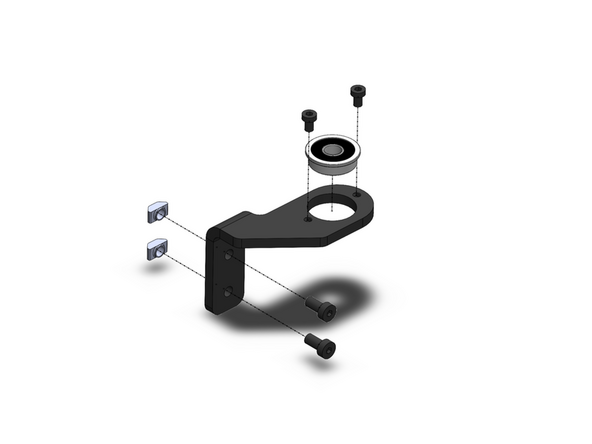
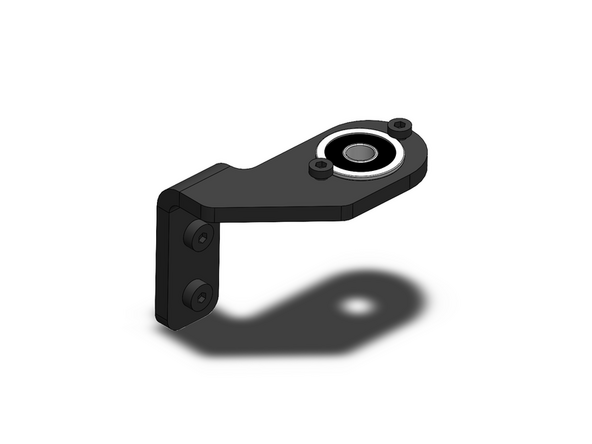
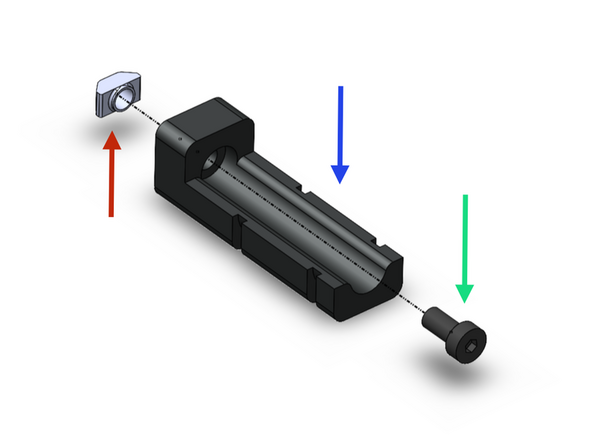
Prepare the lead screw brackets as shown.
-
Note that the brackets are mirrored, you should have two types of each.
-
Lead Screw Bracket
-
F608ZZ Bearing
-
M4 x 6mm Bolt
-
M5 x 10mm Bolt
-
M5 T-Nut
-
-
-
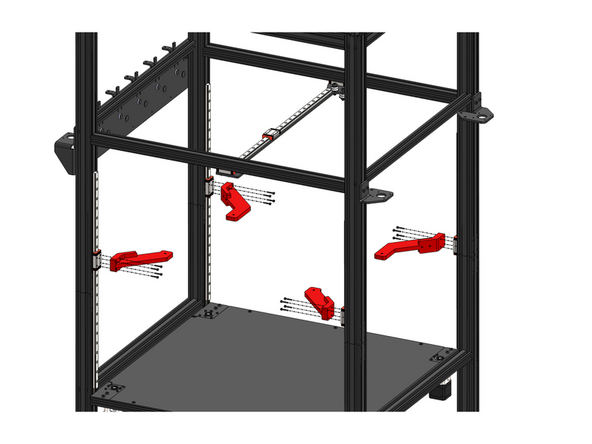
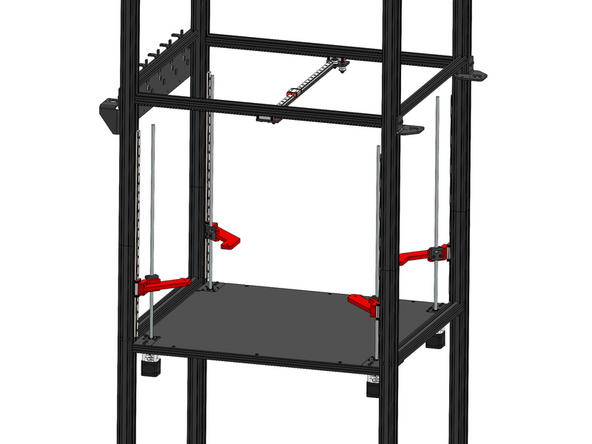
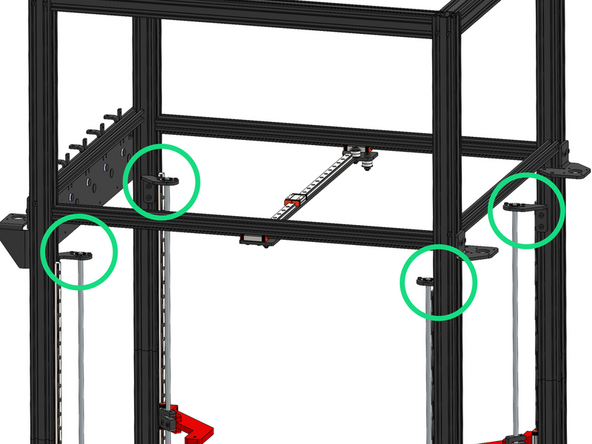
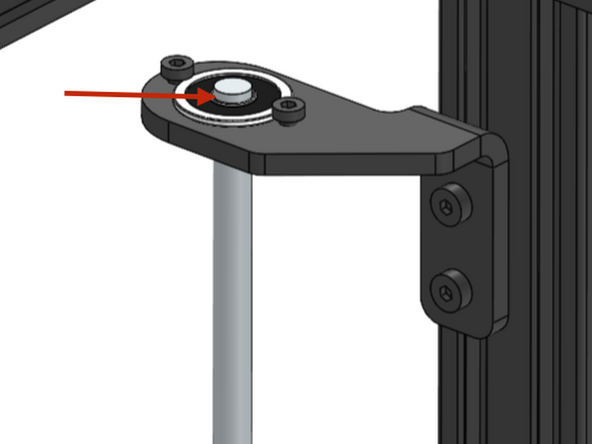
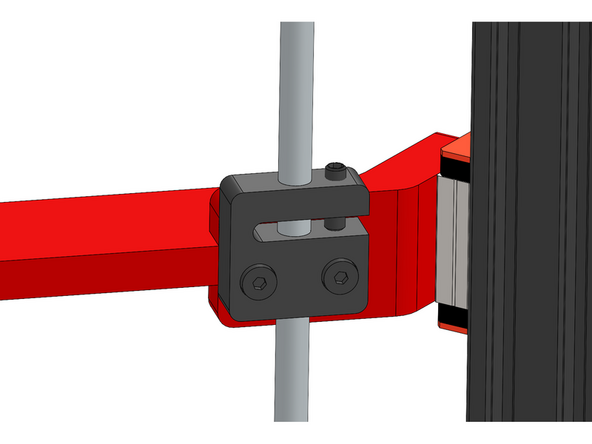
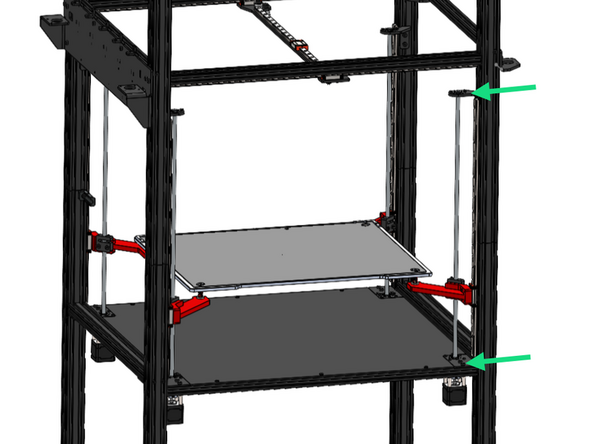
Fix the four lead screw bracket assemblies onto the frame.
-
Take care to orientate these brackets exactly as shown in the image.
-
Slide the bearing over the lead screw, leaving just the top chamfer of the lead screw visible above the bearing.
-
-
-
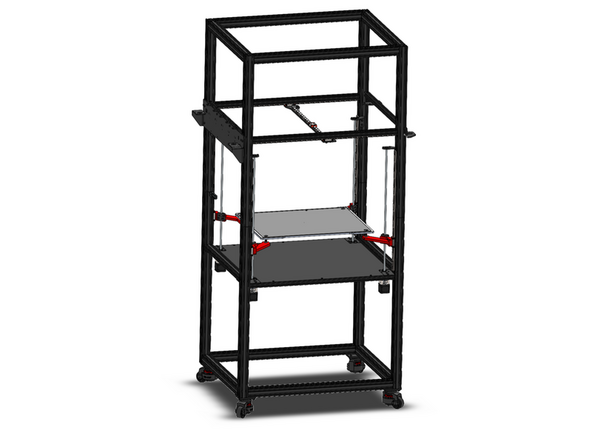
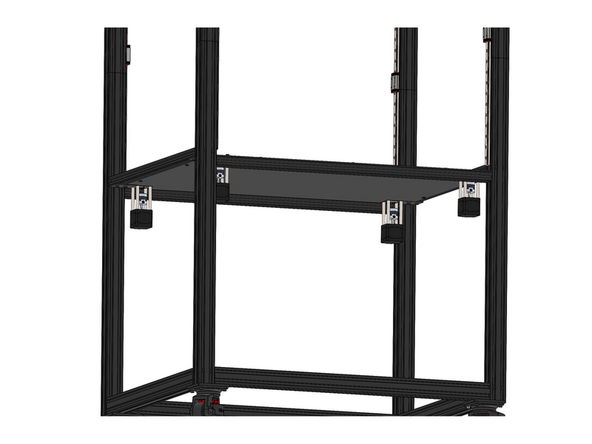
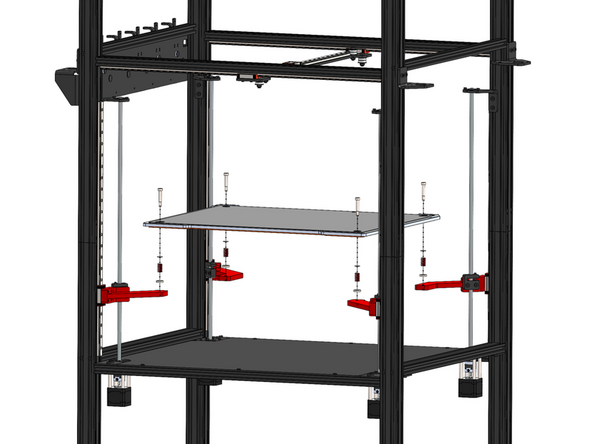
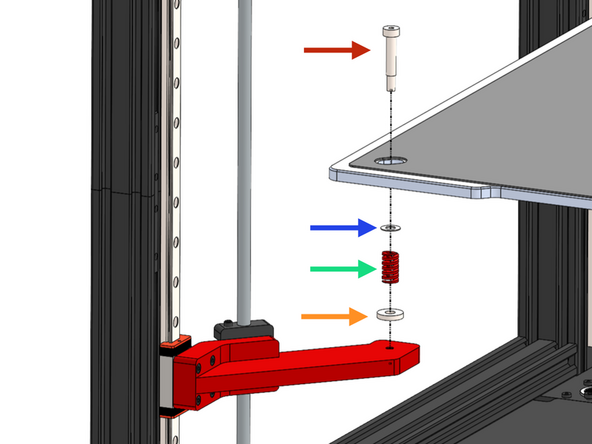
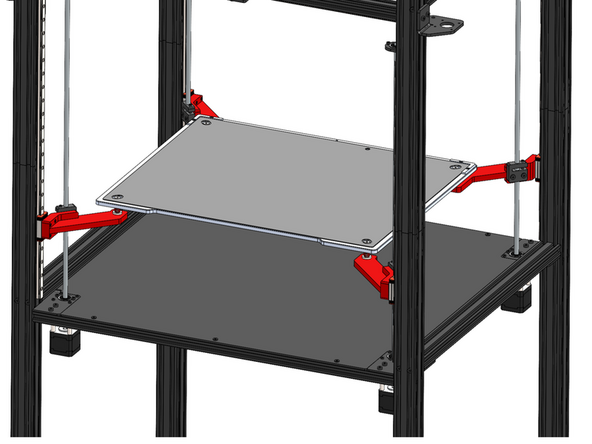
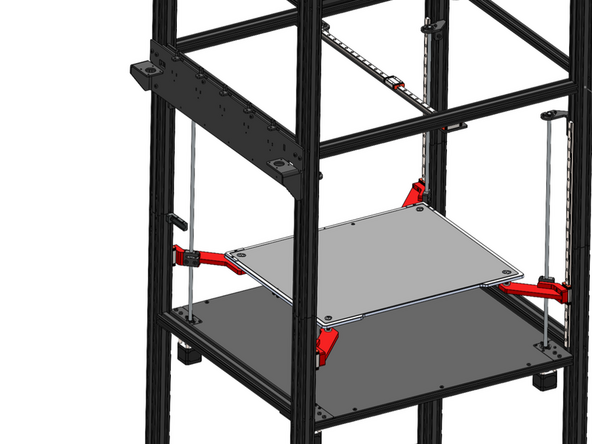
Install the print platform as shown. Ensure the cables come out of the left side of the platform.
-
M5 Shoulder Bolt
-
Shim
-
We’ve identified that the shim may have been left out of some kits. Please don’t worry — this part is not critical to operation and can be safely omitted. If you prefer, a standard M6 washer can be used as a substitute.
-
Bed Spring
-
Spacer
-
-
-
Insert into the four lead screw nuts the grub screw, turn until any play between the lead screw and nut has been removed.
-
Note, do not over tighten, the lead screw should still be able to rotate smoothly, over tightening can result in a z-motor stalling.
-
-
-
If you find that one of the lead screws does not rotate smoothly during inspection, please follow the steps below to correct the issue:
-
Carefully loosen (do not remove) the bearing brackets at the top and bottom of the lead screw.
-
Rotate the lead screw now - it should be smoother.
-
Re-tighten the brackets.
-
-
-
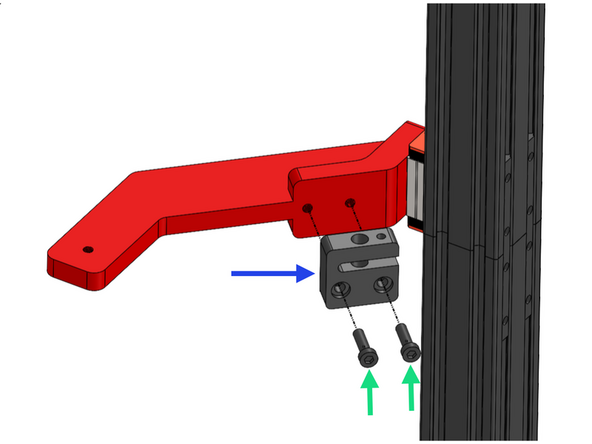
Secure the Z Cable Relief Bracket to the frame.
-
Z Cable Relief Bracket
-
M5 x 10mm Bolt
-
M5 T-nut
-
Secure the bracket just under the joint in the far left corner of the frame as shown.
-
-
-
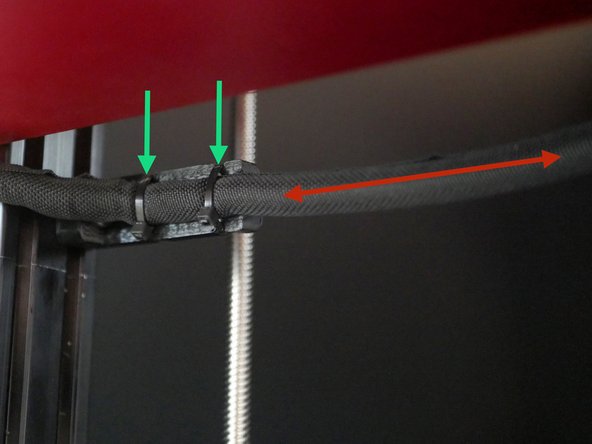
Cable tie the loom from the bed to the bracket.
-
Leave around 50cm of cable between where the loom exits the bed and is fixed to the bracket.
-


Cancel: I did not complete this guide.
9 other people completed this guide.
