Difficulty
Moderate
Steps
4
Time Required
- Stage 5: Print Head 4 steps

In Progress
This guide is currently being written. Reload periodically to see the latest changes.

Private
This guide will not appear in search results and can only be viewed by team members!
Quiz
0
-
-
Fasten onto the print head carriage two M3 x 20mm bolts.
-
M3 x 20mm bolts
-
M3 nyloc nut
-
-
-
Fix the carriage onto the gantry like shown.
-
Slot the bolts of the carriage into the long slit on the gantry. make sure to match the orientation shown.
-
Eccentric guide x1
-
Fixed guide x2
-
M4 x 30mm bolt
-
M4 nyloc nut
-
Secure the fixed guides firmly.
-
You should still be able to turn the eccentric guide by hand.
-
-
-
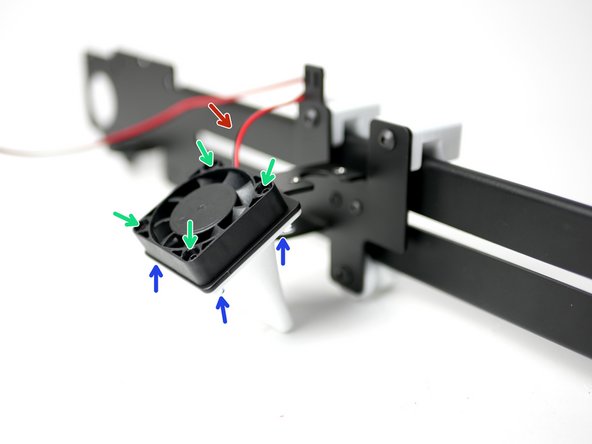
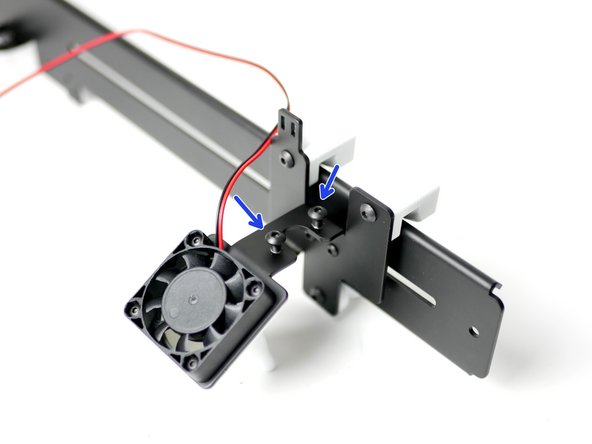
Install onto the print carriage the 40mm fan (with 1m cable).
-
Make sure the cable is off to the top left corner and that the fan is sticker side down.
-
Four M3x16mm bolts
-
Four M3 nyloc nuts
-
The fan shroud is something can be printed and installed later.
-
-
-
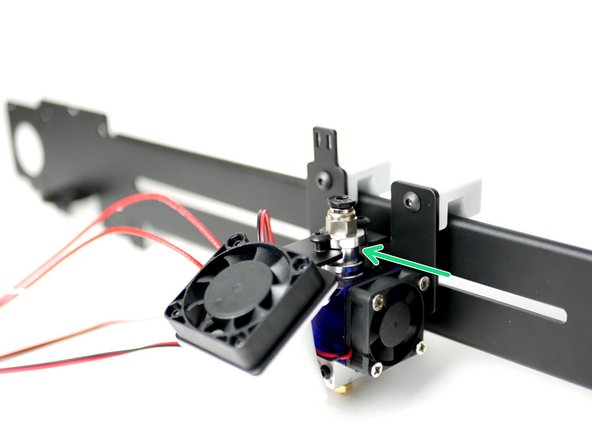
Begin by threading on two M4 x 8mm bolts onto the top of the tool carriage.
-
Two M4 x 8mm bolts
-
Slide the Hotend onto the carriage like shown and tighten the M4 bolts down onto it, clamping it in place.
-
As you tighten, the hotend may move, push the hotend into its slot to prevent as much of this as possible.
-
Make sure that the hotend is orientated like shown, with the cables coming out in the direction of the 40mm fan.
-