
-
-
Check your probe assembly:
-
Check you're able to press the stainless steel ball to trigger the switch.
-
Check that the bolts holding the switch in place are secure.
-
-
-
Run the cable for the probe down to the base through the beds cable loom.
-
The 4-pin header side of the cable should go into the base.
-
Plug the 4-pin header into the Octopus Max board.
-
-
-
Cut the magnetic base to gain access to the mounting hole for the probe.
-
Fix the probe to the platform with the included M5x20mm bolt.
-
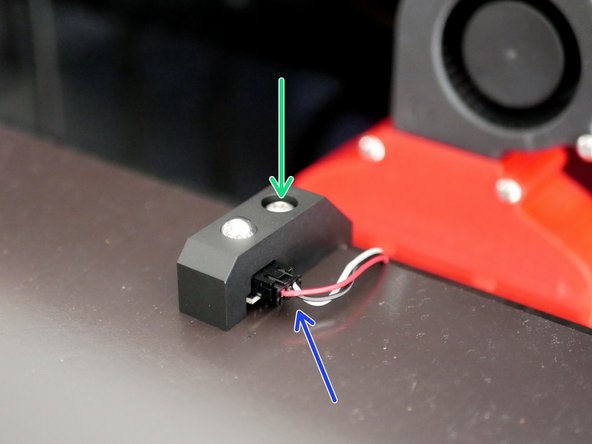
Plug the cable into the probe.
-
-
-
Power up the printer.
-
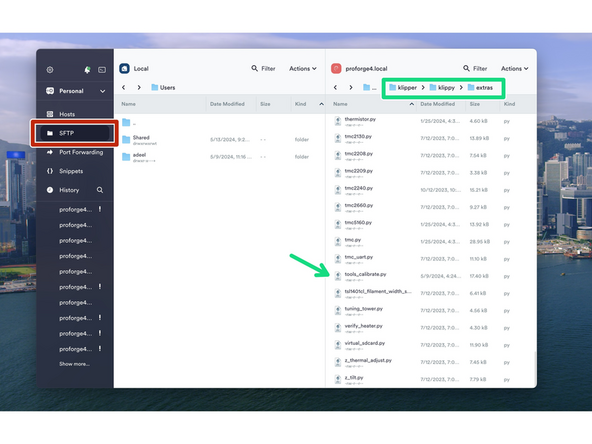
Download the tools_calibrate.py file here.
-
Use Termius to copy (drag and drop) the tools_calibrate.py file into the ~/klipper/Klippy/Extras folder.
-
Instructions for using Termius can be found in the previous stage here.
-
After copying this file across the printer needs to be powered down and restarted.
-
-
-
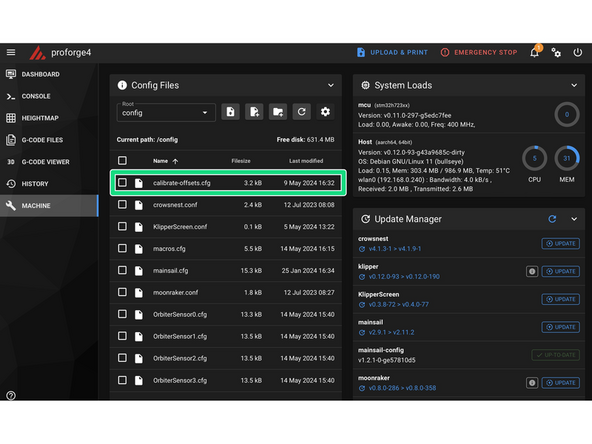
Add the calibrate-offsets.cfg file to your config files folder.
-
Also check that your printers other config files are also up to date.
-
-
-
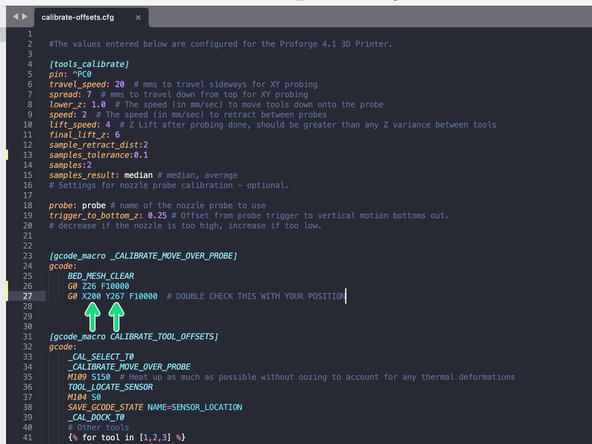
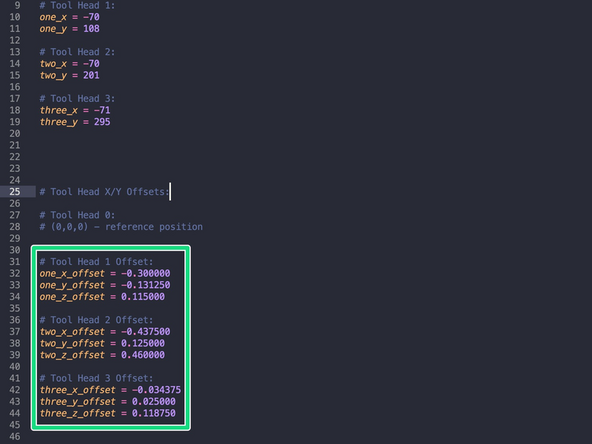
Check the probe position by moving the first print head directly over it.
-
Make a note of the X/Y positions.
-
Enter these values into the calibrate-offsets.cfg file here.
-
-
-
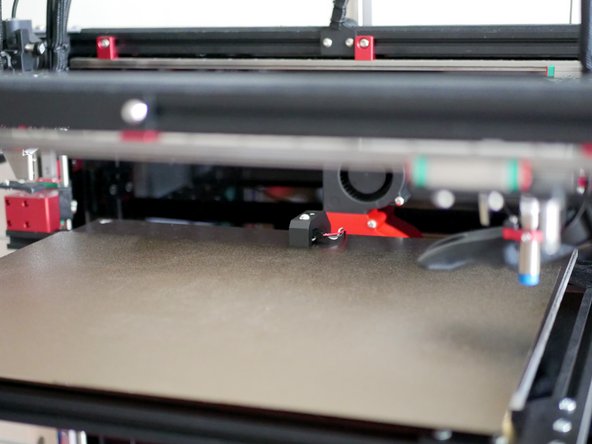
Place the flexplate back onto the platform in front of the probe as shown.
-
Home the printer.
-
Make sure that all of the print heads are docked.
-
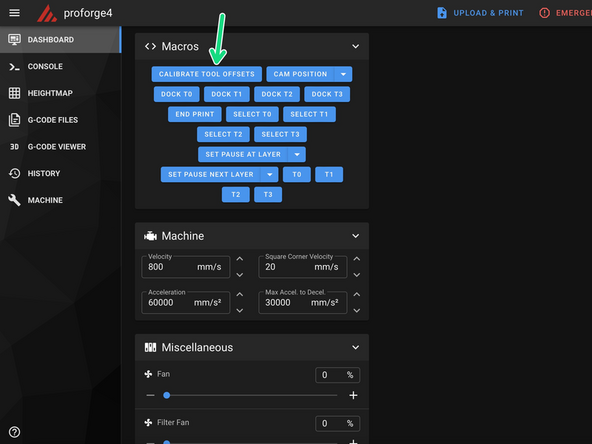
Run the calibration command.
-
-
-
Keep an eye on the printer as it runs through the probing procedure for the first time - be ready to hit the emergency stop button in the event of a crash.
-
The printer will probe the first print heads location to establish a control position.
-
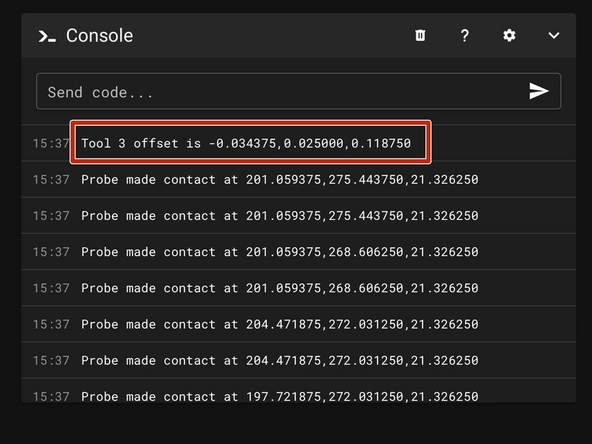
It will then probe the other print heads and present the offset values in the console as shown.
-
Each print head is also heated to 150C to soften any filament residue before probing.
-
-
-
Offset values are presented in the Mainsail console.
-
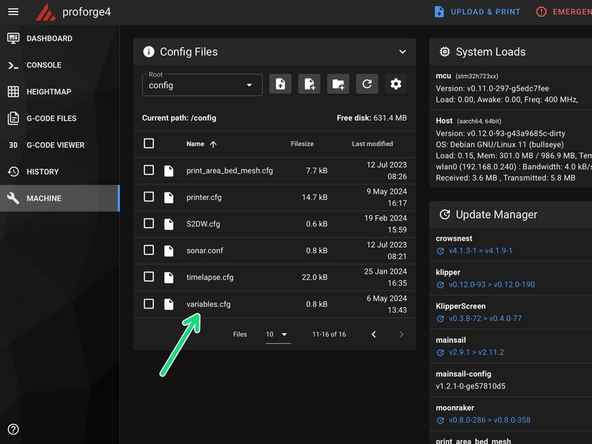
Enter the offset values into the variables.cfg file for each print head.
-
UPDATE: Values are now automatically saved into the variables.cfg file - update to latest tools_calibrate.py file from 01/06/24
-
Probing is typically accurate to +/- 0.05mm
-
Save and restart to resume printing.
-
Remove the probe and restore the flexplate to its normal position. The probe cable can be tucked under the bed.
-


Cancel: I did not complete this guide.
2 other people completed this guide.
