
-
-
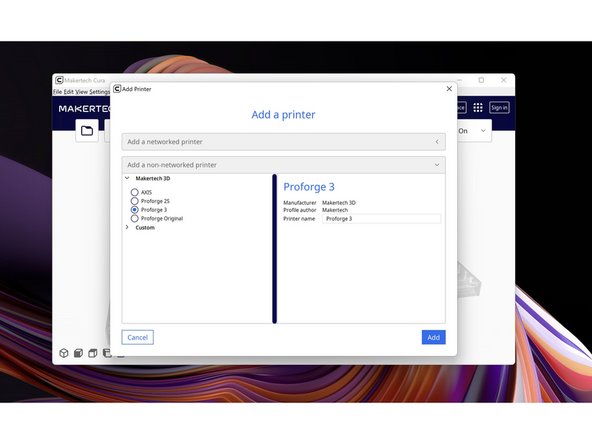
Download the new v5.2.1 of Makertech Cura for windows here.
-
Run through the install and setup wizards.
-
If you have an earlier version of Makertech Cura installed, delete it from your programme folder before installing the new one.
-
-
-
If you are running Mac OS or Linux the 3.5 profiles will be made available in the next release of the official Ultimaker Cura.
-
Follow the progress of this request here.
-
-
-
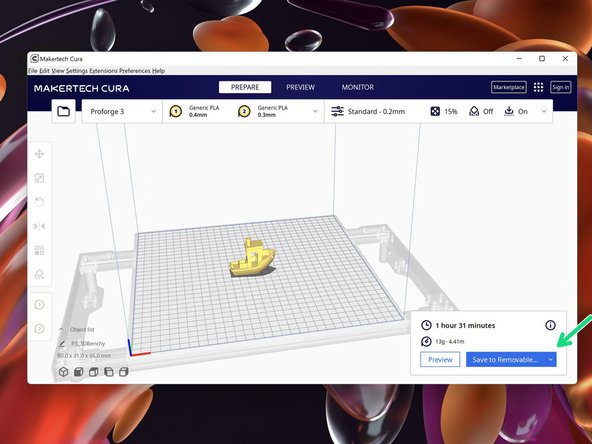
Under the Travel dropdown adjust the retraction setting to 0.2mm for the direct drive extruder.
-
-
-
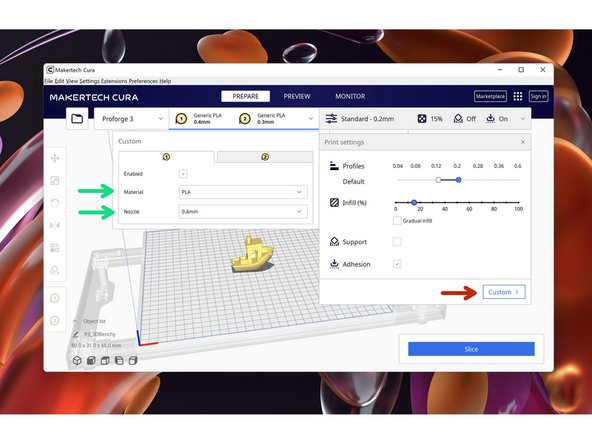
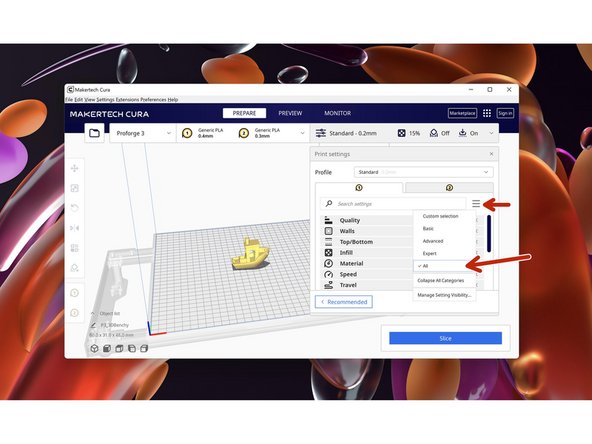
Set the correct nozzle size and material for your set-up.
-
The default profiles give you a good starting point, these will need to be edited to get the best results out of your material, this can be done by going into the custom settings.
-
-
-
Fix the spool holder assembly to the side of the printer:
-
M5 x 100mm Bolt
-
M5 Penny Washer
-
M5 T-Nut
-
-
-
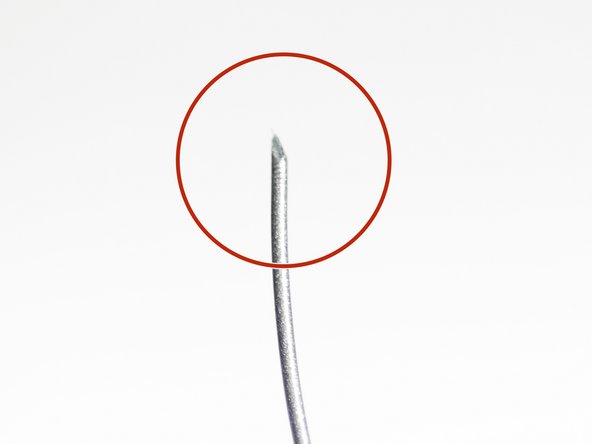
Use a pair of scissors or side cutters to cut a sharp point to your filament.
-
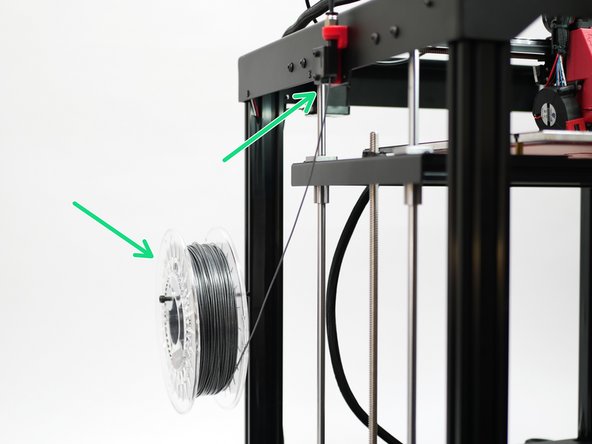
Place the spool onto the spool holder and feed the filament through the filament sensor and up to the extruder.
-
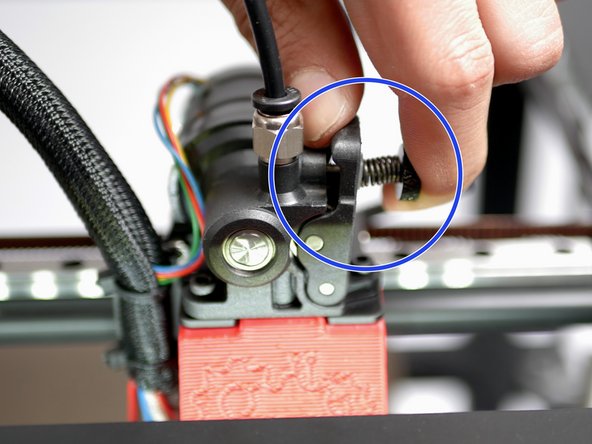
Put pressure on the extruder idler arm and continue to feed the filament into the hotend.
-
-
-
Pre-heat the hotend and heated bed.
-
Remember that the bed is measuring the temperature of the heater, the platform still requires a few minutes to uniformly reach that temperature.
-
-
-
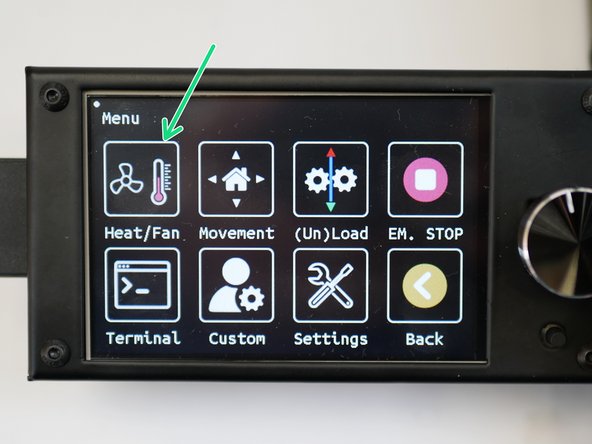
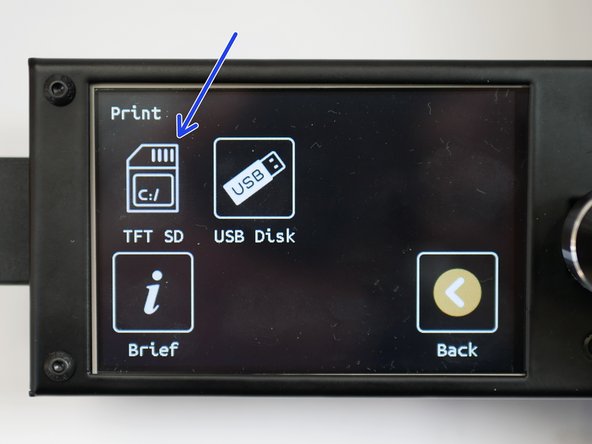
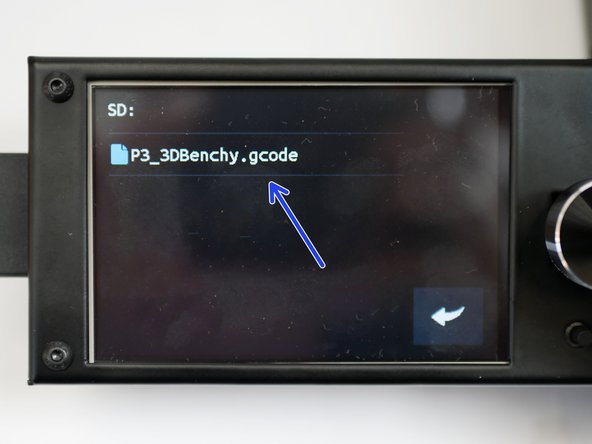
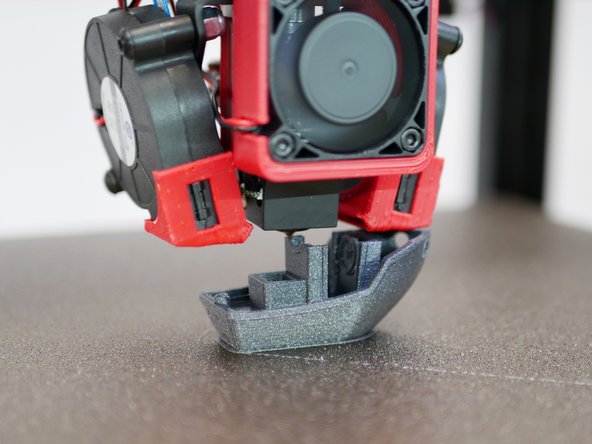
Once the print begins, you can monitor/adjust it from the print menu.
-
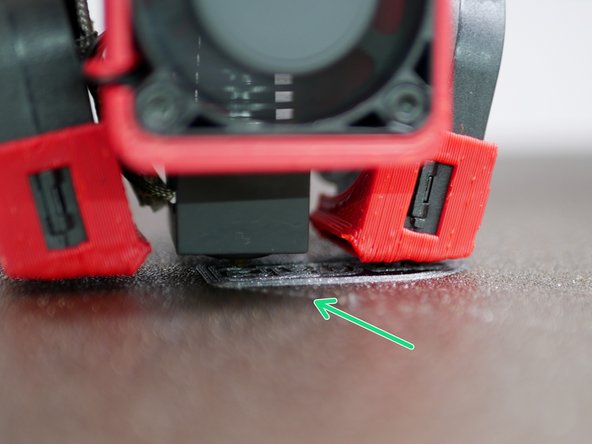
Make sure that you have a good first layer, this is key to a good print.
-
If it's too close (the nozzle is scraping the bed) or too high (the first layer is peeling away) adjust your P offset. See the previous guide for a reminder on how to do that.
-
Keep monitoring your print.
-


One Comment
Which setting in CURA must be used. I used the default setting but the layers don't stick to each other. The printer is otherwise set up and calibrated correctly. The first layer sticks well. What do I have to change?
Hermann Dengler - Resolved on Release Reply