
-
-
Install the spool holders as shown.
-
M5 x 100mm Bolt
-
M5 Penny Washer
-
M5 T-Nut
-
Mod:
-
-
-
-
Build the third spool holder as shown:
-
Spool Holder Bracket
-
M5 x 100mm Bolt
-
M5 Penny Washer
-
M5 Nylon Nut
-
M4 x 6mm Button Head Bolt
-
M4 T-Nut
-
Mount it to the frame as shown.
-
-
-
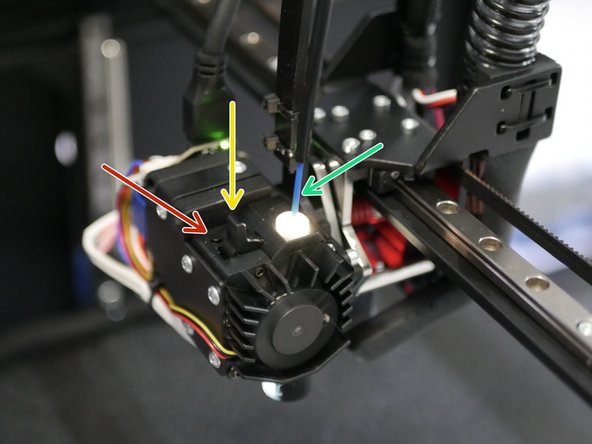
Home the printer and select the first print head. Use the FRONT macro to bring it forward.
-
Feed filament in through the PTFE tube and insert it into the extruder - push it in about an inch so that it makes contact with the gear teeth.
-
The extruder should automatically heat up and load the filament when ready.
-
This button on the print head will unload the filament.
-
This is the tensioning lever, it has three levels:
-
To the left: Lowest tension, good for flexible filaments.
-
In the middle: Medium tension, good for most filaments like PLA/ABS
-
To the right: Highest tension, good for hard filaments like PC
-
-
-
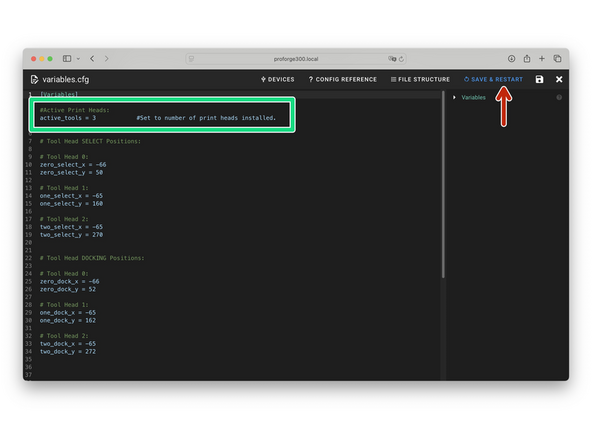
Check that your Variables.cfg file has the correct number of active print heads set.
-
If you have just one print head installed set the value to 1, and so on...
-
Save and restart when done.
-
-
-
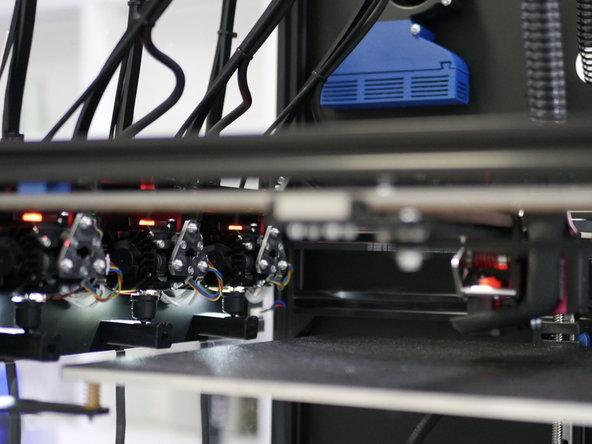
Before starting the calibration it's important to:
-
Home the printer
-
Dock any print heads
-
Make sure that the fexplate is on the bed before homing.
-
-
-
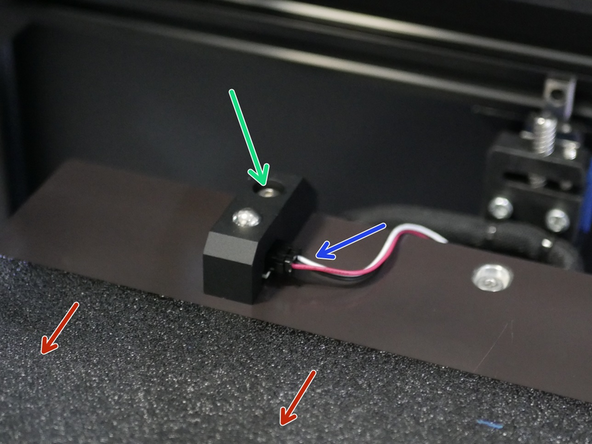
Slide the flexplate forward.
-
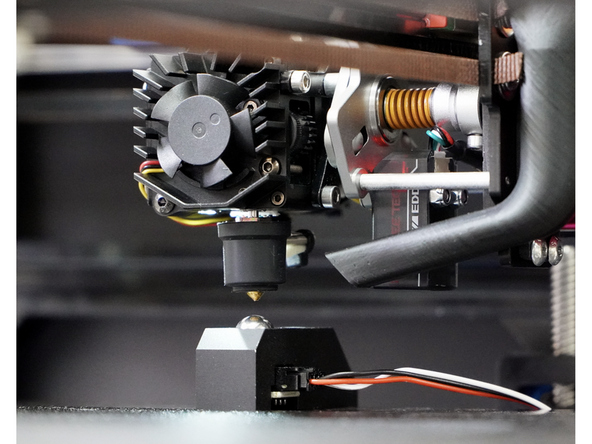
Mount onto the rear of the platform the calibration probe with an M5 x 20mm button head bolt.
-
Known Issue: Some kits unfortunately have the M5 x 20mm button head bolt missing. If you are unable to source a bolt locally please get in touch and we can arrange one to be sent out.
-
Plug the cable into it.
-
Check that the flexplate is not trapped between the probe and bed!
-
-
-
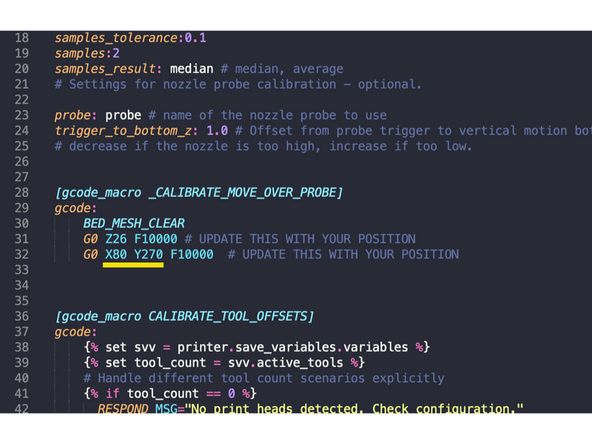
Select the first print head and check that when the nozzle tip is above the ball of the probe the co-ordinates match what has been set in the calibrate-offsets.cfg.
-
By default it is set to X80 Y270.
-
-
-
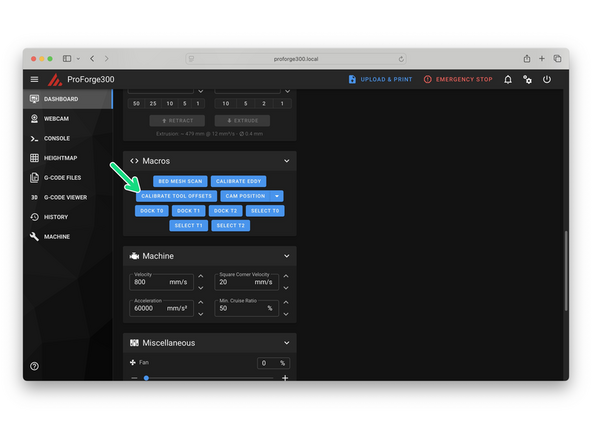
With the probe secured, the printer homed and all of the print heads docked, run the calibration.
-
The print heads will heat up and auto-calibrate.
-
Once complete the printer will restart and the offset values will be stored to the variables.cfg file ready for use when printing.
-
Remove the probe and store it safely.
-
No need to re-do it unless a nozzle is changed or a crash occurs.
-
-
-
We currently support the following Slicers:
-
-
-
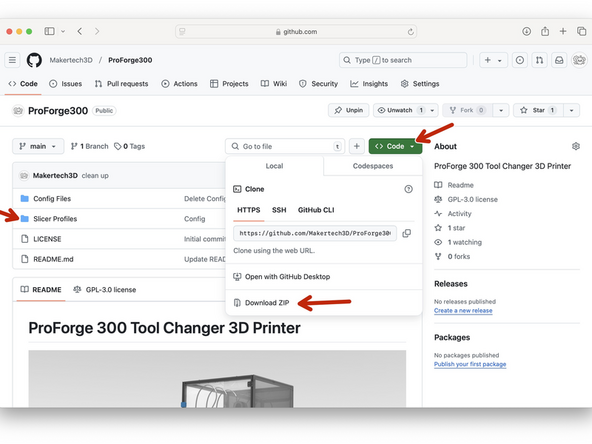
Download Orca/Prusa Slicer profiles here.
-
-
-
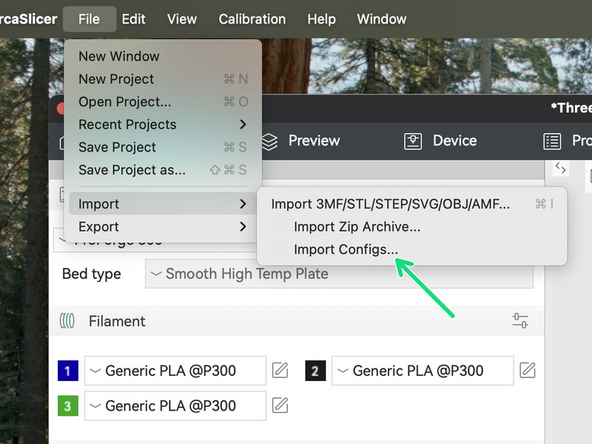
ORCA Slicer: Go to File -> Import -> Import Configs...
-
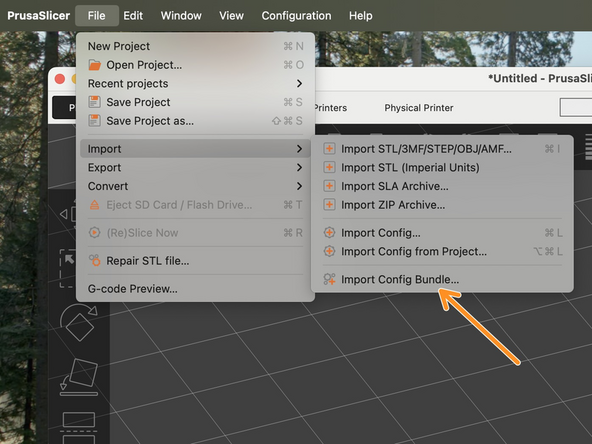
PRUSA Slicer: Go to File -> Import -> Import Config Bundle...
-
-
-
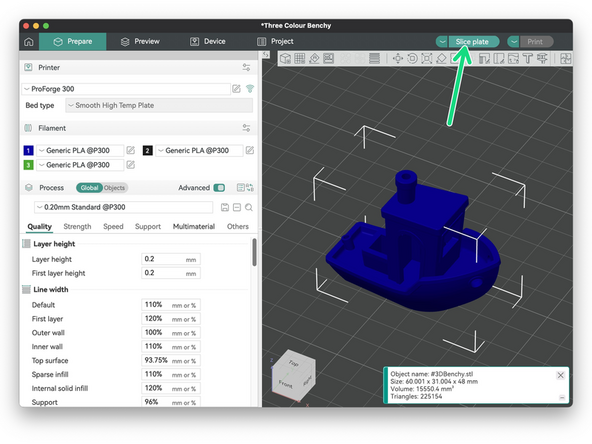
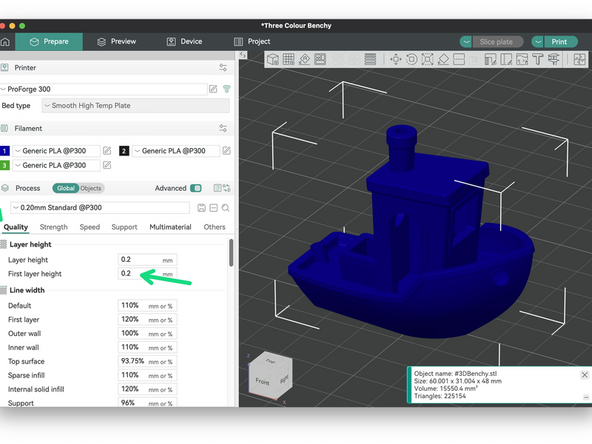
We suggest first printing with one print head to make sure everything is setup correctly before jumping into a multi material print.
-
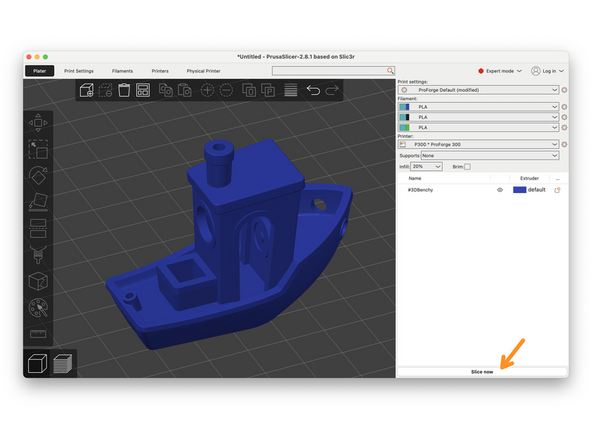
Hit slice and send the model to the printer.
-
Orca slicer
-
Prusa Slicer
-
-
-
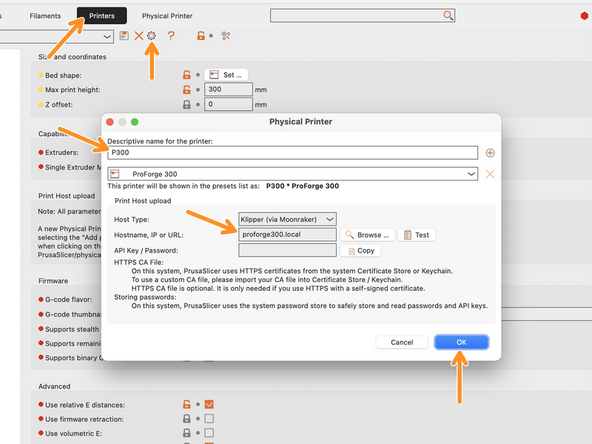
If your printer is available at proforge300.local then the slicer should automatically connect to it and you can upload the gcode straight to it. See the images for adjusting the .local name in Prusa and Orca slicer.
-
Orca Slicer (Advanced Mode)
-
Prusa Slicer (Expert Mode)
-
-
-
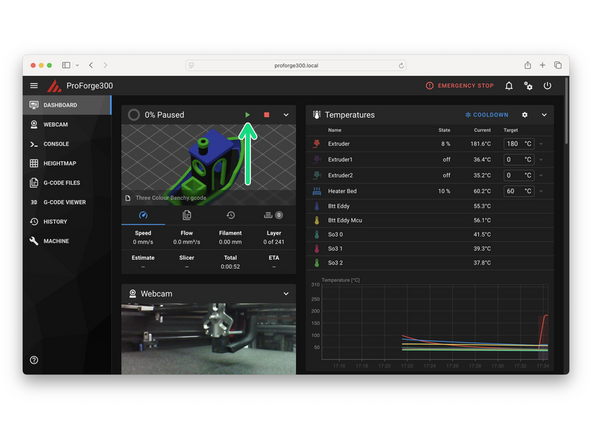
When starting a print on the ProForge 300 you will be prompted to check that all print heads are docked.
-
The printer will pause in the beginning to allow you to dock any print heads you might have selected.
-
When ready hit the play/resume button to continue.
-
-
-
Things to check when printing:
-
First Layer - If your first layer is too low or too high adjust the Eddy Offset as described here.
-
Print Quality - Print quality will vary from filament to filament. Adjust temperature, cooling and speed to find the optimum settings for your material.
-
The Orbiter 3 hotends run a bit hotter than usual, so try using a slightly lower temperature for better results.
-
-
-
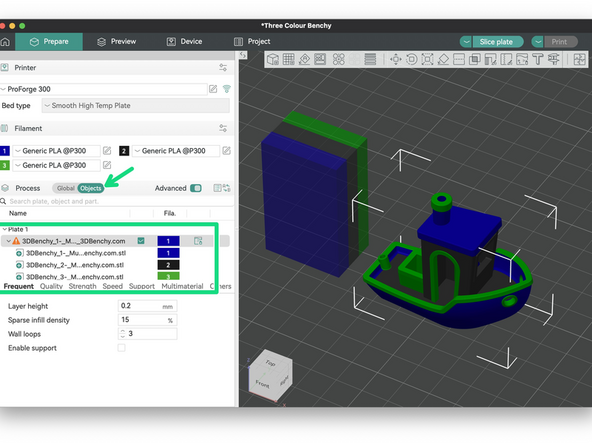
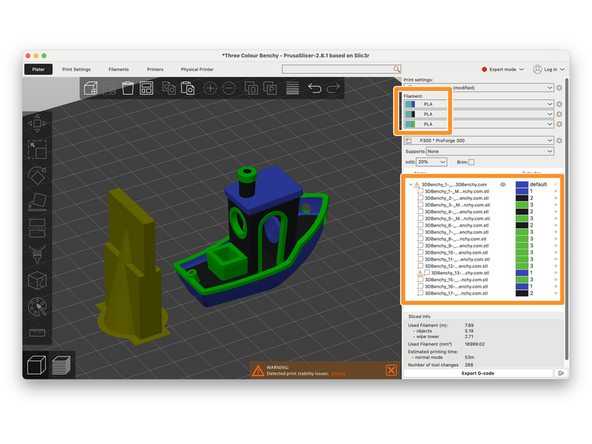
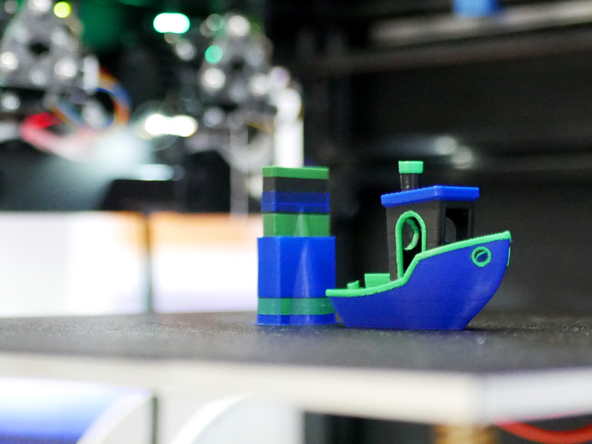
With a successful single material print you can now try a multi material print.
-
The multi-part benchy we're printing can be found here.
-
Load your model and assign a print head and material to each part of your model.
-
Orca Slicer
-
Prusa Slicer
-
In the same way as before we can slice and send the model to the printer for printing.
-
We recommend using a wipe tower when printing with multiple materials, this ensures the best possible print quality.
-
There are numerous resources available online that provide detailed guidance on using PRUSA and ORCA Slicer to set up various aspects of a print. We encourage you to explore them for further information.
-
-
-
Owning a Tool Changer 3D Printer unlocks new ways to print, we recommend trying some of the following:
-
Multi-material printing: Print different filament types in one job (e.g. TPU for gaskets, PLA for structure).
-
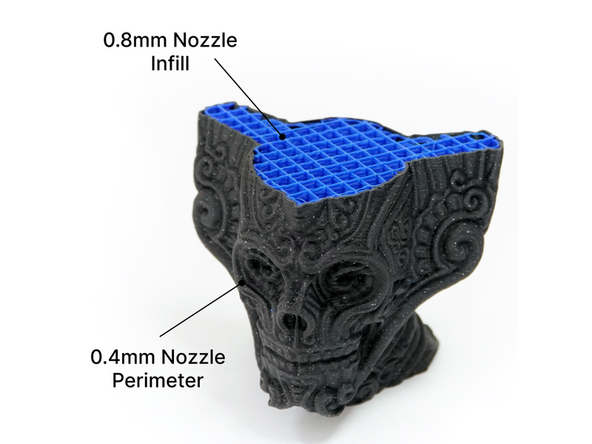
Larger Nozzle for Infill: Print faster and stronger by using a bigger nozzle for infill while preserving detail with a smaller one on the outer walls.
-
-
Dedicated support material nozzle: Use a separate head for soluble supports (e.g. PVA, HIPS) without contaminating primary nozzles.
-


Cancel: I did not complete this guide.
2 other people completed this guide.
