
-
-
The Proforge 4 is an open source machine. And can therefor run any gcode from any slicer - so long as the slicer is capable of:
-
Producing G-code that is compatible with Klipper/Marlin Firmware.
-
Multiple Extruder Support
-
Custom Start and End G-code for each extruder
-
-
-
CURA is the primary slicer for the Proforge 4, thanks to its adeptness in managing multi-extruder setups.
-
We examined slicers such as Orca Slicer and Super Slicer, however found they were designed for printers that use multiple materials through a single nozzle. When used with a tool changer, their slicing methods did not perfectly align, leading to occasional compatibility issues. We are still working on making other slicers available.
-
-
-
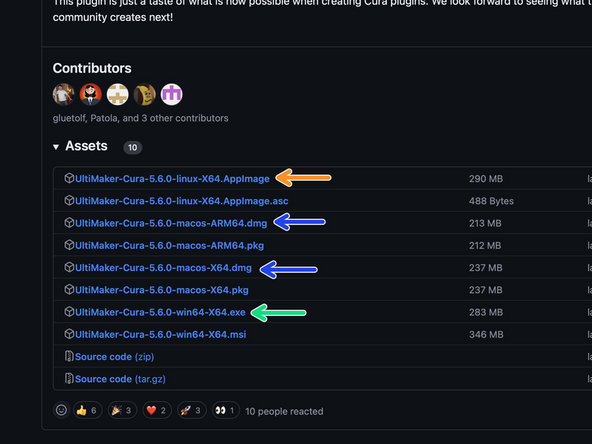
Download the latest version of CURA here. Scroll down to Assets to download.
-
Windows
-
Mac
-
Linux
-
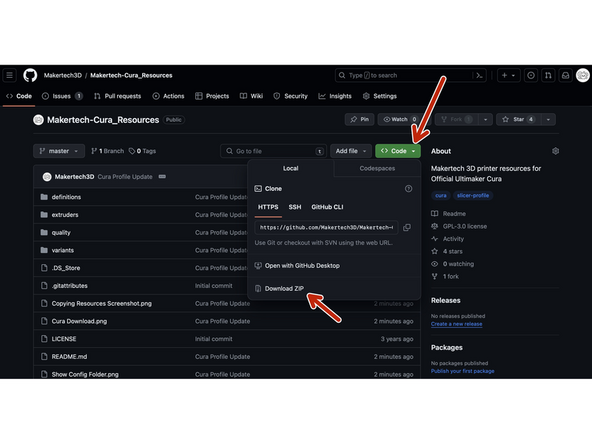
We have submitted a request to include the Proforge 4 configs natively, but in the meantime you will need to download the config files separately and copy and paste them into the config folder.
-
-
-
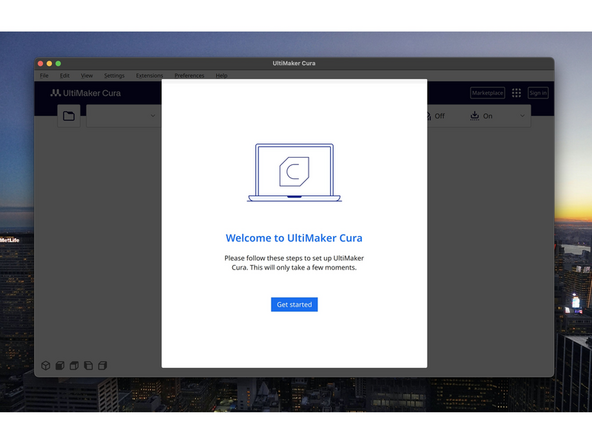
After installing and upon first launching Cura you will need to run through the setup wizard.
-
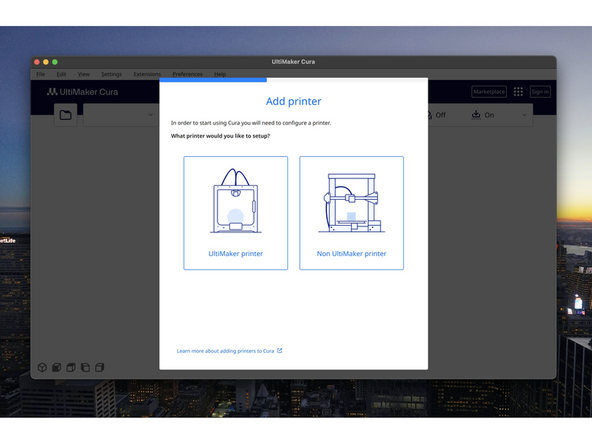
Select Non-Ultimaker printer.
-
In the "Add Non-Networked Printer" section select a random machine for now.
-
Makertech 3D profiles are to be included in the next release.
-
-
-
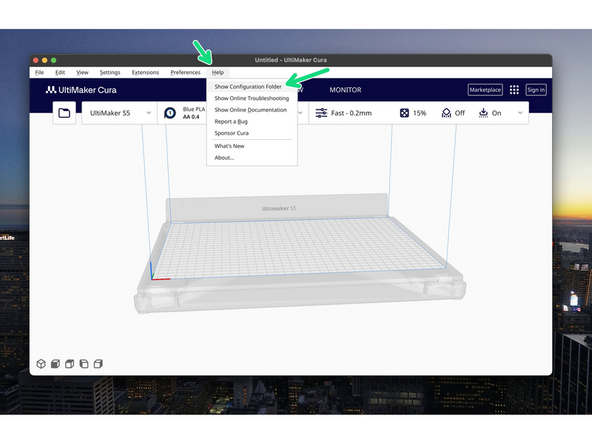
After setting up Cura go to Help and then Show Configuration Folder
-
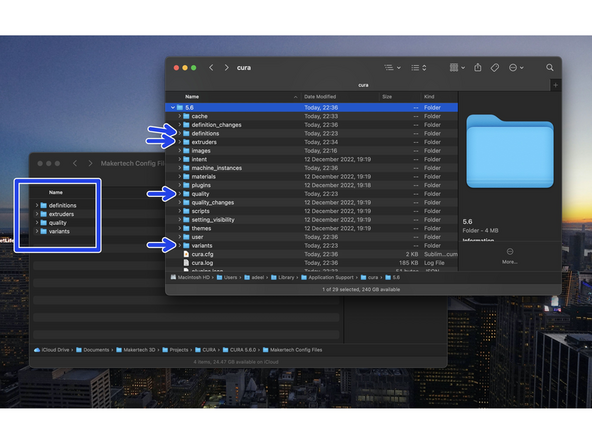
Copy the config files that you downloaded previously to the corresponding folders.
-
-
-
Close and re-open Cura.
-
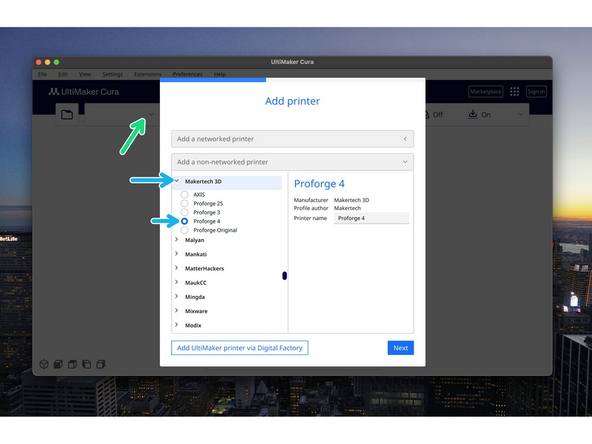
Go to Add Printer
-
Scroll down to Makertech 3D and add the Proforge 4
-
-
-
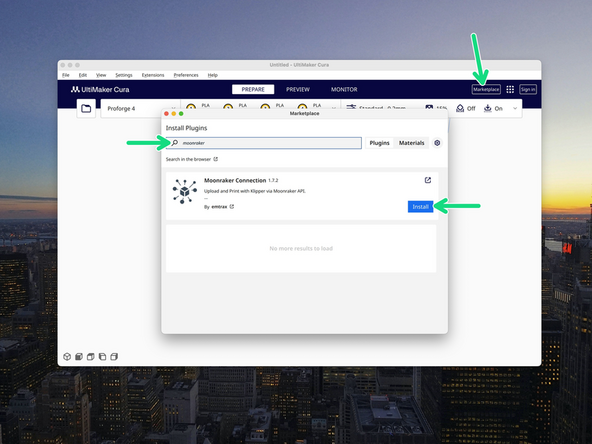
Cura can be connected to the Proforge 4 to send sliced files directly to it over Wi-Fi.
-
Do this by going to the Marketplace and installing the Moonraker Connection plugin.
-
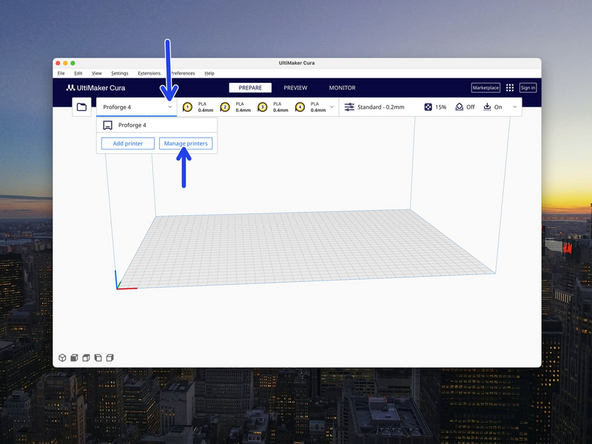
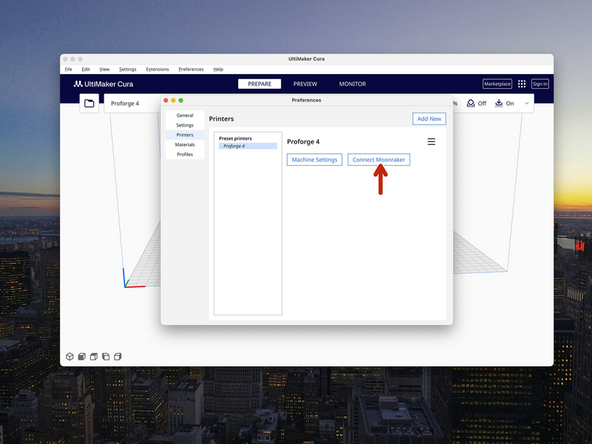
After installing go to Manage Printers.
-
Then go to Connect Moonraker.
-
-
-
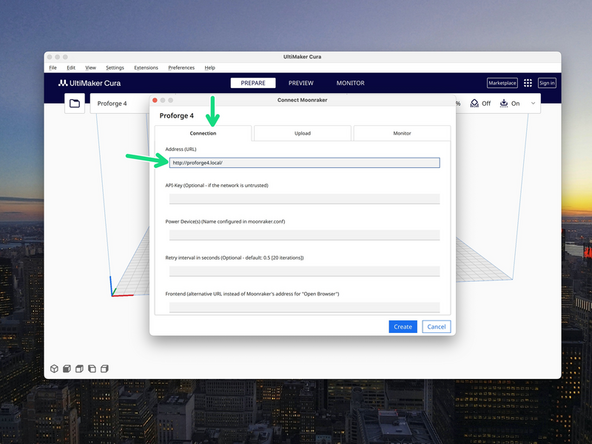
In the Connection tab set the Address(URL) field to:
-
-
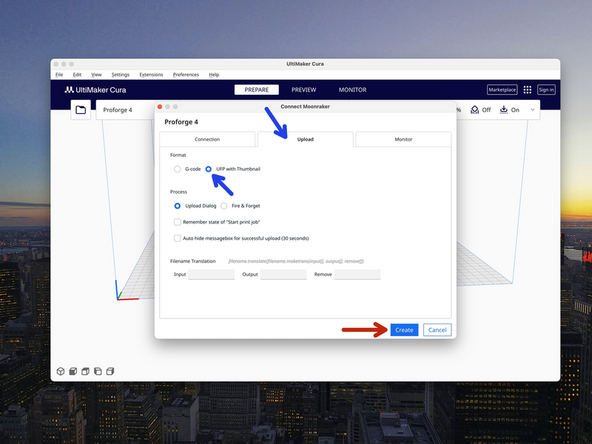
In the Upload tab set format to UFP with Thumbnail.
-
Hit create when done.
-
-
-
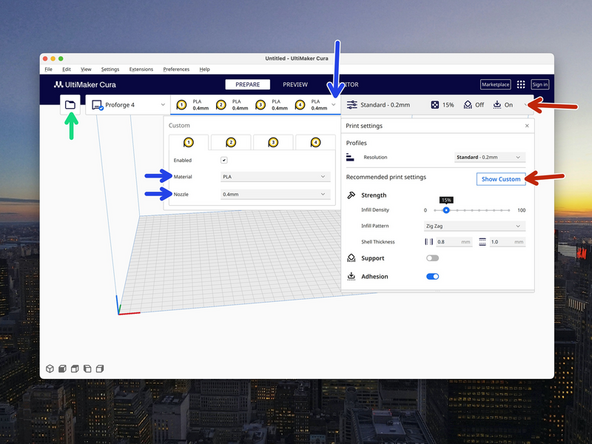
Load STL's here.
-
Set print head materials and nozzle sizes here.
-
Adjust print setting here.
-
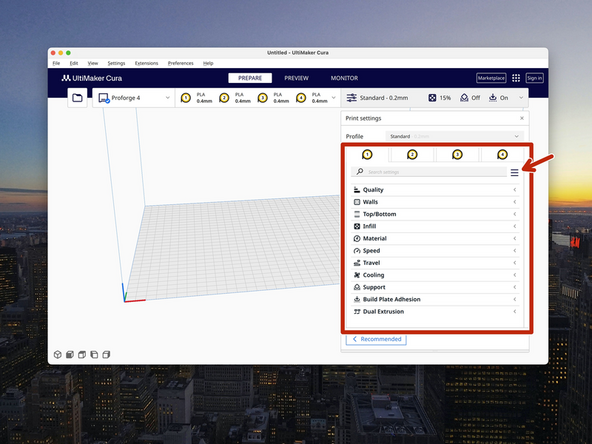
Click on Show Custom to set settings for individual print heads. Select all from the menu to show all settings.
-
Settings are defaults - we recommend following the filament manufacturers guidelines and also making adjustments to suit your printing needs.
-
-
-
We recommend printing at the lower end of the temperature range recommended by the filament manufacturer, this is because the Proforge 4 hotend has a large melt zone.
-
If you're printing just one material we recommend disabling the draft shield as it's not necessary, the setting can be found under Experimental.
-

Cancel: I did not complete this guide.
9 other people completed this guide.

One Comment
@makertech3d If you go into Materials Cura crashes. I see other with the same issue. The fix is using a profile Bill provides on Discord (search Cura Crash). It would be great if this could be officially fixed? Thanks