-
-
Download the new v5.2.1 of Makertech Cura for windows here.
-
Run through the install and setup wizards.
-
If you have an earlier version of Makertech Cura installed, delete it from your programme folder before installing the new one.
-
-
-
If you are running Mac OS or Linux the 3.5 profiles will be made available in the next release of the official Ultimaker Cura.
-
In the mean time you can adjust the start and end g-codes of your v3 profile so that it works with the v3.5.
-
;-----Proforge 3.5 Start G-code---- M190 S{material_bed_temperature_layer_0} ;wait for bed temp G28 ;Home Z_TILT_ADJUST G1 F8000 X10 Y3 ;Move hotend to bottom left corner G1 Z{layer_height_0} ;Set to first layer height M82 ;absolute extrusion mode G92 E0 ;Zero Extruder G1 F1500 X290 E16 ;Prime Hotend ; ----Proforge 3.5 Start G-code-----
-
The end g-code is simply END_PRINT
-
-
-
Follow the instructions outlined here for setting up CURA for Dual Extrusion printing and here for Direct Drive printing.
-
However, for v3.5, the file is not saved to an SD card, instead it is directly uploaded to your printer. Complete the remaining steps of this guide for setting that up.
-
-
-
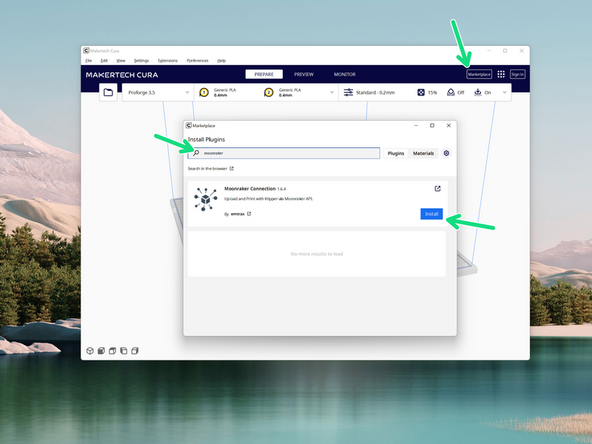
In order to upload print files directly to your printer you will need to download and install the Moonraker Connection plug-in.
-
-
-
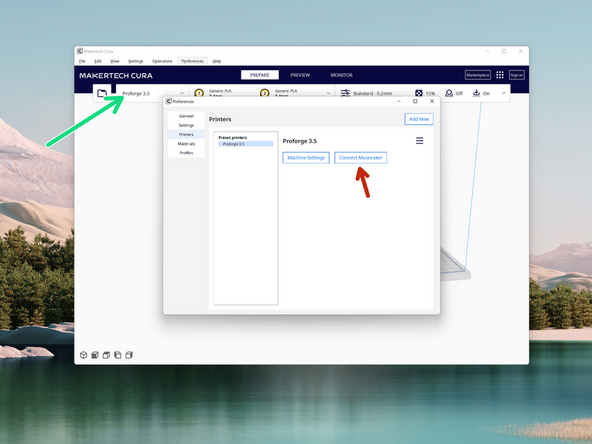
Click on the printer drop down. Go to Manage printers.
-
Click on Connect Moonraker
-
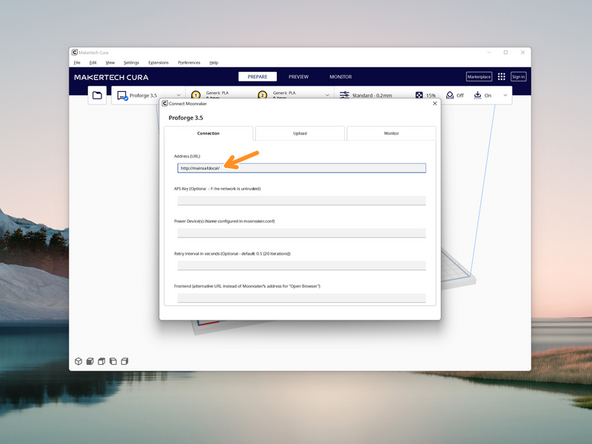
Under the Connection tab, set the Address (URL) field to: http://mainsail.local
-
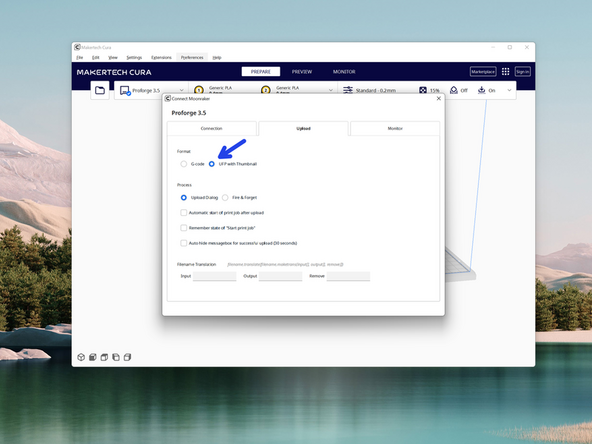
Under the Upload tab set the Format to UFP with Thumbnail
-
-
-
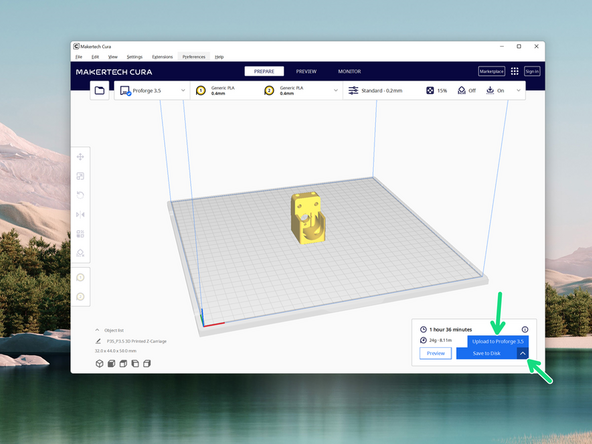
After slicing a model, click the arrow to show the upload to Proforge 3.5 button. Click it to begin the upload.
-
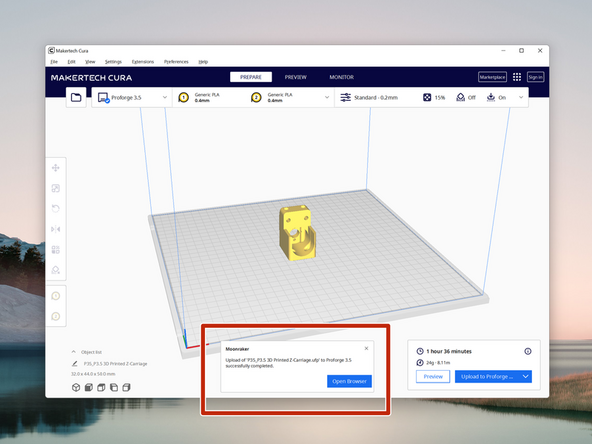
Upon a successful upload you should get this message.
-
-
-
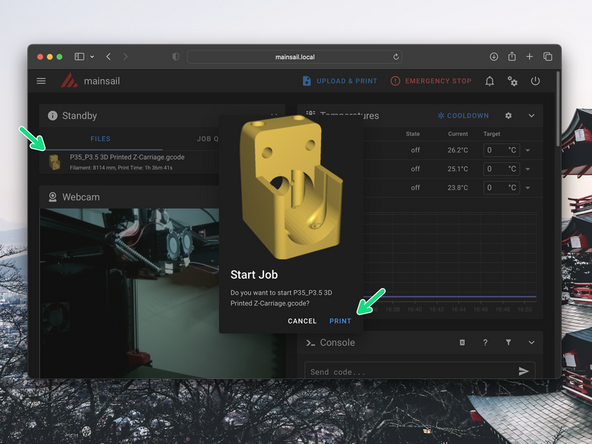
In your browser at mainsail.local the gcode file should appear and be ready for printing.
-