
-
-
You will need to download the following:
-
-
-
Notepad ++ (Atom is a good alternative for Mac)
-
On windows you will also need 7zip to unpack the OctoPi file.
-
Newer versions of of these files/software's may have been released since the publishing of this guide but the steps outlined here should still remain valid.
-
-
-
Extract the OctoPi image using 7zip to convenient location on your computer.
-
Run Etcher
-
Point it to the .img file that you extracted.
-
Insert the Micro SD card into your computer.
-
Hit Flash
-
On windows you may be asked to format the SD card after it's been flashed. Do not format the drive.
-
-
-
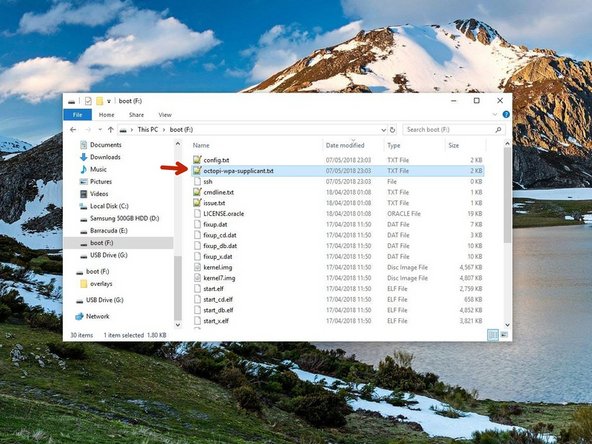
Navigate to the flashed SD card (you may have to remove and reinsert it) and open the file named octopi-wpa-supplicant.txt with Notepad++ or Atom.
-
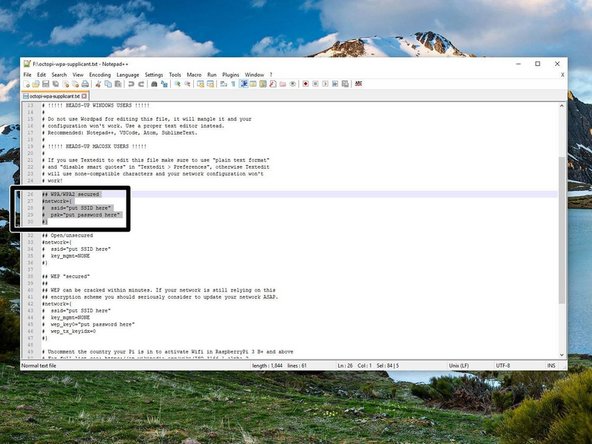
In the text editor read the instructions for the different WiFi configurations and choose the most appropriate for your network. For most this will be WPA/WPA2 security.
-
Remove the single # from the the beginning of each line of your chosen configuration.
-
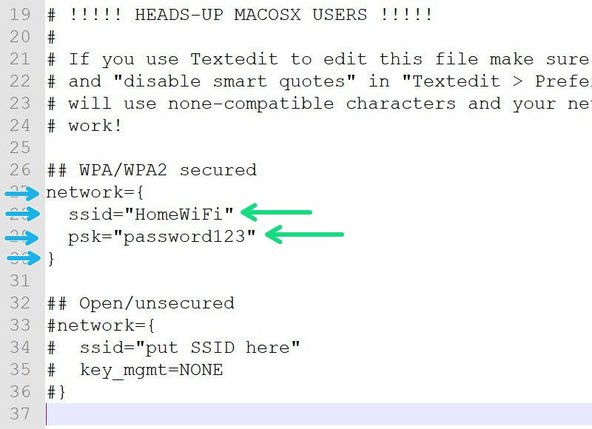
Type in your routers SSID as it’s broadcast and its password. Save and close the file.
-
Do not remove the inverted commas (" ").
-
-
-
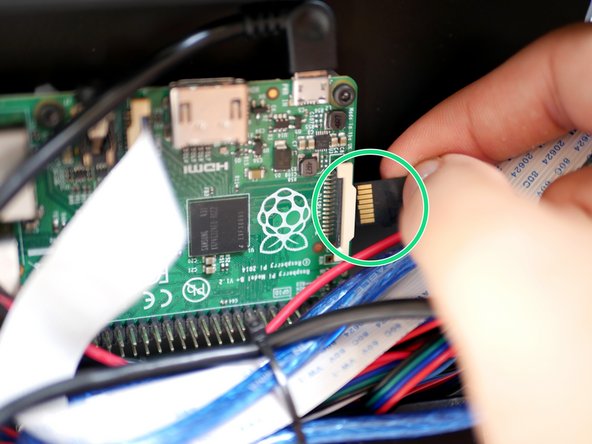
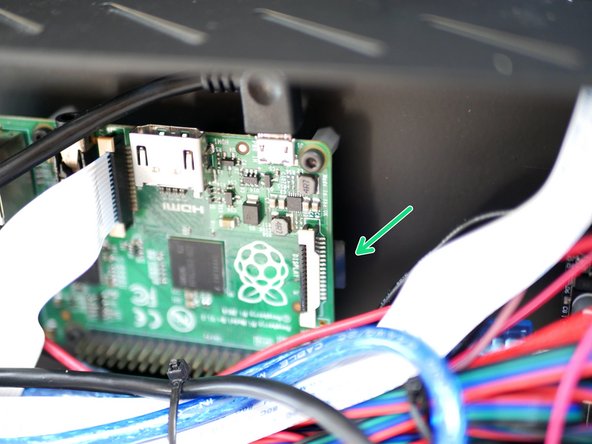
Insert the Micro SD card into the Raspberry Pi.
-
It is inserted into the back of the board with the golden contacts facing up. You may find it easier to unscrew the board from the mounts to gain better access.
-
Once the SD card is inserted power up the printer.
-
-
-
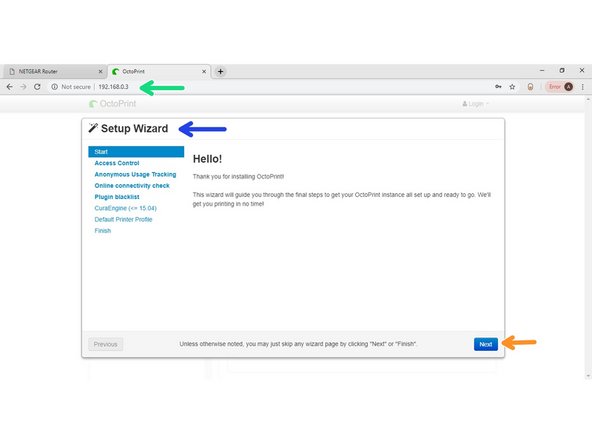
Type''http://octopi.local'' into your browser to load the OctoPrint interface.
-
If that doesn't load the octoprint interface you will need to find the IP address for it, see the next two steps for finding the IP address.
-
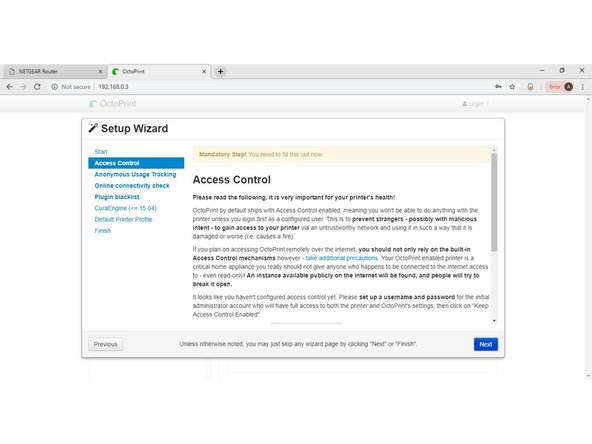
Loading from the first boot up may take several minutes but once it does you will be greeted with the setup wizard. You may also get a "something went wrong" message, that's normal, just be patient.
-
Click Next
-
-
-
On your PC open command prompt.
-
Type ipconfig and hit return/enter.
-
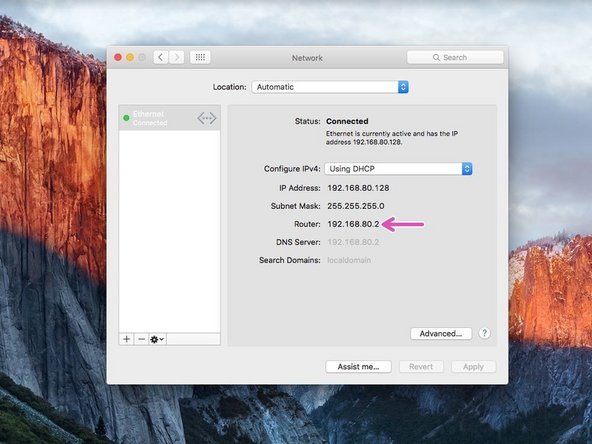
Type the Default Gateway ip address into your browser.
-
On Mac you can find the Default Gateway ip in system prefferneces -> Network -> Router.
-
-
-
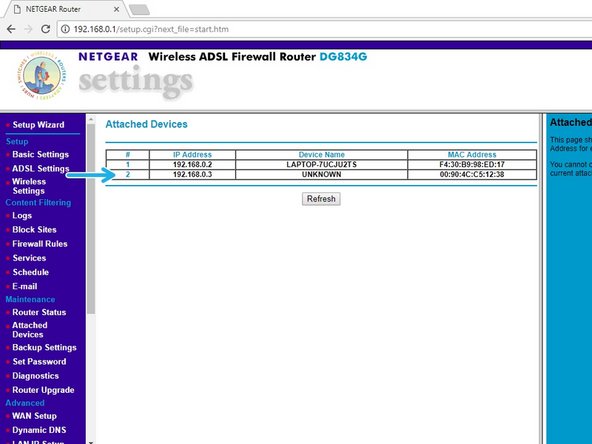
After entering the Default Gateway ip into your browser you will be prompted for a user name and password.
-
The username and password can be found on the back of your router.
-
On the settings page (this will vary depending on your router) find the connected devices page and note the OctoPi's ip address.
-
Make sure you are connected to the same router that you connected the Raspberry Pi to.
-
If you find that your routers settings page isn't loading restart your router.
-
-
-
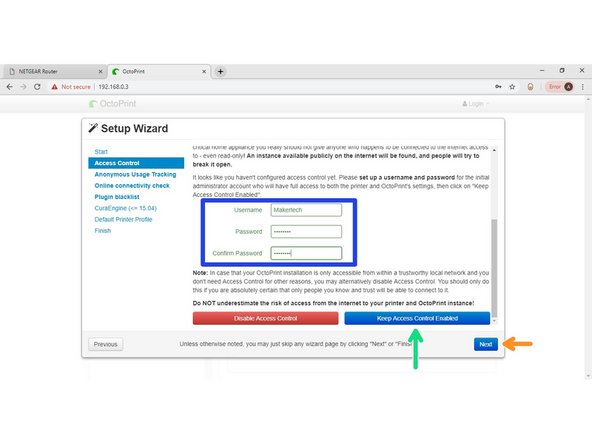
Create a Username and Password.
-
Click "Keep Access Control Enabled".
-
Click Next.
-
-
-
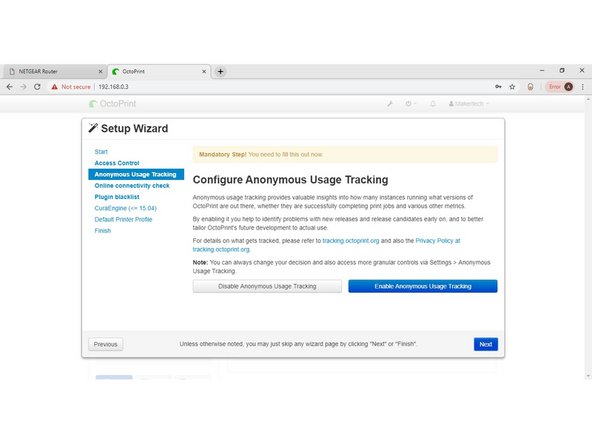
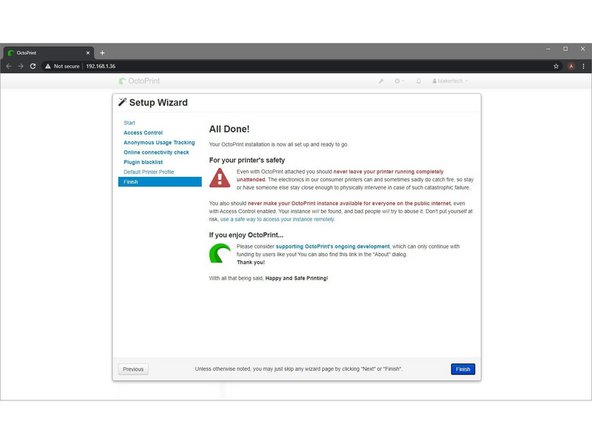
Read through the privacy policy info and decide whether you would like to enable the tracking.
-
-
-
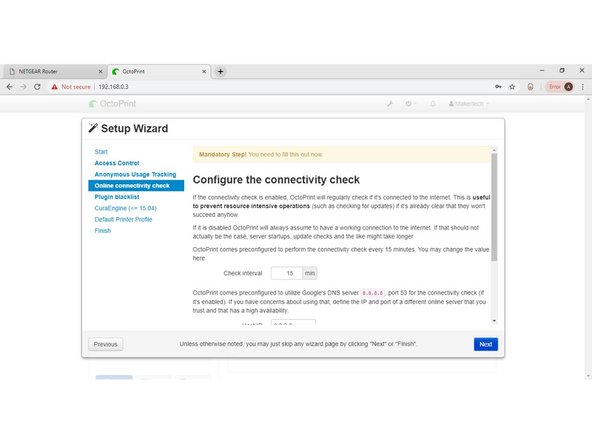
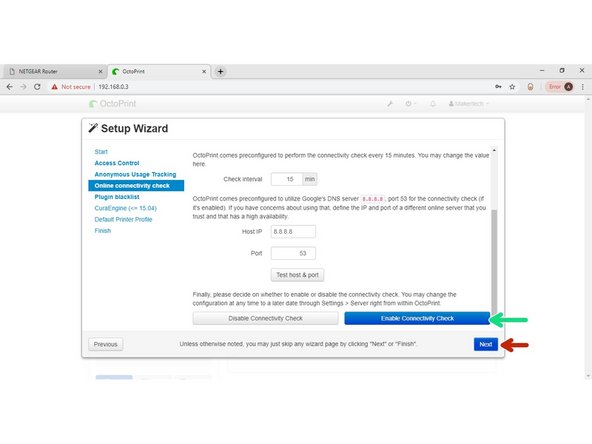
Leave the options here as default.
-
Click "Enable Connectivity Check".
-
Click Next.
-
-
-
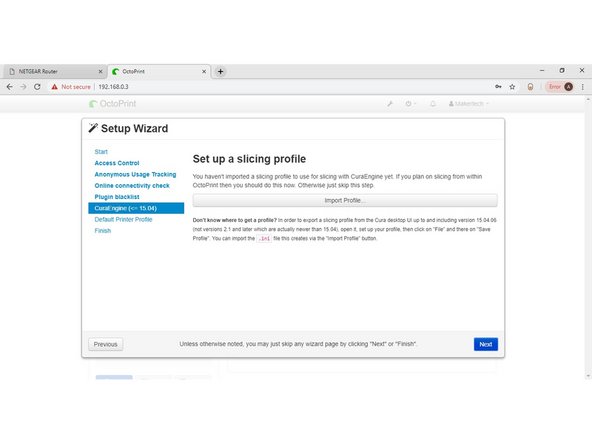
We recommend slicing files with the Cura software and then uploading the gcode to octoprint rather than slicing inside octoprint.
-
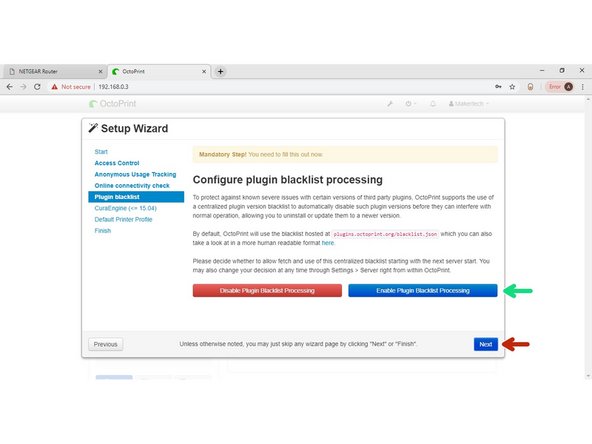
Click Next.
-
-
-
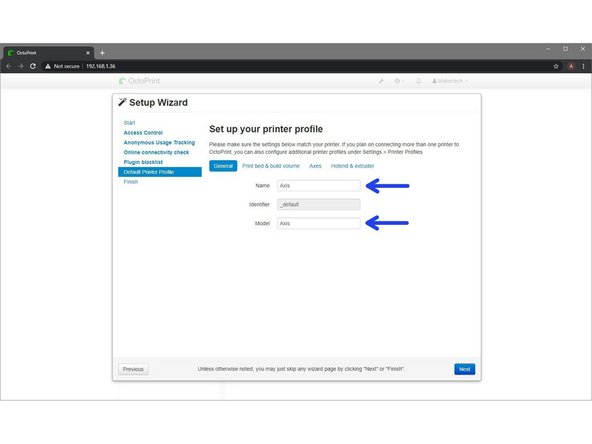
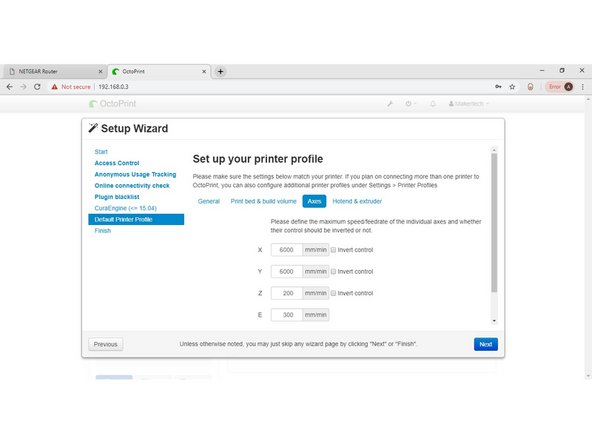
Form Factor: Rectangular
-
Origin: Lower Left
-
Heated Bed (If you have it installed)
-
Width (X): 300
-
Depth (Y): 200
-
Height (Z): 200
-
-
-
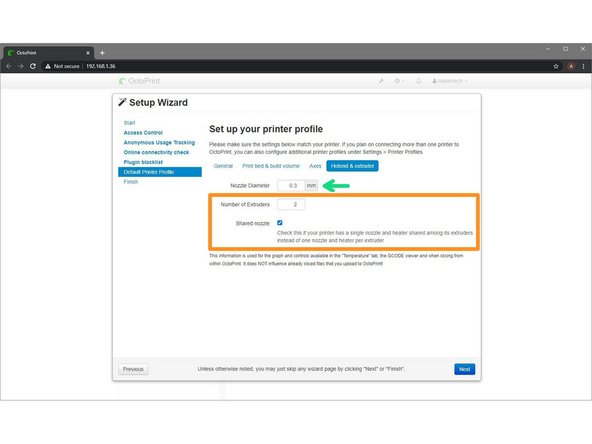
Nozzle Diameter: Your installed nozzles diameter.
-
If you have the dual extrusion upgrade installed set this to two and check "shared nozzle".
-
-
-
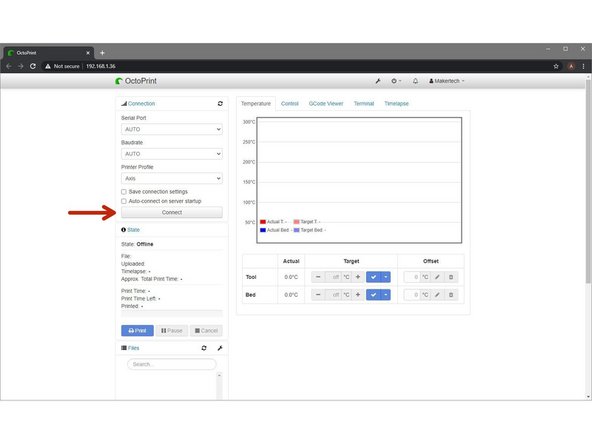
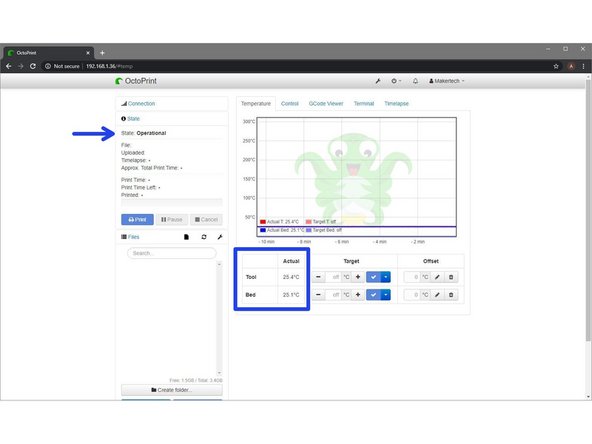
Click Connect
-
A successful connection should read:
-
State: Operational
-
Room Temperatures
-
-
-
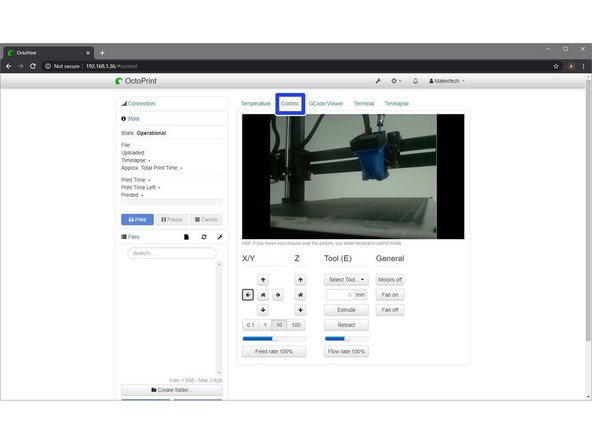
Under the Control Tab you should see a live feed from the Pi cam.
-
If you don't get an image power off the Axis. Check that the ribbon cable is installed the right way round, also check that the camera module is still connected to the camera board inside of the casing.
-
-
-
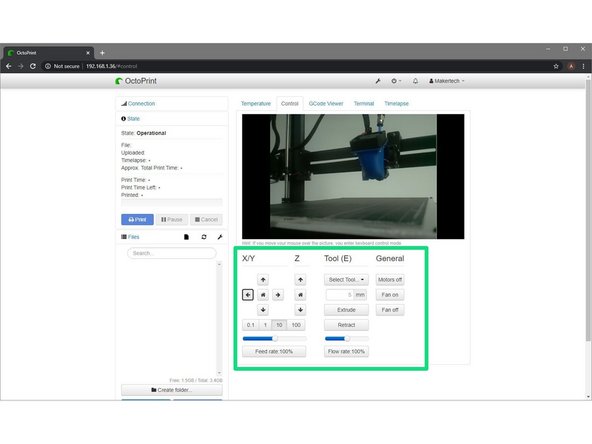
Check that you can move the axes of the printer with the Octoprint control panel.
-
-
-
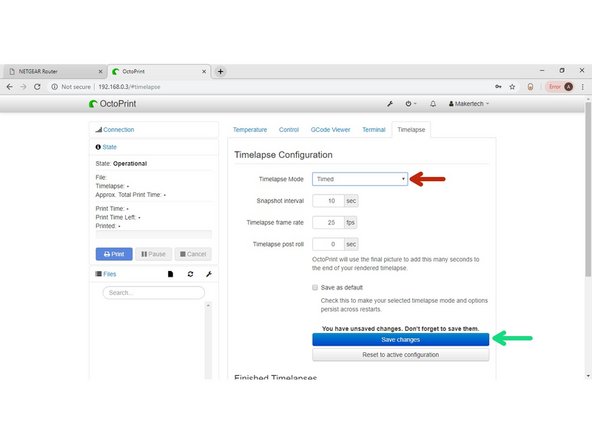
Before starting a print, set the time-lapse mode to either take a photo at a timed interval or at every Z-layer move.
-
Click save.
-
-
-
Use Cura to slice a model into Gcode.
-
Click upload to send the Gcode to Octoprint for printing.
-
We recommend uploading to the SD card if you have the display installed and an SD card inserted into it.
-
Click print to start the print.
-
-
-
More information on the OctoPrint interface can be found at http://octoprint.org
-


Cancel: I did not complete this guide.
One other person completed this guide.
