
-
-
Fasteners and fixing for this stage can be found in the print head accessory bags.
-
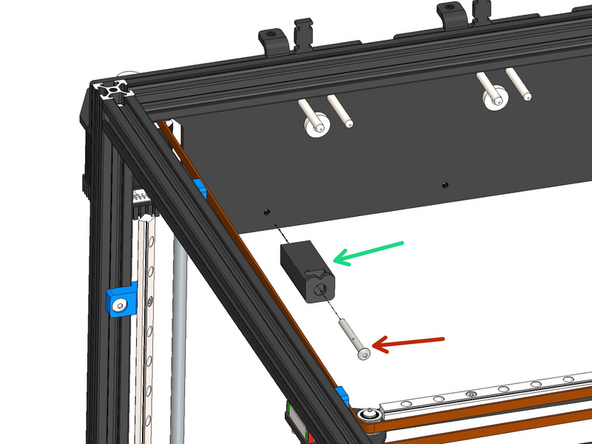
Fix to the docking bracket two docking pins.
-
Docking Pin - D5 M3x35mm
-
M3 x 10mm Cap Head bolt
-
Use the included bottle of thread locker to ensure these bolts do not come loose.
-
If you are building the REVO version of the print head fix the pins to the upper holes.
-
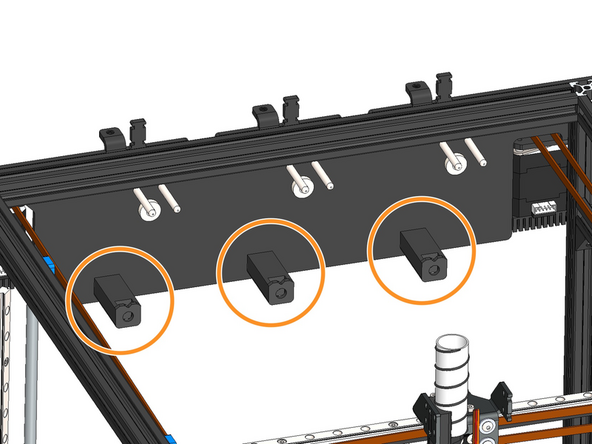
Repeat this across the docking bracket for the number of print heads you are installing.
-
-
-
Fix onto the docking bracket the docking magnet.
-
Button Magnet
-
M3 x 8mm Countersunk Bolt
-
Repeat this across the docking bracket for the number of print heads you are installing.
-
-
-
Fix onto the docking bracket the Silicone Dock.
-
Silicone Dock
-
M4 x 40mm Button Head Bolt
-
Repeat this across the docking bracket for the number of print heads you are installing.
-
-
-
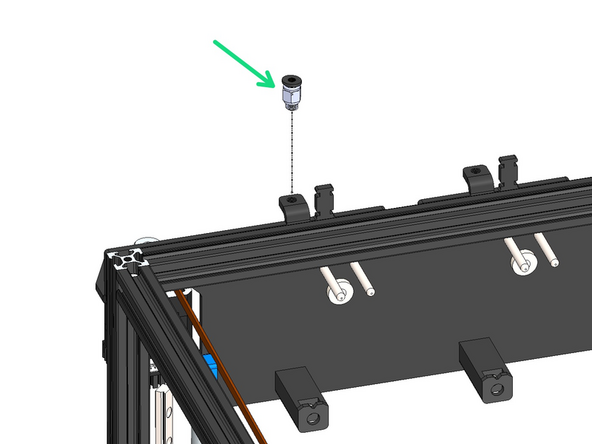
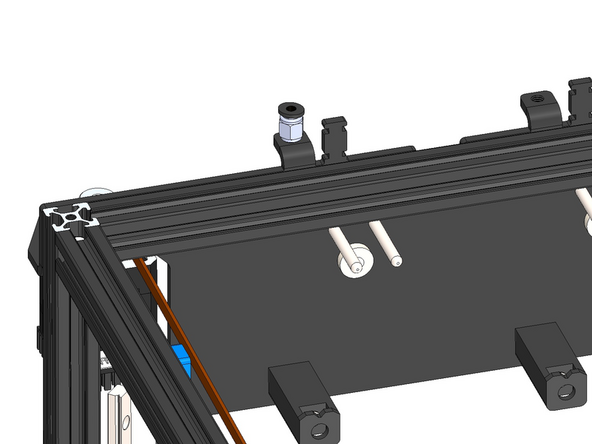
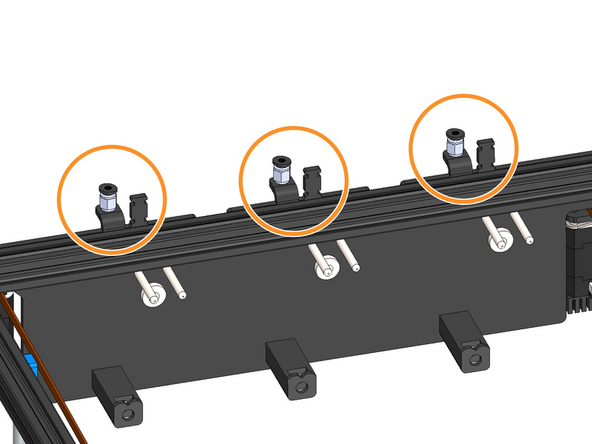
Screw onto the docking bracket a PC4-M6 Coupling.
-
PC4 - M6 Coupling
-
Repeat this across the docking bracket for the number of print heads you are installing.
-
-
-
Below is a link to a video by the creator of the Orbiter v3 Extruder showing its assembly. Feel free to watch for additional information, our guide will summarise the steps below.
-
-
If you are building more than one print head we recommend completing the steps below in parallel for all your print heads.
-
-
-
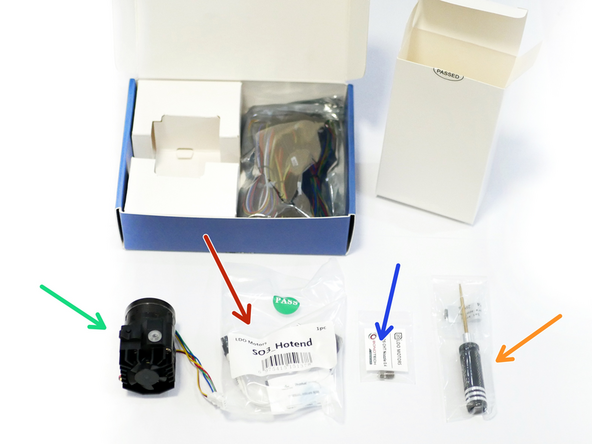
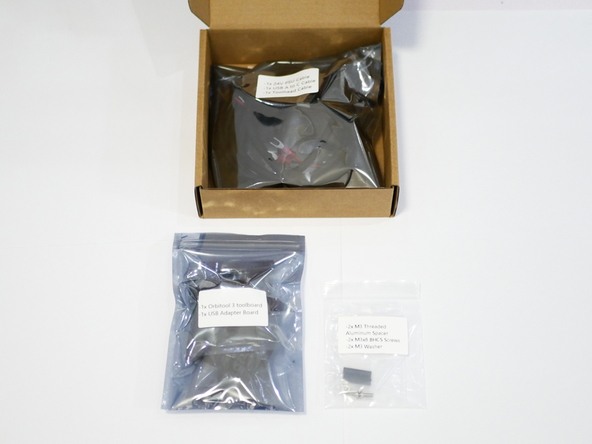
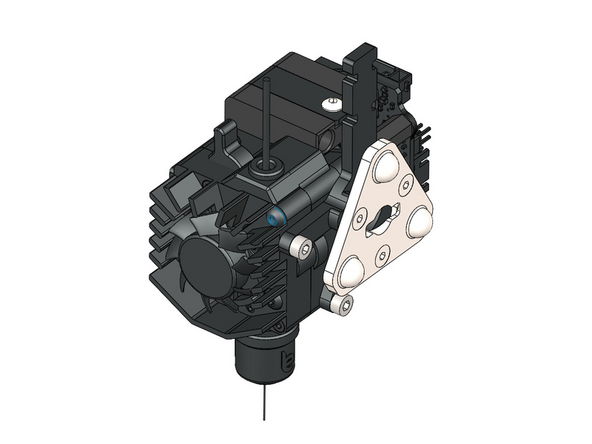
Upon opening the box you should find:
-
The Extruder Main Body
-
The Hotend
-
Nozzle
-
Screw driver
-
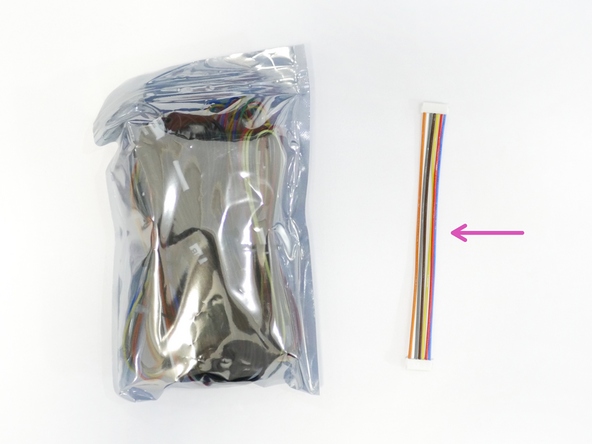
IO Cable
-
-
-
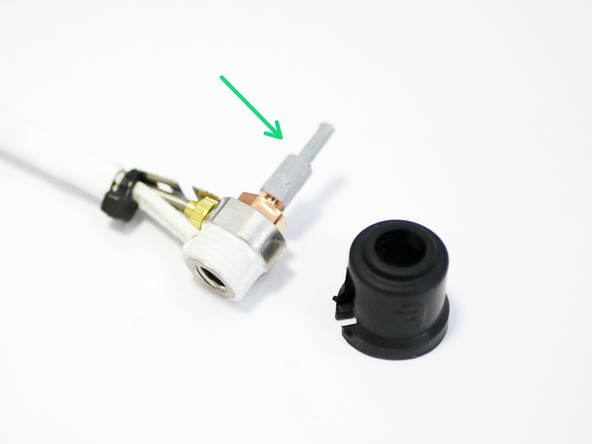
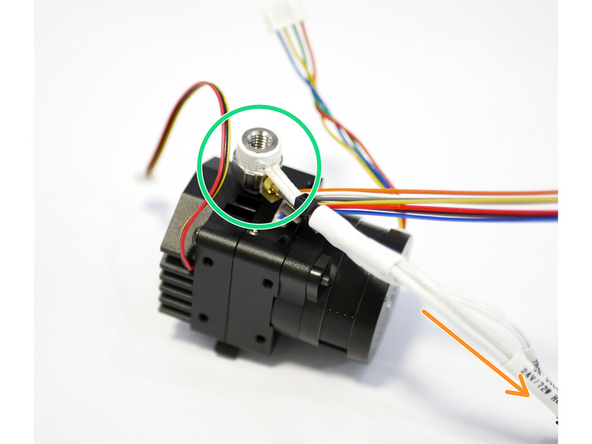
Apply a thin layer of the included thermal paste to the shaft of the hotend heatbreak as shown.
-
For the REVO edition of the print head, no thermal paste is required.
-
-
-
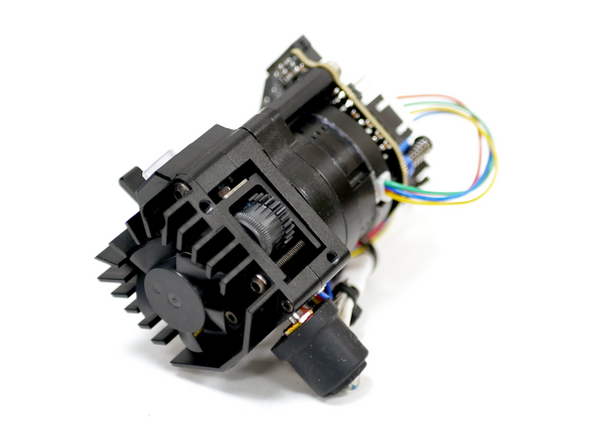
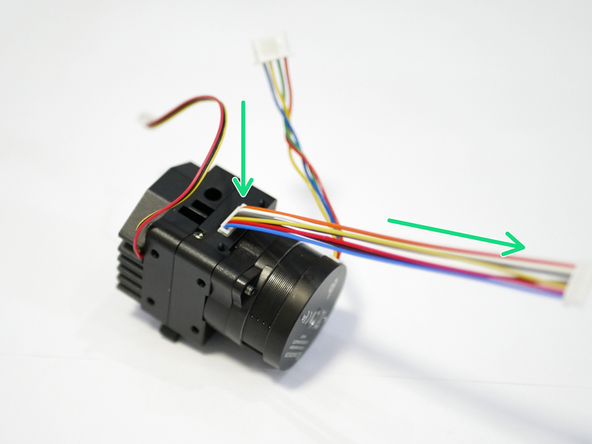
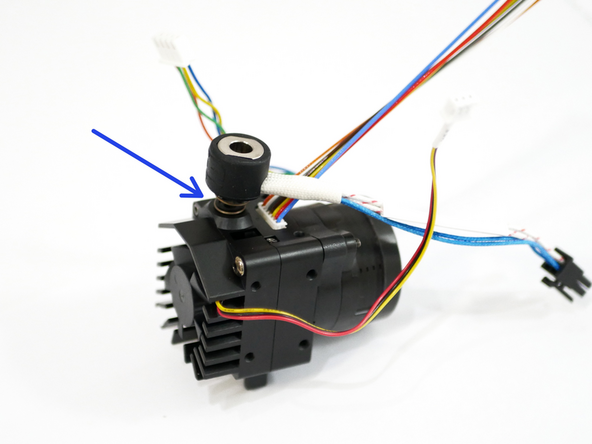
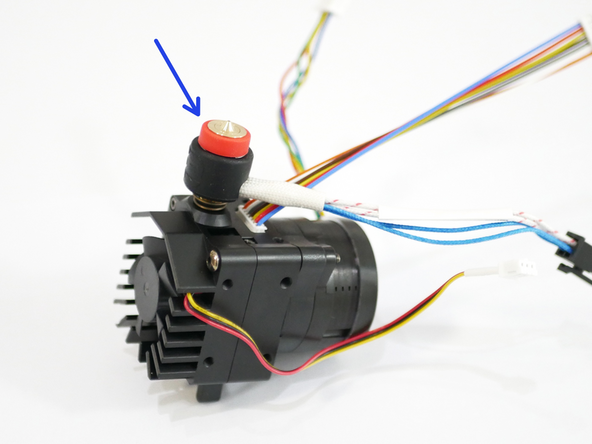
Loosen this grub screw using the included screw driver.
-
Slide the hotend in.
-
Orientate its cables so that they point to the corner of the motor as shown.
-
Tighten down the same grub screw to secure the hotend in place.
-
For the REVO version there is no set screw, the heater block spring snaps onto the extruder body.
-
-
-
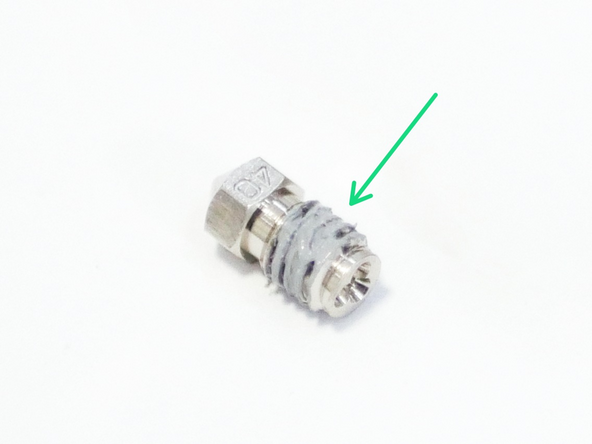
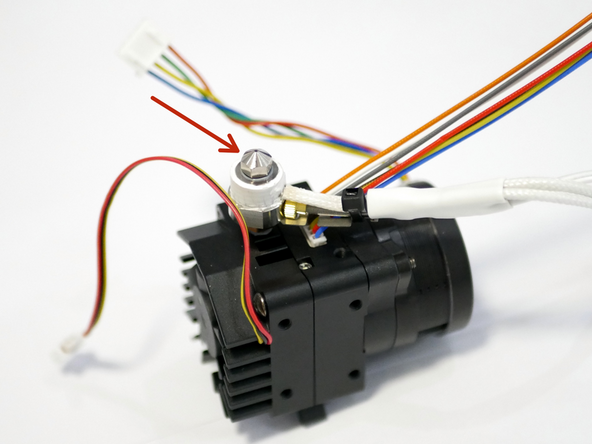
Apply some thermal paste to the thread of the nozzle.
-
Screw the nozzle into the heater block.
-
For the REVO edition of the extruder, you don't need any thermal paste and the nozzle can just be screwed directly into the extruder body.
-
-
-
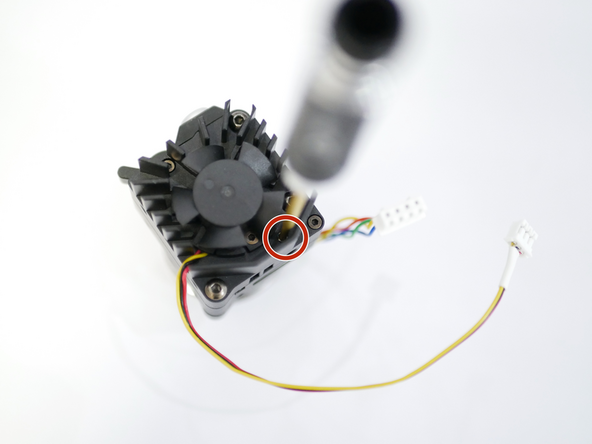
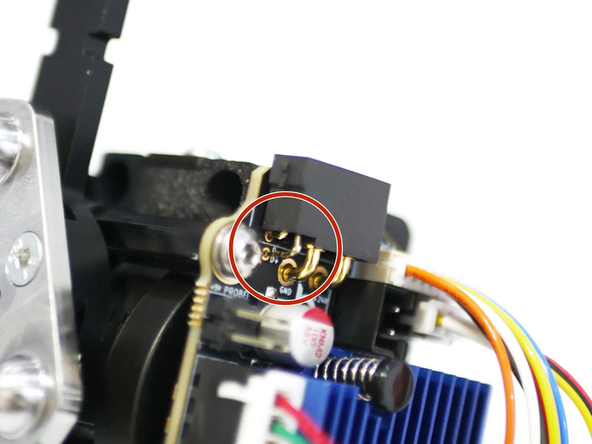
Open the orbiter tool board box and take out the tool board and mounting spacers.
-
Check that these pins match the image and are not touching or otherwise damaged.
-
-
-
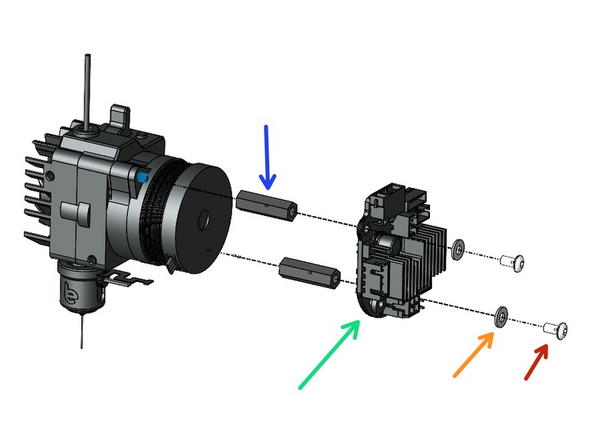
Mount the Tool Board to the back of the extruder.
-
Spacer - Mount these first
-
Tool Board
-
Washer
-
M3 x 6mm bolt
-
-
-
Assemble the Print Head Docking Bracket as shown.
-
Metal Docking Bracket
-
3D Printed Docking Bracket
-
M3 x 8mm Button Head Bolt
-
Thread these bolts directly into the 3D printed part
-
-
-
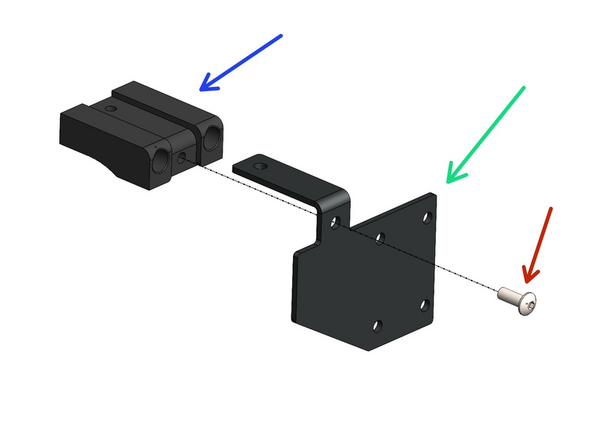
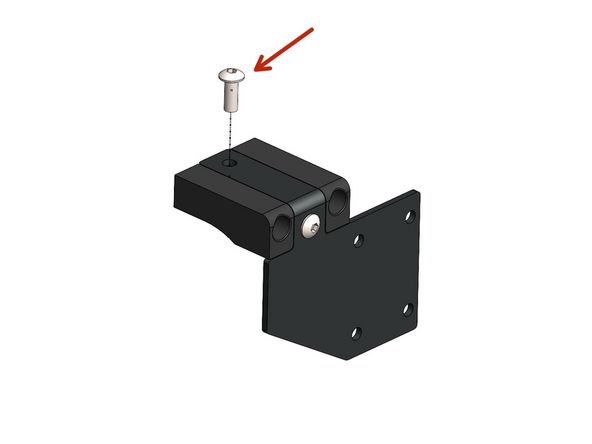
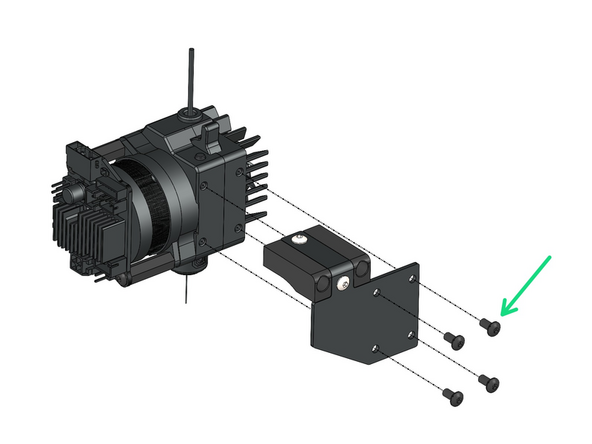
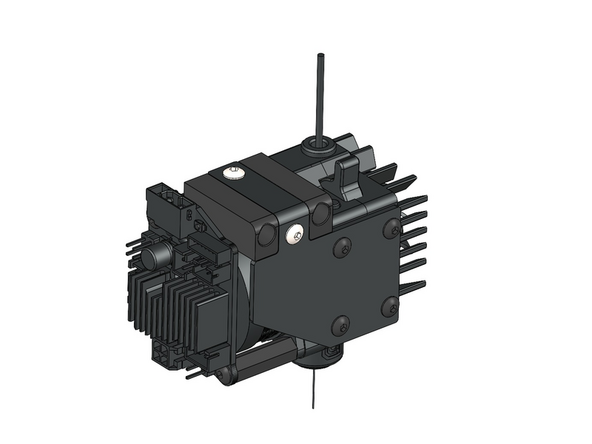
Fix the docking bracket onto the side of the Smart Orbiter V3
-
M3 x 5mm Button Head Bolt
-
-
-
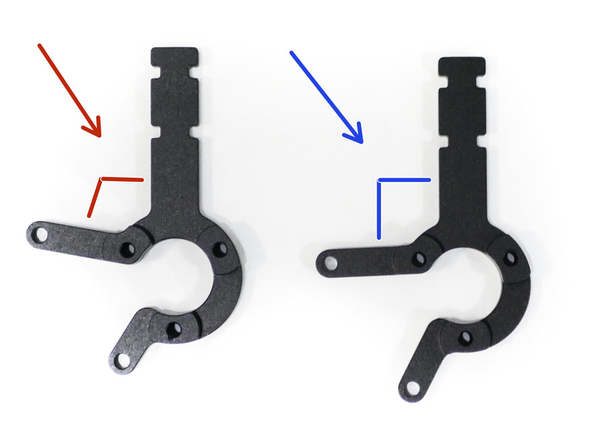
The bracket has a slightly different shape for the REVO version of the extruder.
-
Orbiter REVO Bracket
-
less that 90 degrees
-
Standard Orbiter SO3 Bracket
-
~90 degrees
-
-
-
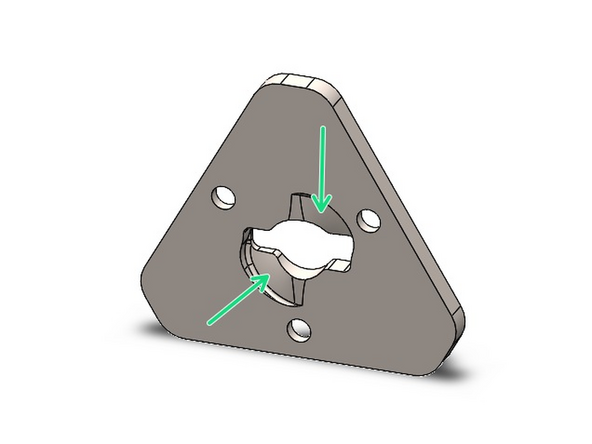
Add some grease to the grooves on the inside of the tool plate.
-
Use a lithium based grease for this. It should be easy to source locally.
-
-
-
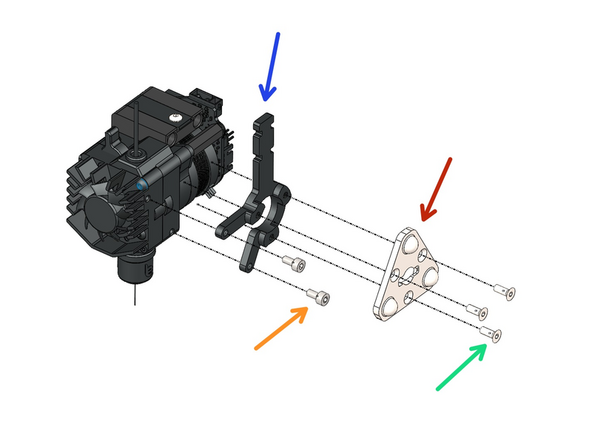
Fix to the other side of the Smart Orbiter V3 Assembly the Tool Plate Brackets.
-
Tool Plate
-
Cable Guide Bracket (SO3/REVO)
-
M3 x 8mm Countersunk bolt
-
M3 x 6mm Cap Head Bolt
-
-
-
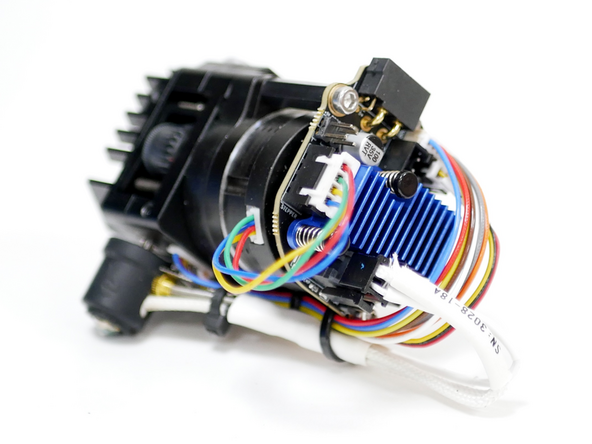
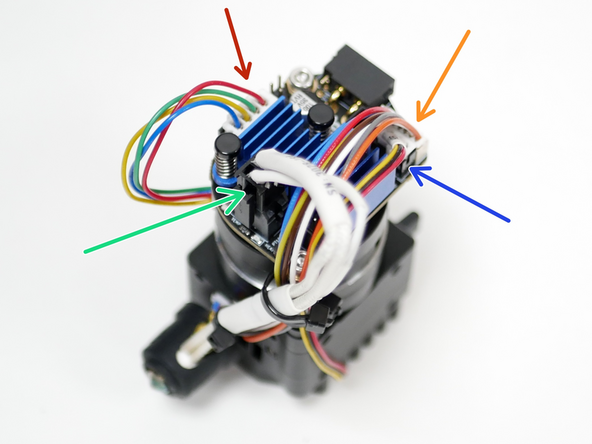
After mounting the tool board to the back of the extruder, connect the cables as shown.
-
Heater and Thermistor
-
Motor
-
Integrated Electronics
-
Ensure this is pushed in all the way as this connector can be a little stiff.
-
Fan
-
-
-
Use cable ties to secure the cables as shown.
-
Set the hotend at an angle as shown.
-
Integrated electronics cable and fan cable to spacer.
-
All cables to spacer.
-
Make sure your cables match the image.
-
-
-
Attach the USB cable.
-
Use cable ties to fix to the nylon cable guide to the print head.
-
-
-
Dock the print heads onto their pins.
-
Push the PTFE tubing into the extruder.
-
Use a cable tie to fix the PTFE tube and USB cable to the cable guide.
-
Make sure to include some slack on the USB cable.
-
-
-
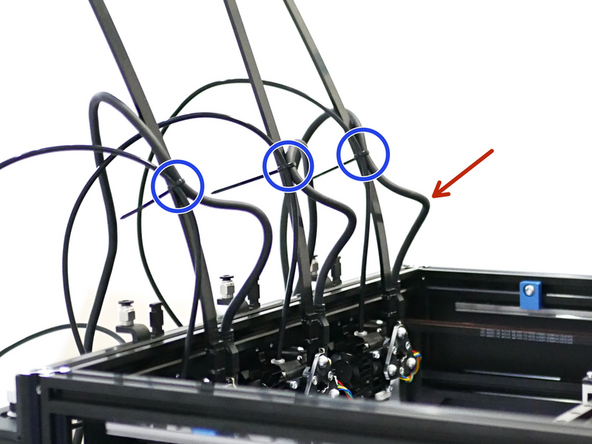
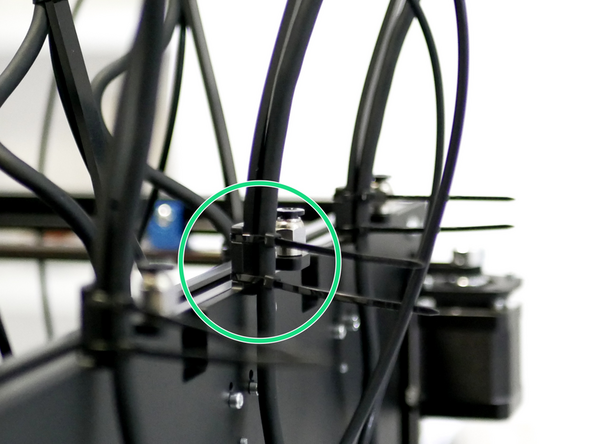
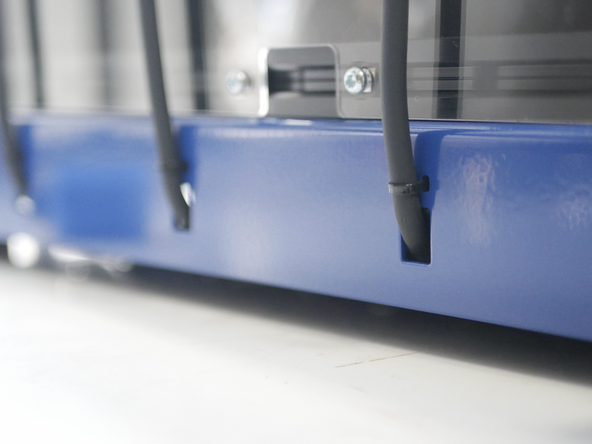
With the USB cable following the guide, secure them both to the dock bracket as shown.
-
-
-
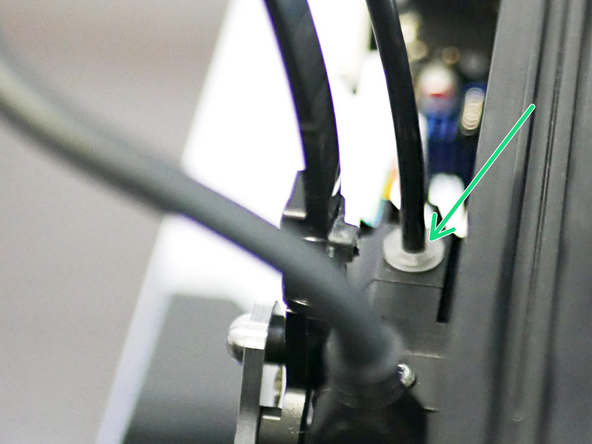
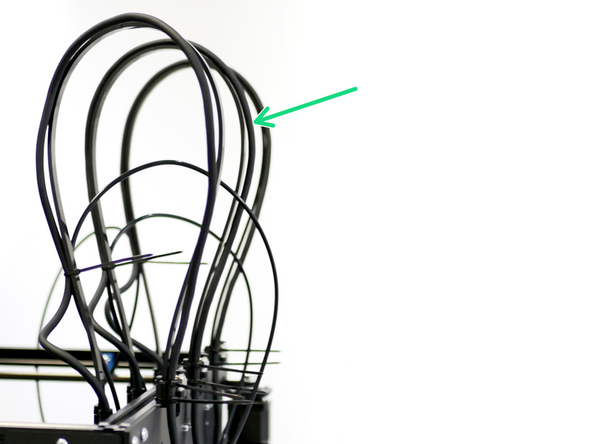
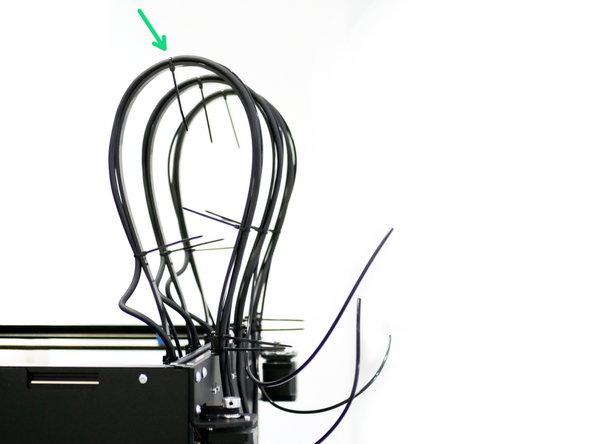
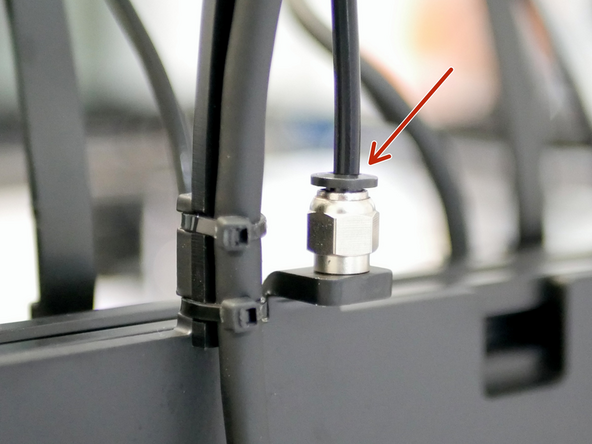
Cable tie the PTFE tube to the top of the cable support guide.
-
Cut any excess tubing.
-
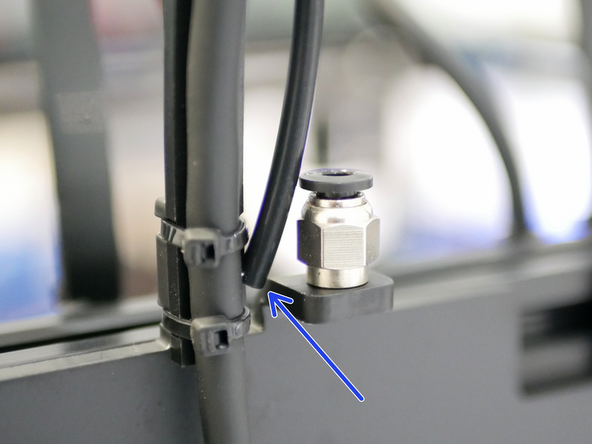
Insert the PTFE tube into the coupling.
-
-
-
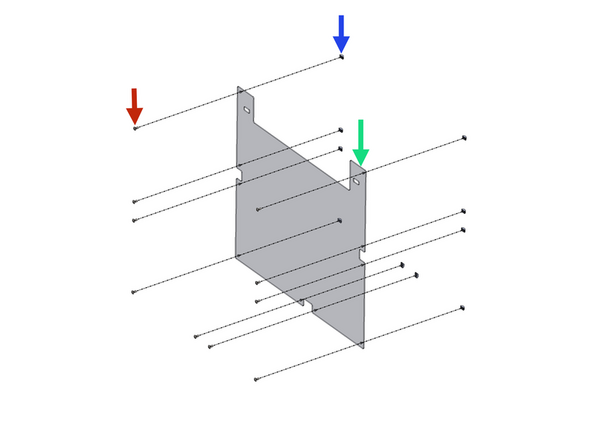
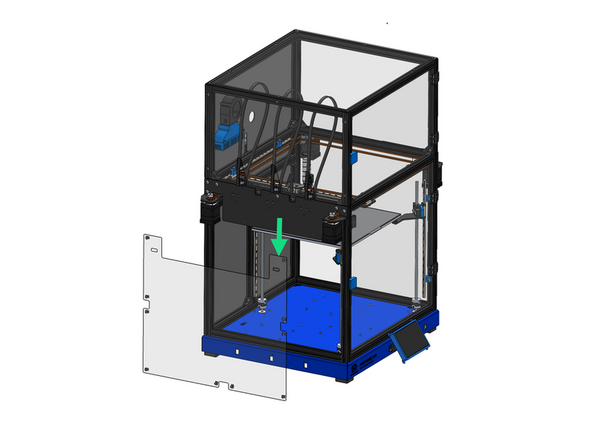
If you are planning to install the enclosure we recommend installing the left side panel at this stage before secure the print head cables into the base.
-
The longer tab goes to the front.
-
M4 x 8mm Button Head
-
M4 T-Nut
-


Cancel: I did not complete this guide.
2 other people completed this guide.
