
-
-
Slide the camera into the 3D printed camera case.
-
Secure it in place with:
-
M3 x 18mm Cap Head Bolt
-
M3 Nylon Nut
-
-
-
Secure the assembly to the inside left of the printer’s front frame using an M4x12mm button head bolt and an M4 T-nut.
-
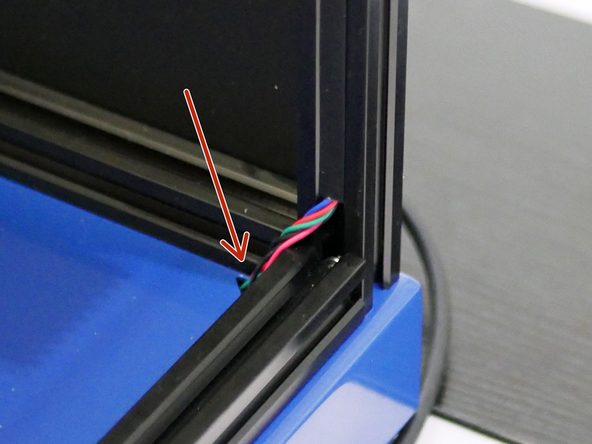
Route the USB cable up from under the base and connect it to the camera.
-
To avoid potential camera feed issues, we’ll take a few precautionary steps:
-
Ensure the connector is securely mounted and the cable is free of kinks, especially in exposed areas.
-
The cable is shielded, but interference is still possible — route it on the opposite side of the extrusion from the motor cable.
-
-
-
Plug in the gantry motor cables.
-
These are the twisted cables that came with the LDO motors.
-
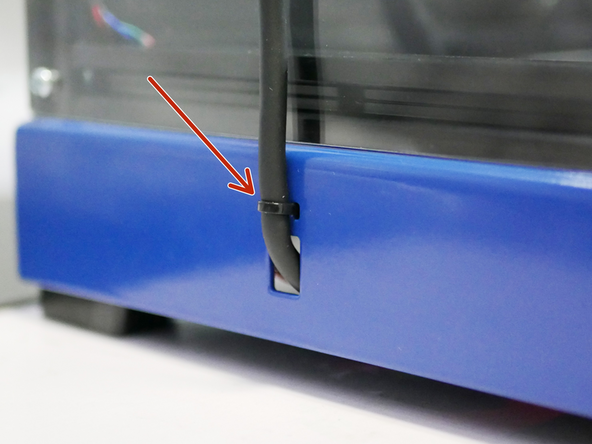
Feed them into the base.
-
Feed into the base with the top right motor cable the endstop cable.
-
-
-
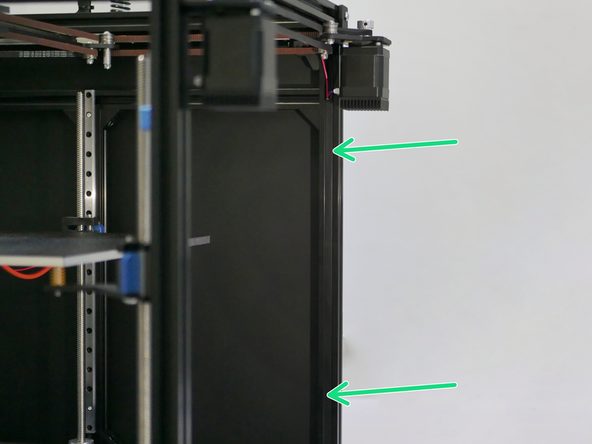
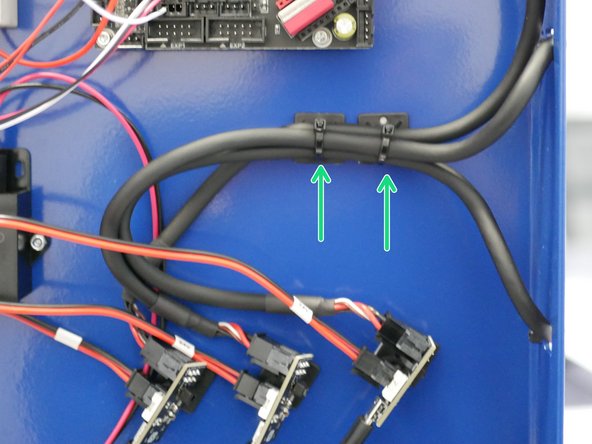
Use the included cable covers to hide the cables in the extrusions.
-
The camera cable should be excluded.
-
-
-
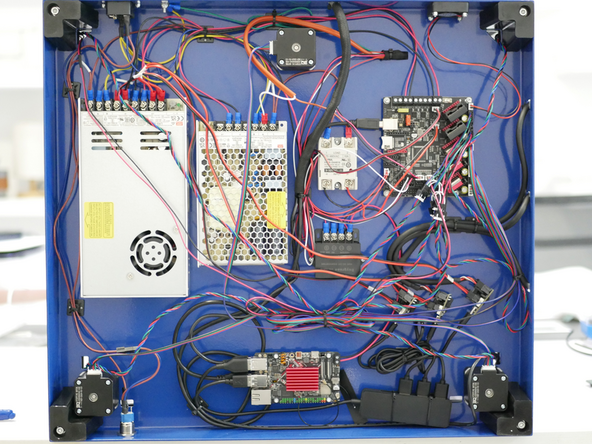
Lay the printer front side down to gain access the the electronics underneath.
-
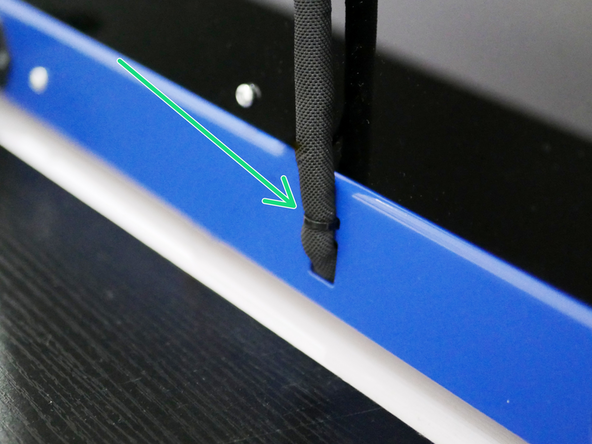
Feed the tool carriage cable loom into the base and use a cable tie to secure it in place.
-
Feed the cables from the print heads into the base and use a cable tie to secure them in place also.
-
-
-
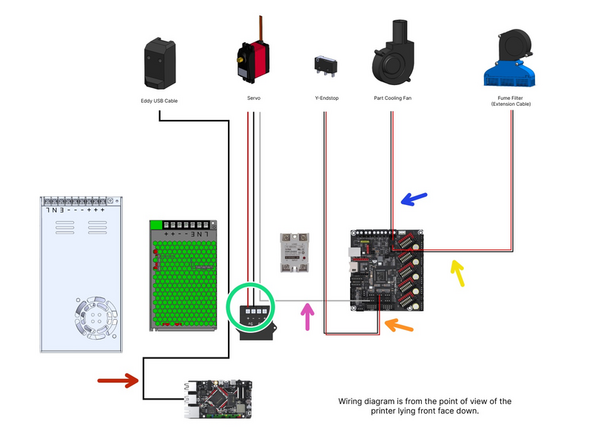
Eddy Probe to USB port on BTT Pi.
-
Servo:
-
Black and Red power cables to the 5V terminals on the converter.
-
White signal cable to mainboard.
-
Y-Endstop
-
Part cooling
-
Enclosure Fan (Extension Cable)
-
-
-
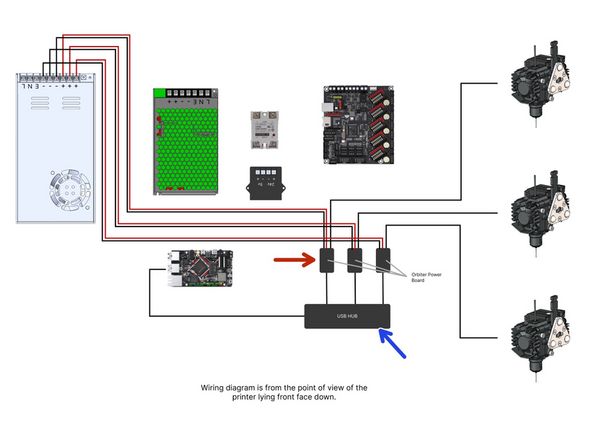
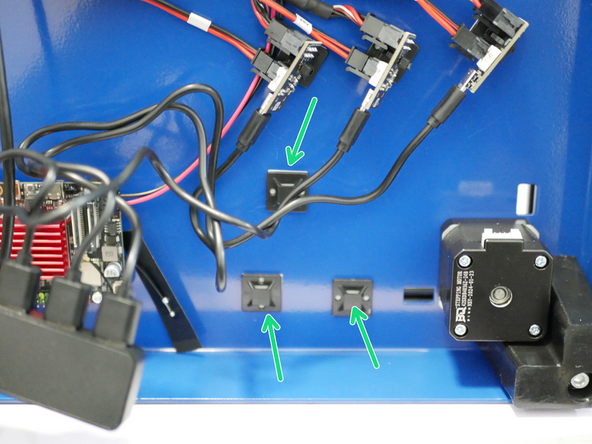
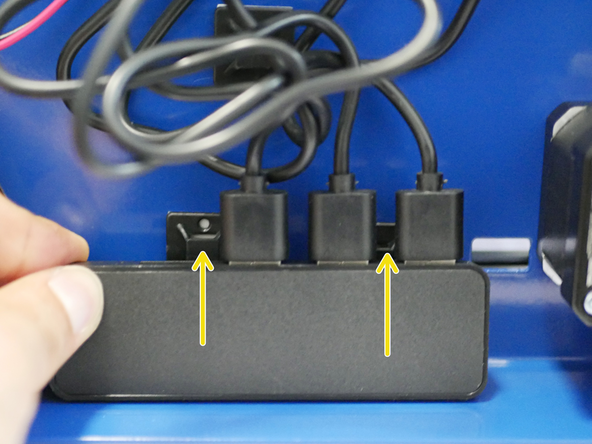
Use the cable tie mounts and cable ties to hold everything together.
-
When securing the cable tie mounts for the USB hub, ensure they are spaced so the cable ties run between the ports on the hub.
-
-
-
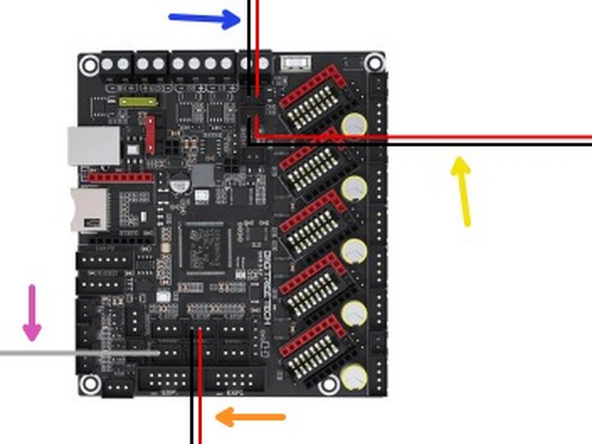
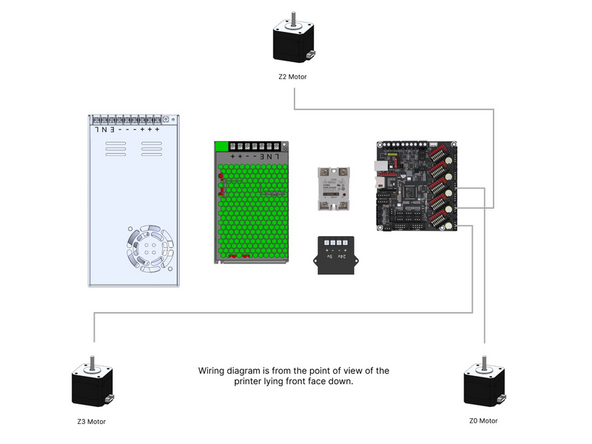
Wire the Z-motors as shown in the diagram.
-
The diagram is orientated to show you the position of the motors if the printer were lying front face down.
-
-
-
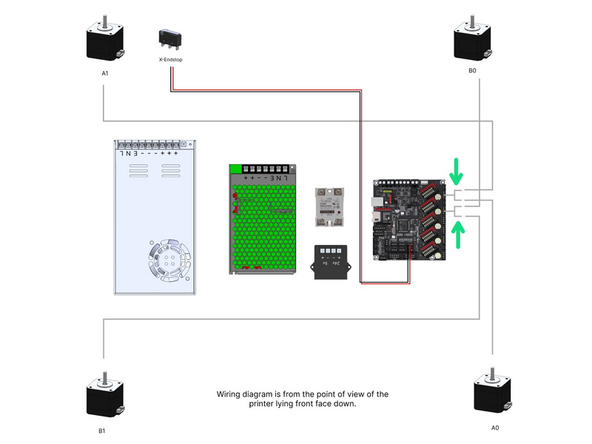
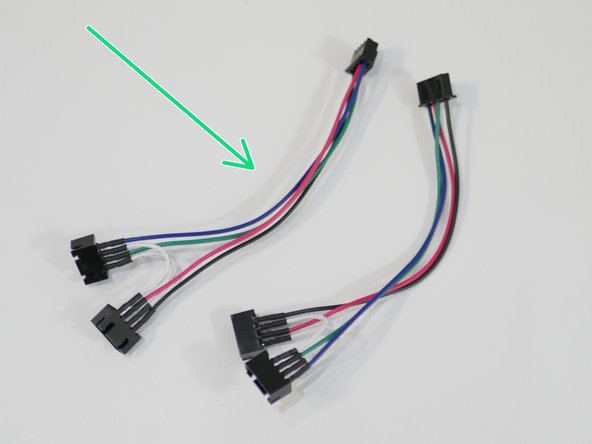
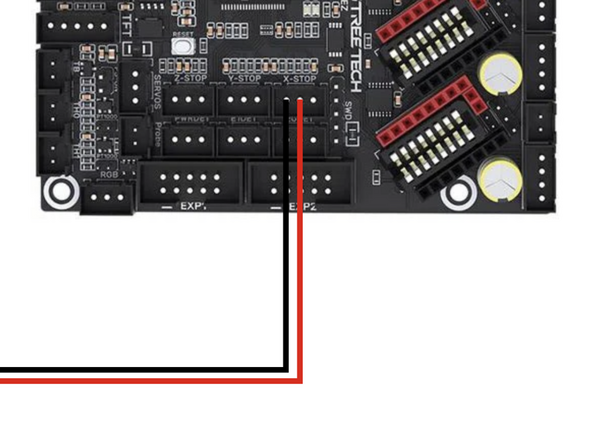
Wire the gantry motors and X-Endstop as shown.
-
Motor cable adapter
-
The diagram is orientated to show you the position of the motors if the printer were lying front face down.
-
-
-
Use the cable tie mounts and cable ties to clean up any loose or dangling cables.
-
-
-
Ready to move onto the next stage? Click here.
-
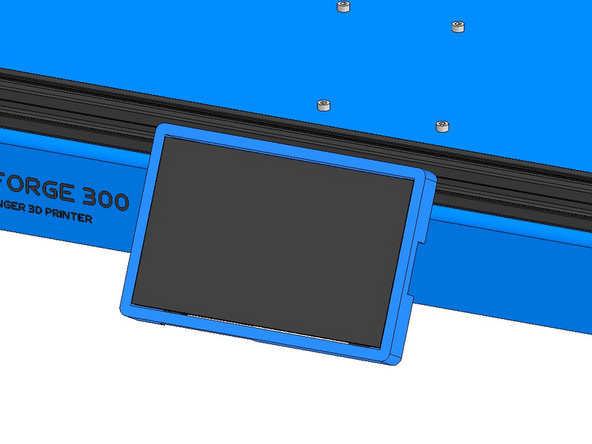
Don't have the Touch Screen upgrade? Skip to Stage 08: Klipper - Flashing.
-


Cancel: I did not complete this guide.
2 other people completed this guide.
