-
-
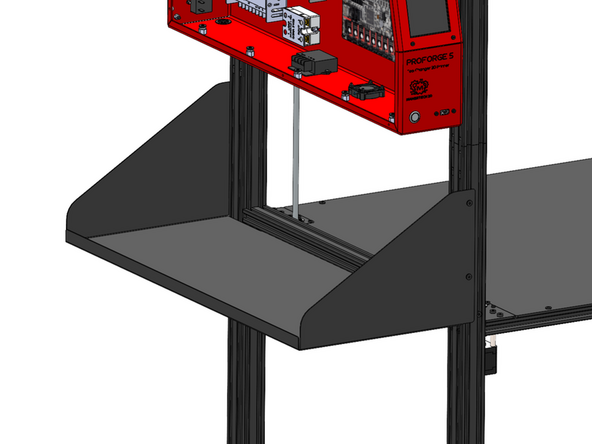
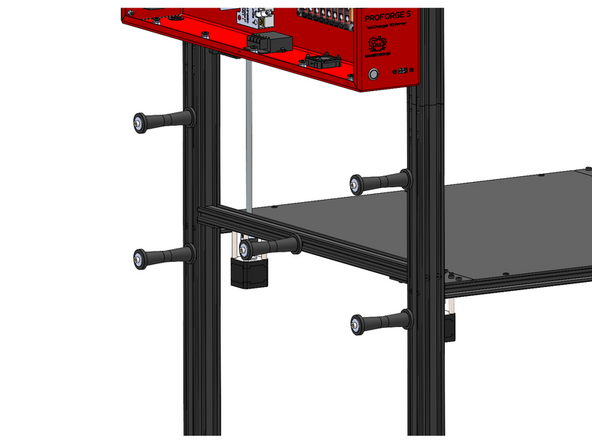
Install the Dry Box Platform to the left side of the frame with M5 x 6mm bolts and M5 T-Nuts.
-
-
-
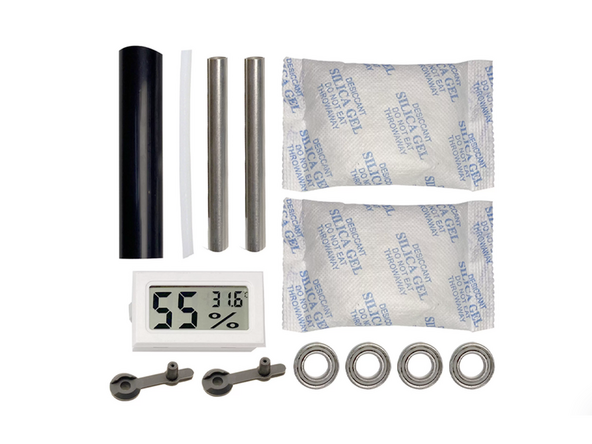
Each Drybox should come with these set of parts.
-
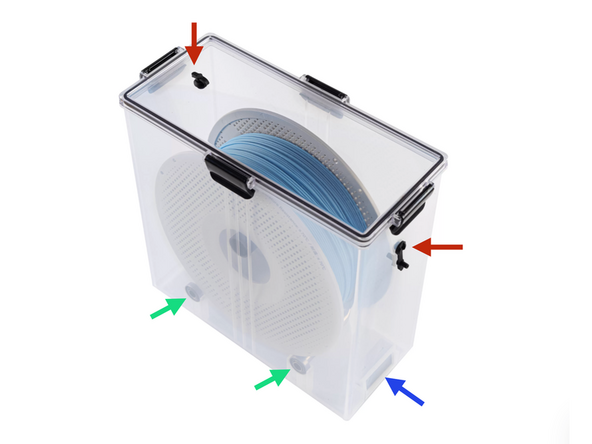
The rubber grommets can be pressed into the holes in the lid and side of the drybox.
-
Fit a bearing onto each end of the metal shafts, then place the assembled shafts into the drybox.
-
Pull the battery tab from the humidity sensor to switch it on, then place it into its slot inside the drybox.
-
The DryBoxes can be loaded with filament spools and placed onto the shelf.
-
-
-
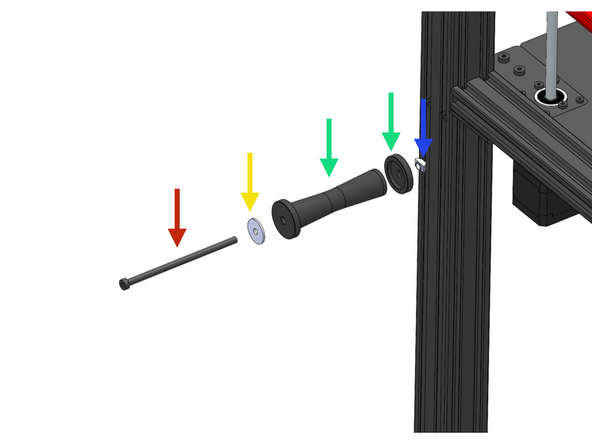
If you do not have the Dry Box upgrade you can use the regular spool holders.
-
-
It can be mounted with:
-
M5 x 100mm Bolt
-
M5 Penny Washer
-
M5 T-Nut
-
-
-
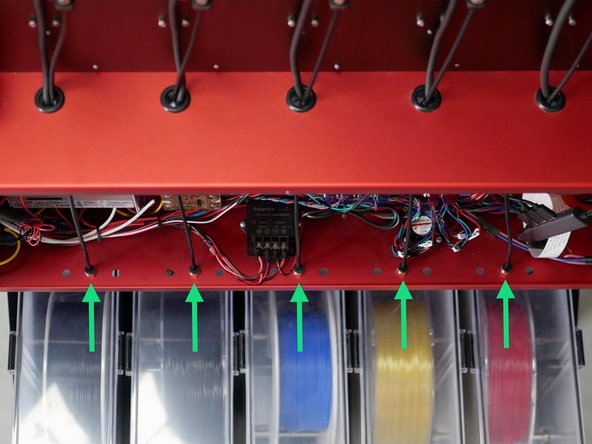
With the wiring and hardware checks completed you can push the PTFE filament tubes in through the couplings on the bottoms of the electronics box as shown.
-
The tubing can either be pushed directly into the box or be cut closer to the electronics box to make feeding easier.
-
-
-
Select the first print head PH1. Use the FRONT macro to bring it forward.
-
Feed filament in through the PTFE tube and insert it into the extruder - push it in about an inch so that it makes contact with the gear teeth.
-
The extruder should automatically heat up and load the filament when ready.
-
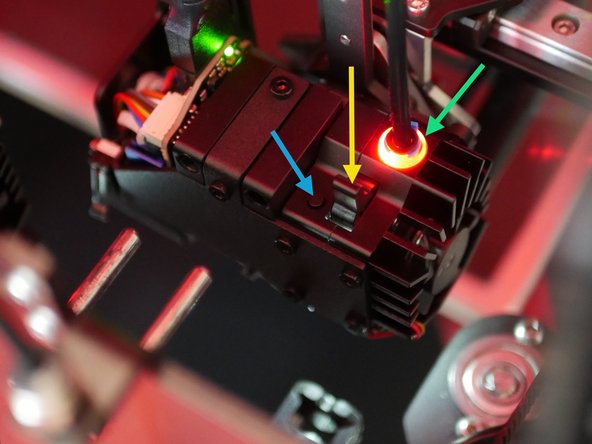
This button on the print head will unload the filament.
-
This is the tensioning lever, it has three levels:
-
To the left: Lowest tension, good for flexible filaments.
-
In the middle: Medium tension, good for most filaments like PLA/ABS
-
To the right: Highest tension, good for hard filaments like PC
-
-
-
We currently support the following Slicers:
-
-
-
-
-
-
-
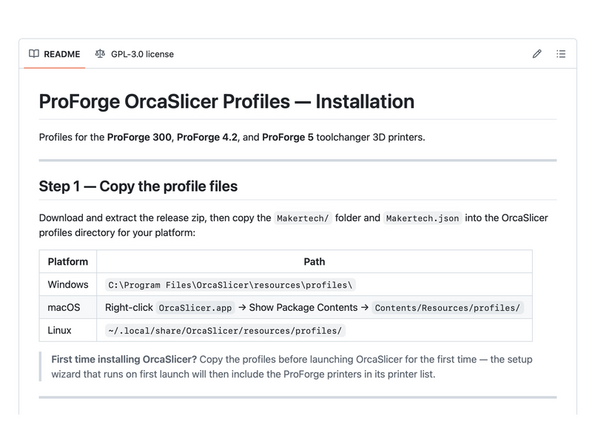
ORCA Slicer
-
If you are installing for the first time on Mac open the software first before adding the profiles.
-
See the Read me file here.
-
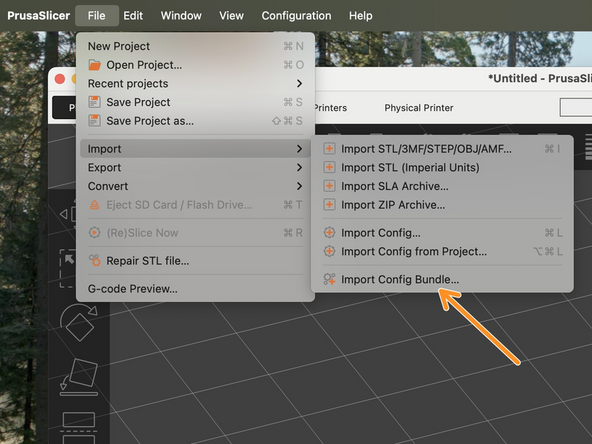
PRUSA Slicer
-
Go to File -> Import -> Import Config Bundle...
Hello.. What's happening exactly before..
- the system wait the right temperature..
- the carriage move to check the bed
- the carriage take the head and do a tap test succefully..
- the bed move down and the head go back to the dock..
- carriage go on the center of the plate and wait.
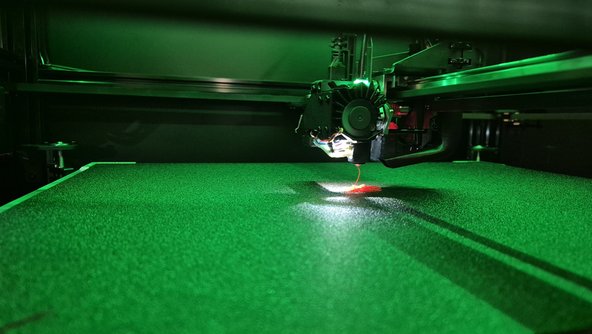
- few moment after the carriage take the head.. go on the center where it was supposed to print.. and start to print as you can see on the video..😅😅😅
The bed do not move..
David PENOT - Open Reply
-
-
-
We suggest first printing with one print head to make sure everything is setup correctly before jumping into a multi material print.
-
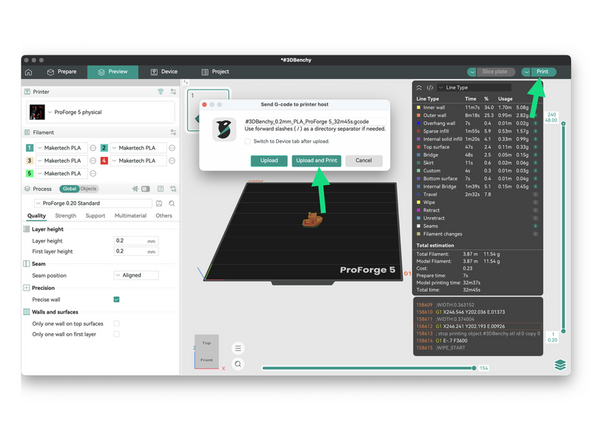
Import in a model and slice it. Then hit print and you should be able to upload it directly to the printer for printing.
-
Troubleshoot the network connection here if needed.
-
-
-
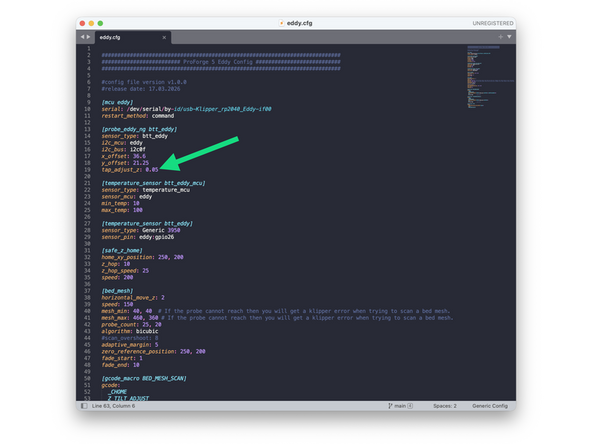
Although the bed is physically tapped the offset may need slight adjustment the first time.
-
If the first layer is too high decrease the tap_adjust_z value in eddy.cfg. And vice versa if too low. This value can be negative.
-
-
-
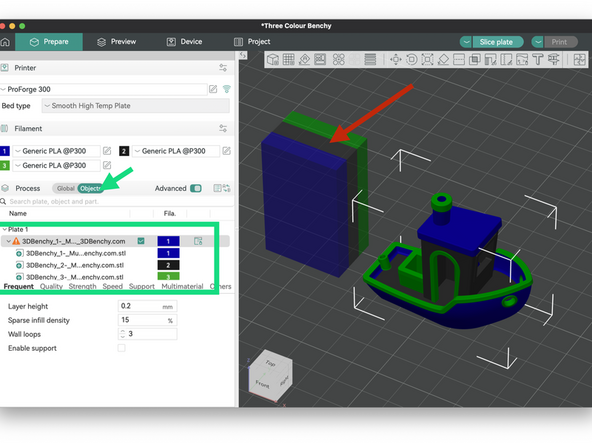
The multi-part benchy we're printing can be found here.
-
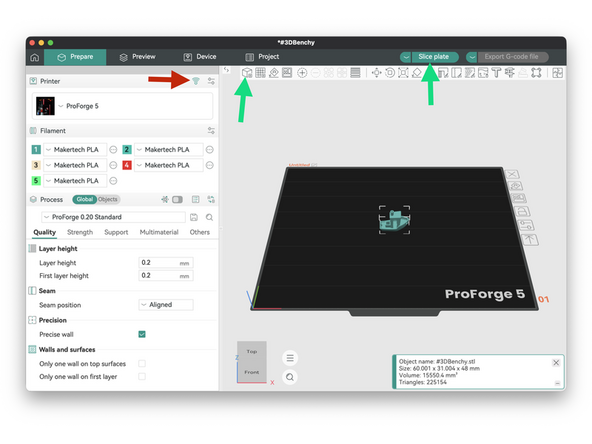
Load the model and assign a print head to each section.
-
Orca Slicer
-
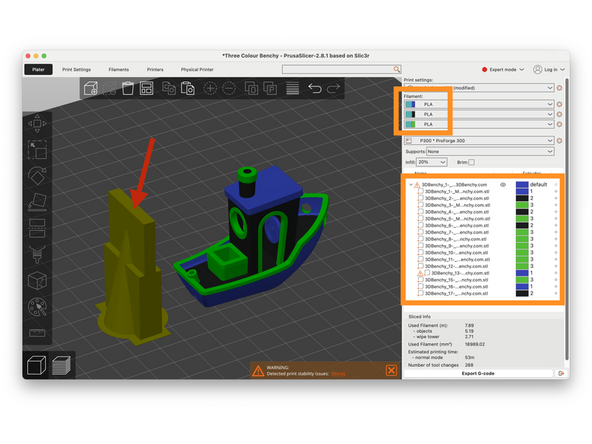
Prusa Slicer
-
Keep the wipe tower close and to the left of your model.
-
Hit slice and print when ready.
-
Note, the screenshots are from the ProForge 300 however the concept is the same.
-
There are numerous resources available online that provide detailed guidance on using PRUSA and ORCA Slicer to set up various aspects of a print. We encourage you to explore them for further information.
-
-
-
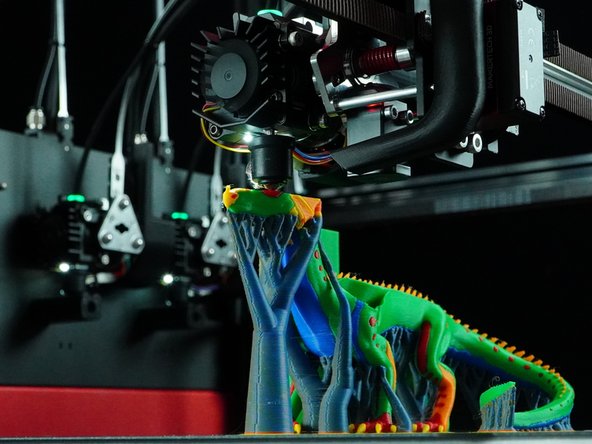
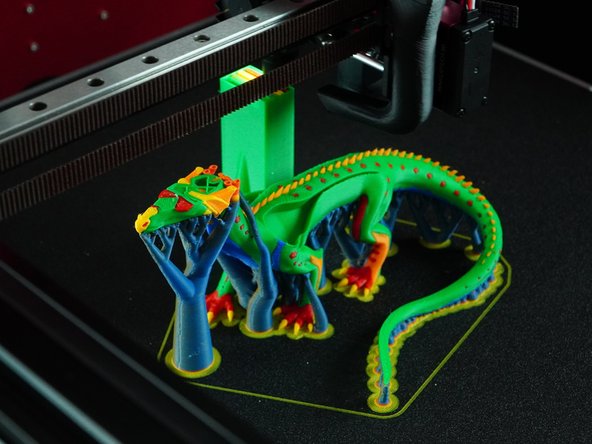
Owning a Tool Changer 3D Printer unlocks new ways to print, we recommend trying some of the following:
-
Multi-material printing: Print different filament types in one job (e.g. TPU for gaskets, PLA for structure).
-
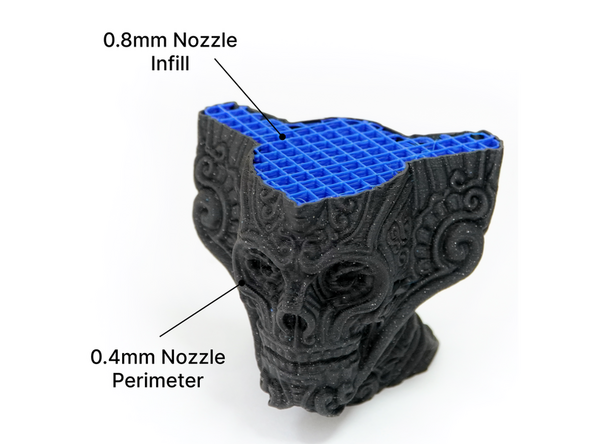
Larger Nozzle for Infill: Print faster and stronger by using a bigger nozzle for infill while preserving detail with a smaller one on the outer walls.
-
Dedicated support material nozzle: Use a separate head for soluble supports (e.g. PVA, HIPS) without contaminating primary nozzles.
-
-
-
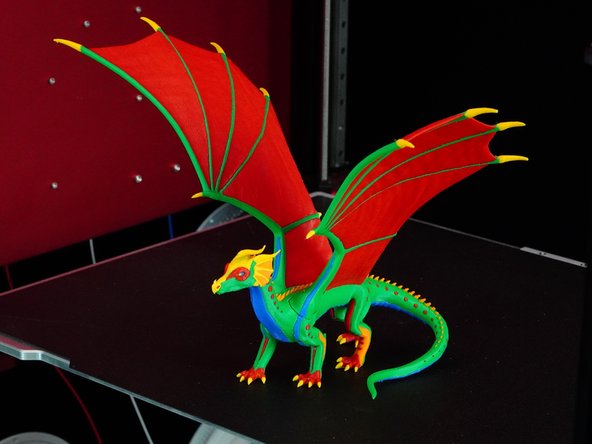
Congratulations you're all set up to go!
-

Cancel: I did not complete this guide.
4 other people completed this guide.

2 Comments
Thought I'd point out that these shipped with a 10amp fuse when they should have shipped with a 15amp. First fuse barely survived 5 prints and the second fuse melted to the plastic plug.
Replacement inlets are being shipped out for all affected 110v users. Should be ready for dispatch next week.