
-
-
Download the latest version of Cura here.
-
Run through the setup wizard and install it onto your computer.
-
Also download the benchy test print, this will be your first print and at the same time will test that the printer can safely print all of its geometries.
-
-
-
Open up the Cura application.
-
Run through the startup wizard.
-
Click on "add a non-networked printer"
-
Select the AXIS 3d printer.
-
Then hit next.
-
-
-
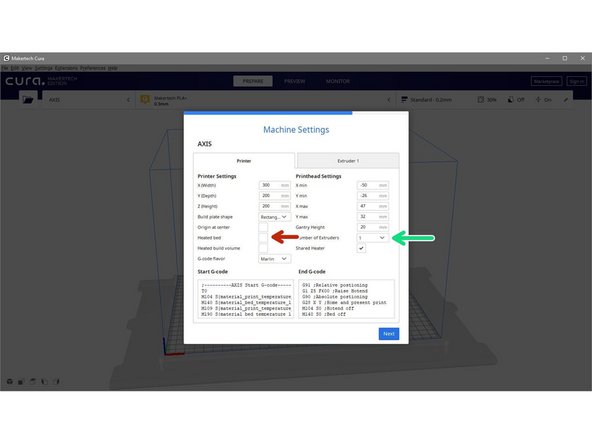
Here these setting will vary depending on your setup.
-
If you have a heated bed installed, check this box.
-
If you have dual extruders set-up, set number of extruders to 2.
-
Finally hit next and then finish.
-
-
-
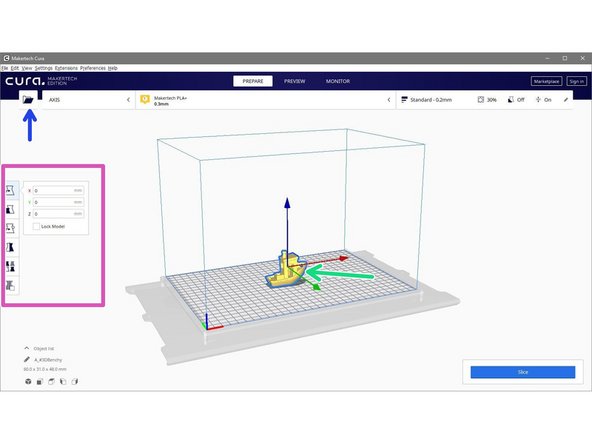
Click on the open file icon.
-
Navigate to and open the Benchy.stl file.
-
You can also use the tools on the side of the screen to move, scale and rotate your model.
-
-
-
Select the nozzle size you have installed.
-
We recommend to have installed 0.4mm or 0.3mm.
-
Select the material.
-
we recommend picking from the Makertech list and choosing PLA+ for your first print.
-
-
-
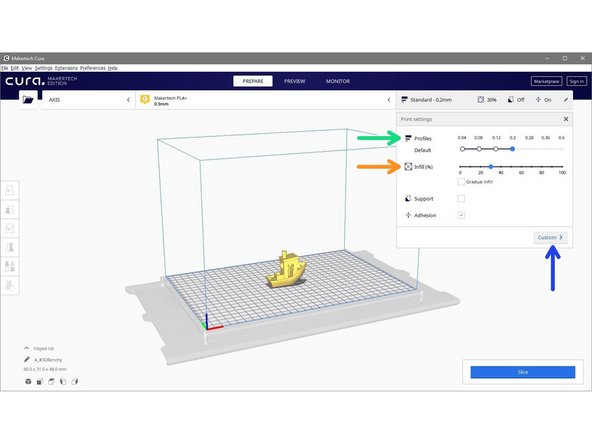
Leave setting as their defaults for the first print.
-
Profiles: Print profiles are default settings at different layer heights. The lower the number the more layers, hence more detail, but at the cost of greater print time.
-
Note, different nozzle sizes will have different layer height ranges.
-
Infill: This is the amount of material the printer will deposit inside the print. Between 20-30% is ideal in most cases.
-
Other options can also be tweaked by clicking custom. Hovering over an option will give you a description of its purpose.
-
You may find you need to adjust certain settings to get your printer working perfectly, we recommend posting in the forum for the best advise on this.
-
-
-
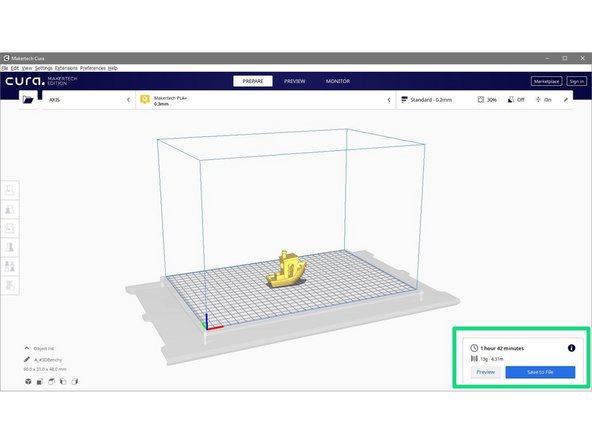
When happy with the settings, hit slice.
-
Slicing will convert your 3d model (an .stl file) into and .gcode file which in turn can be read by the printer to print your model.
-
If you have the LCD screen installed (from the highly recommended power pack upgrade) you can save your sliced file to an SD card and print directly from your printer.
-
-
-
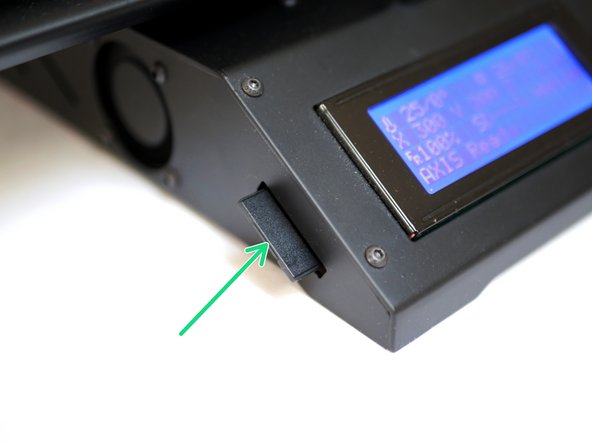
The most efficient way to print is via SD card, its self contained and doesn't rely on a computer connection.
-
After saving your .gcode to the SD card, slot it into the side of the Axis like shown.
-
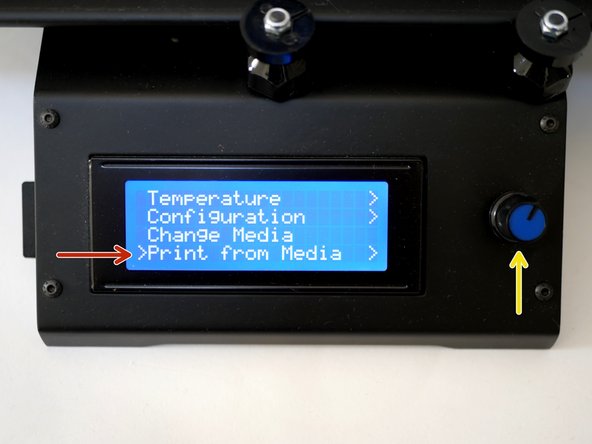
Click the turn wheel once and turn it clock wise to scroll to the bottom of the menu.
-
Click on "Print from Media"
-
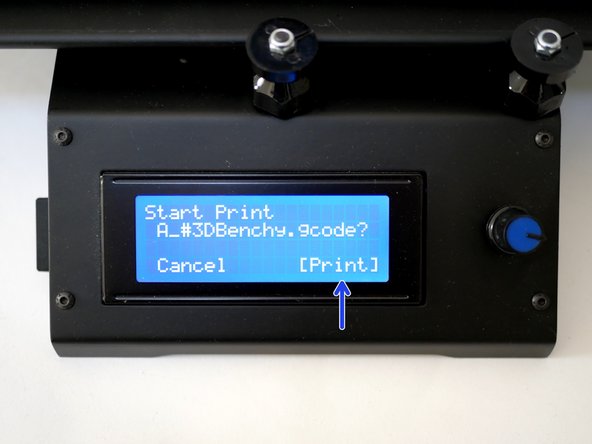
Print the .gcode file.
-
-
-
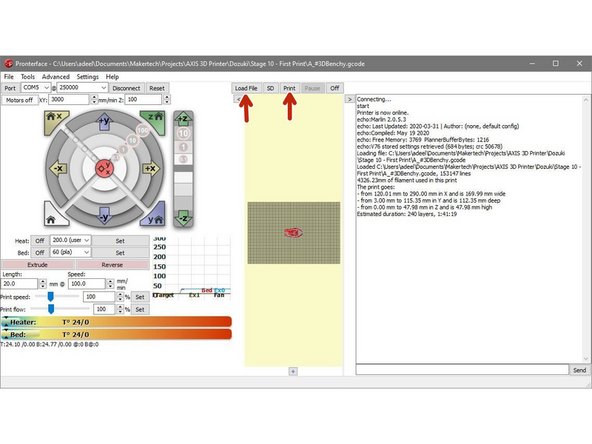
To print via USB you will first need to connect the Axis to your printer via USB.
-
Open your saved .gcode in pronterface and hit print once it's loaded.
-
In case of an error pronterface should receive a message in it's terminal to help diagnose.
-
-
-
The most critical part of any print is its first layer, this is the contact point between the rest of the print and the print platform.
-
If printed too high then the model will detach mid-print, too low and will be a pain to remove form the platform.
-
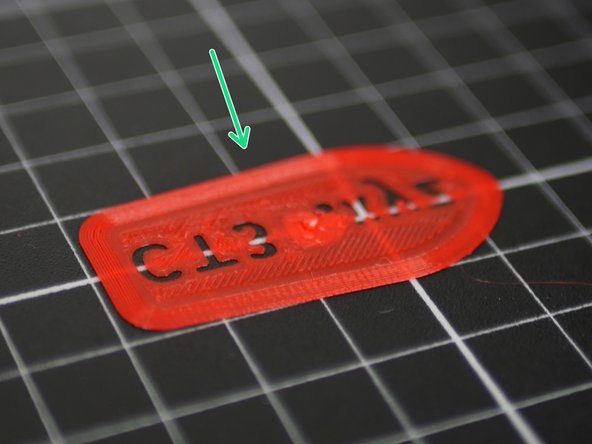
What we want is a happy medium like this.
-
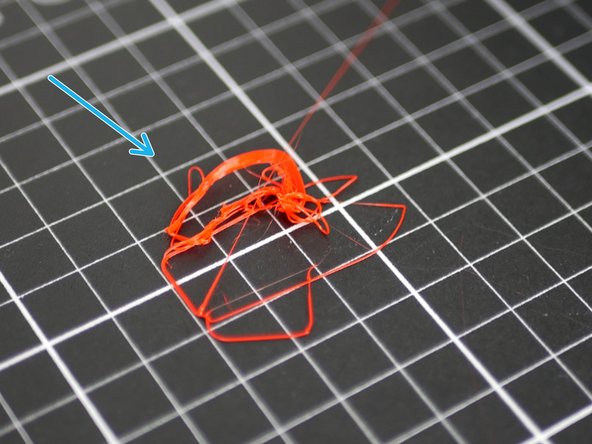
Too high - the first layer isn't sticking or the model has peeled off.
-
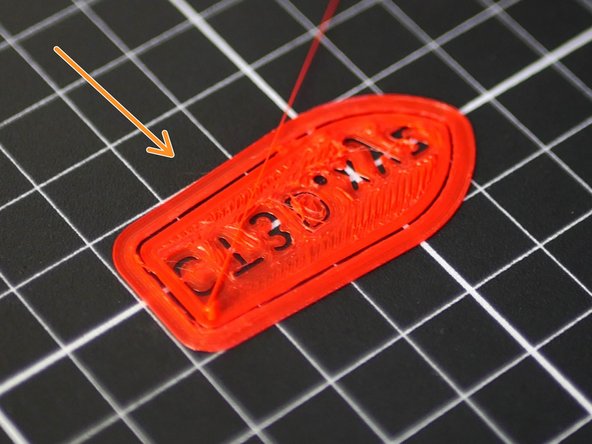
Too low - the nozzles is pressing the plastic down too much, or at worst digging into the bed.
-
If you find your first layer to be too low or high, stop the print and adjust the z-offset, as shown in next step.
-
-
-
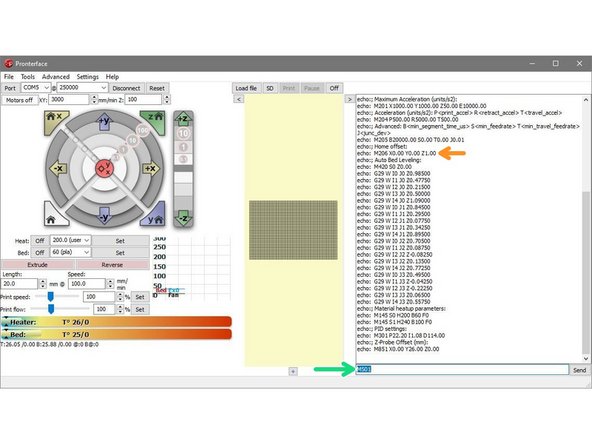
Connect the Axis to Pronterface.
-
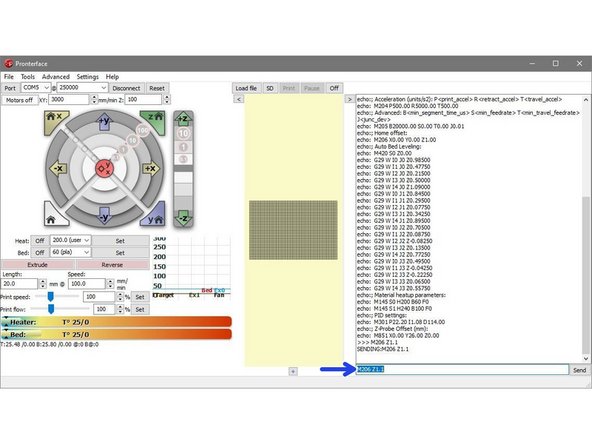
Send M501 to check what your previous z-offset is set to.
-
In our case this was 1.0.
-
First layer too high, increase the Z-offset by 0.1mm.
-
First layer too low, decrease Z-offset by 0.1mm.
-
E.g. The first layer isn't sticking (it is too high) we will increase the Z-offset by 0.1mm to 1.1mm.
-
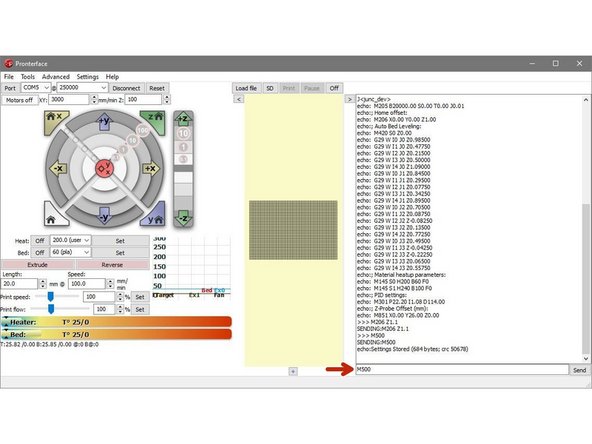
Enter M206 Z1.1 to set the new Z-offset.
-
Enter M500 to save to printer memory.
-
-
-
With the Z-axis offset dialled in you should have a successful first print!
-
If you're having issues with getting your first print done, post your issue in the forum here and we'll do our best to help!
-


Cancel: I did not complete this guide.
3 other people completed this guide.
