Difficulty
Easy
Steps
8
Time Required
00:10:00 - 00:20:00
- Stage 10: First Print 8 steps

In Progress
This guide is currently being written. Reload periodically to see the latest changes.

Private
This guide will not appear in search results and can only be viewed by team members!
Quiz
0
-
-
Download the latest version of Cura here.
-
Run through the setup wizard and install it onto your computer.
-
Also download the benchy test print, this will be your first print and at the same time will test that the printer can safely print all of its geometries.
-
-
-
Open up the Cura application.
-
Run through the startup wizard.
-
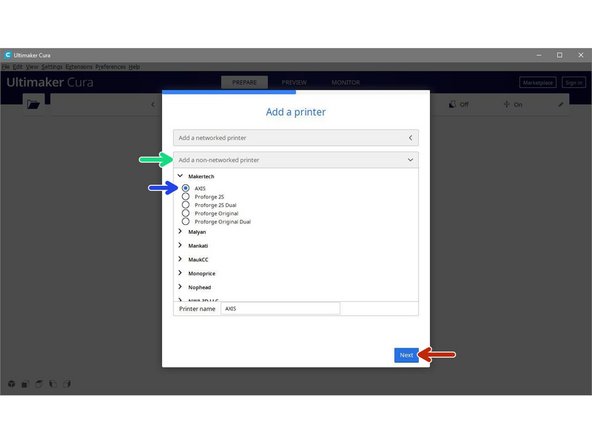
Click on "add a non-networked printer"
-
Scroll down to Makertech and select the AXIS 3d printer.
-
Then hit next.
-
-
-
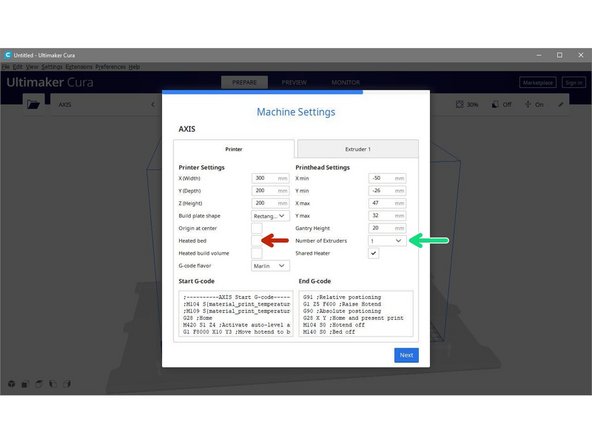
Here these setting will vary depending on your setup.
-
If you have a heated bed installed, check this box.
-
If you have dual extruders set-up, set number of extruders to 2.
-
Finally hit next and then finish.
-
-
-
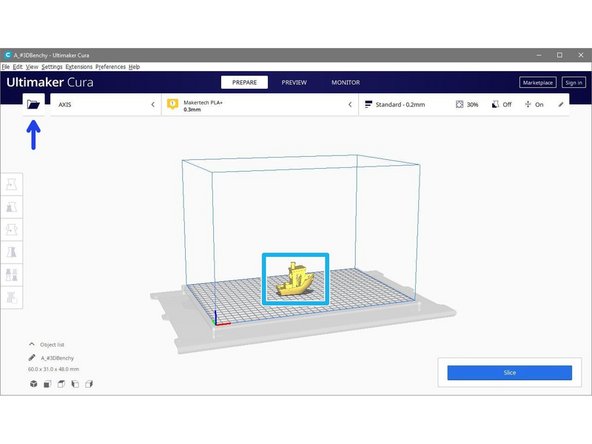
Click on the open file icon.
-
Navigate to and open the Benchy.stl file.
-
-
-
Select the nozzle size you have installed.
-
We recommend to have installed 0.4mm or 0.3mm.
-
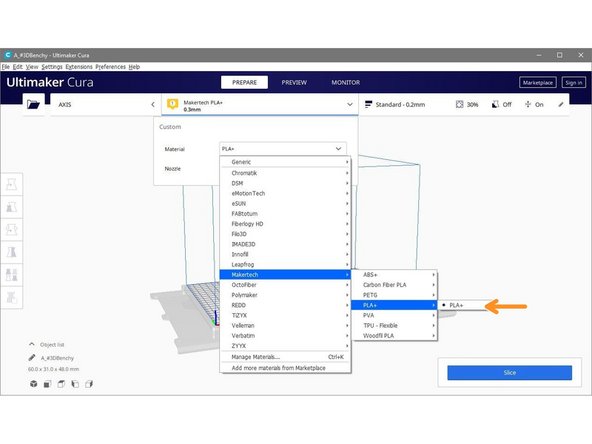
Select the material.
-
we recommend picking form the Makertech list and choosing PLA+ for your first print.
-
-
-
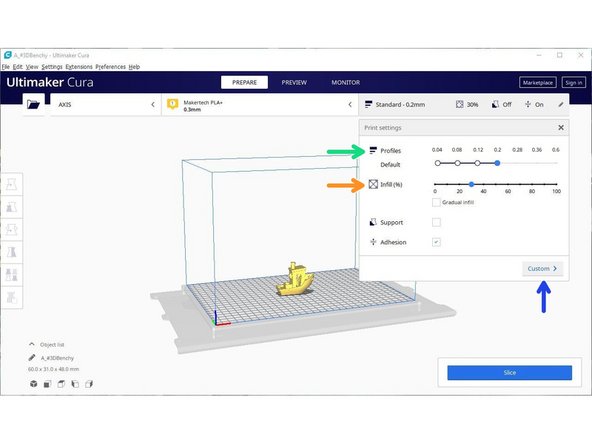
Leave setting as their defaults for the first print.
-
Profiles: Print profiles are default settings at different layer heights. The lower the number the more layers, hence more detail, but at the cost of greater print time.
-
Note, different nozzle sizes will have different layer height ranges.
-
Infill: This is the amount of material the printer will deposit inside the print. Between 20-30% is ideal in most cases.
-
Other options can also be tweaked by clicking custom. Hovering over an option will give you a description of its purpose.
-
You may find you need to adjust certain settings to get your printer working perfectly, we recommend posting in the forum for the best advise on this.
-
-
-
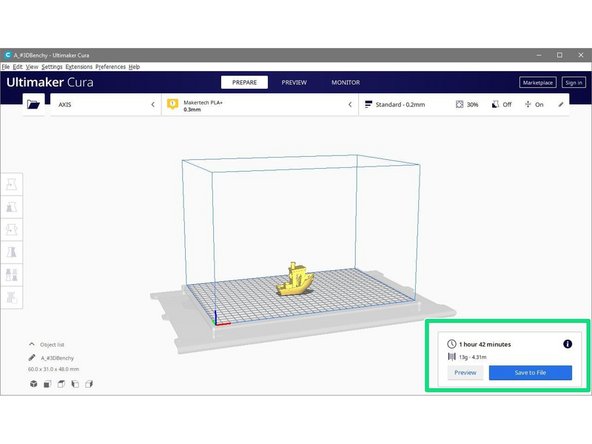
When happy with the settings, hit slice.
-
Slicing will convert your 3d model (an .stl file) into and .gcode file which in turn can be read by the printer to print your model.
-
If you have the LCD screen installed (from the highly recommended power pack upgrade) you can save your sliced file to an SD card and print directly from your printer.
-
Otherwise, see next step.
-
-
-
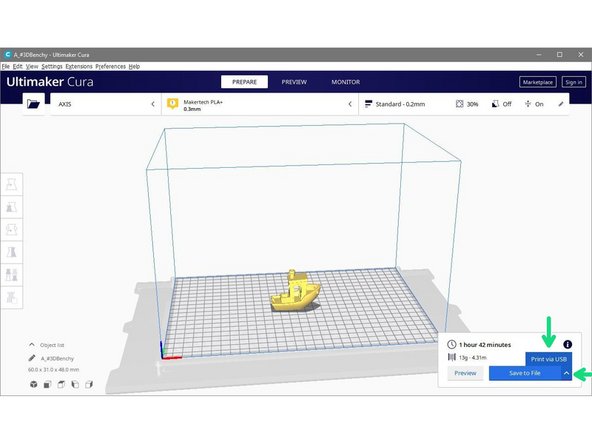
To print via USB you will first need to connect the Axis to your printer via USB.
-
Next, after slicing, there will be an arrow next to the save to file option it, click on it and then click print via USB.
-
You should then be presented with the monitoring screen of Cura. The Axis should begin heating and begin printing.
-