
-
-
Input shaping is a feature that is designed to reduce vibrations and improve print quality - this is especially important when printing at high speeds.
-
The firmware has default values in place for input shaping, however each machine will have slightly unique values, we will use the S2DW accelerometer to determine those values.
-
The S2DW sensor replaces the ADXL sensor that was originally shipped with your kit - if your kit shipped in 2023. You should have now have received the S2DW sensor in a separate package.
-
-
-
The S2DW board requires us to generate firmware for it in order for it to communicate with Klipper and the Pi board.
-
It's important that before starting this step you are running an up-to-date version of Klipper.
-
Major updates to future Klipper versions may require you to re-generate the boards firmware. Just follow these next few steps again in order to do this.
-
-
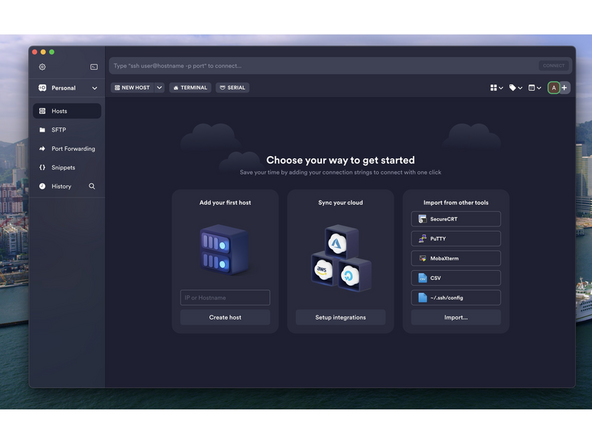
Termius is an incredibly useful SSH software that will allow us to access the Pi in order to generate the firmware for the S2DW board.
-
-
-
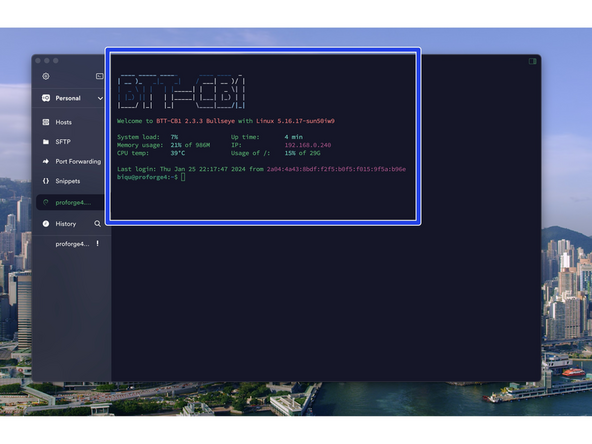
Install Termius and run through the set up wizard until you reach this dashboard.
-
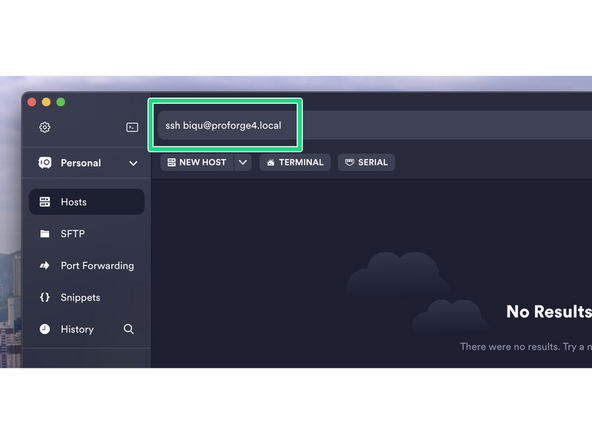
In the text bar at the top type in the following:
-
ssh biqu@proforge4.local
-
Make sure the printer is powered up and the Pi is connected to your network.
-
-
-
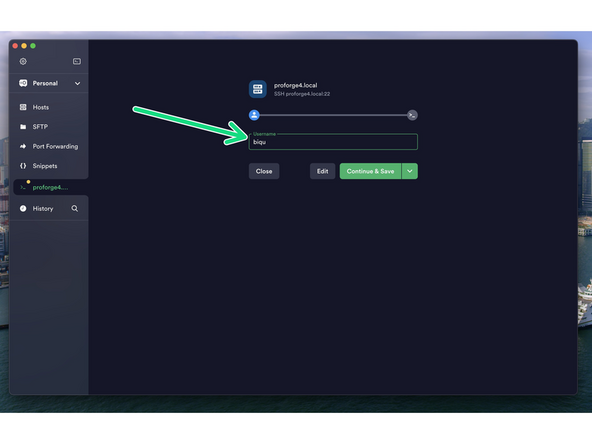
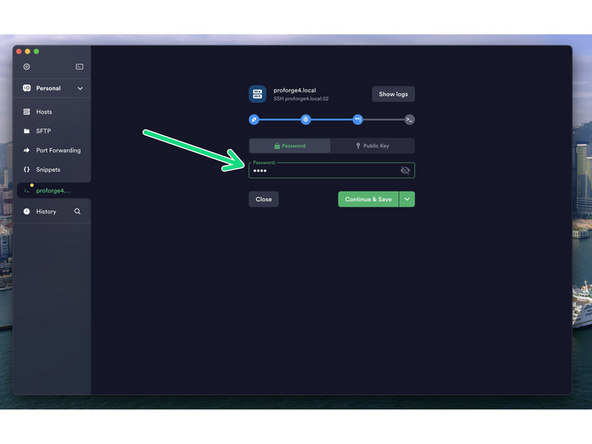
Enter biqu for both the username and password.
-
After successfully logging in you should see a screen like this.
-
-
-
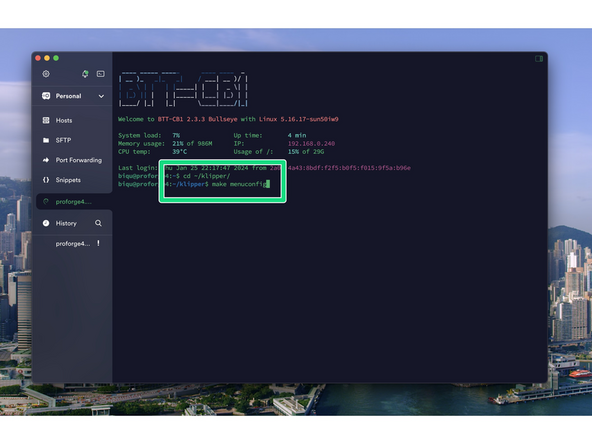
After logging in send the following commands to the terminal:
-
cd ~/klipper/
-
followed by:
-
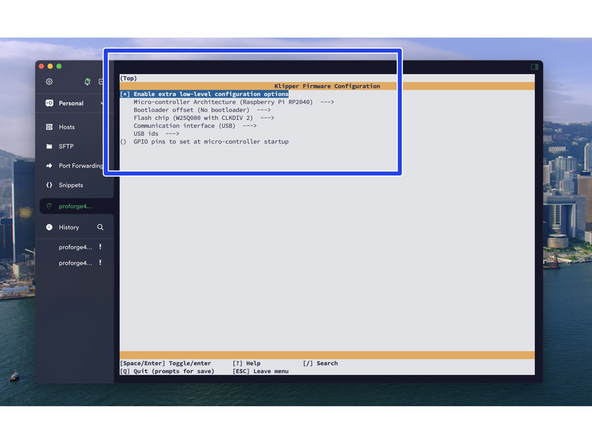
make menuconfig
-
After hitting enter a config menu should pop up. Use the arrow keys on your key board to match the options selected in the image.
-
When done, enter Q and then Y to save.
-
-
-
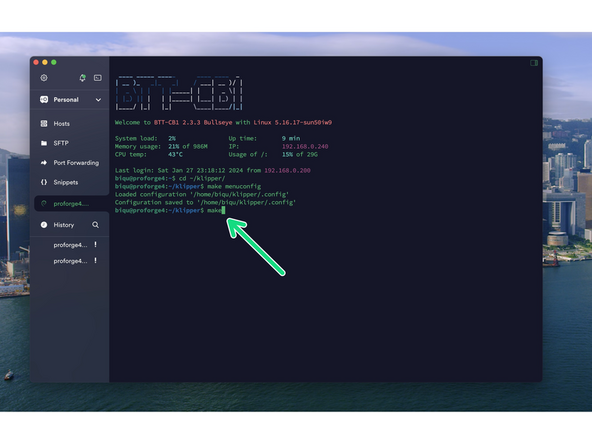
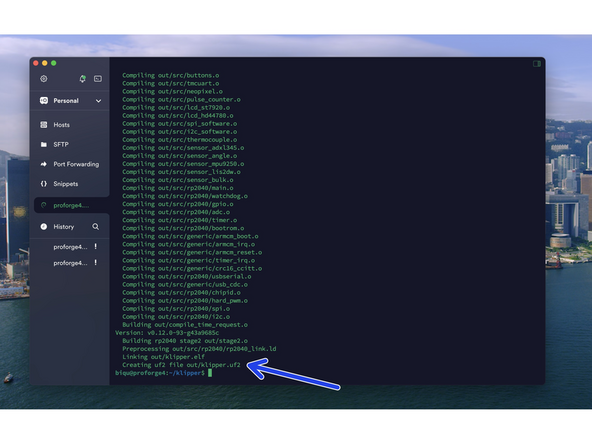
Send a make command to create the firmware file.
-
You should see file out/klipper.uf2 when done.
-
-
-
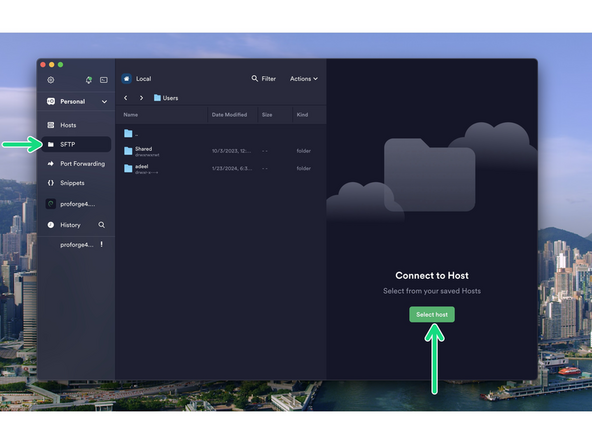
Go to the SFTP tab and press Select Host to open up the file browser for the Pi.
-
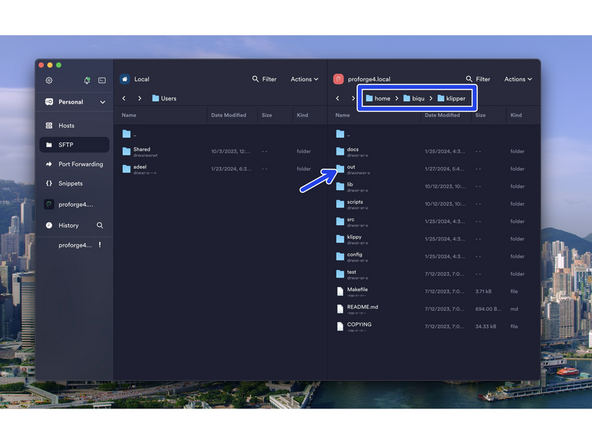
Navigate to the klipper.uf2 file by going to:
-
home -> biqu -> klipper -> out
-
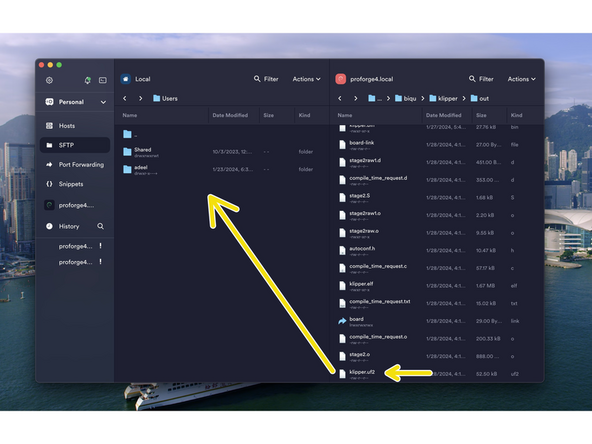
Drag the klipper.uf2 file over to a folder on your computer.
-
-
-
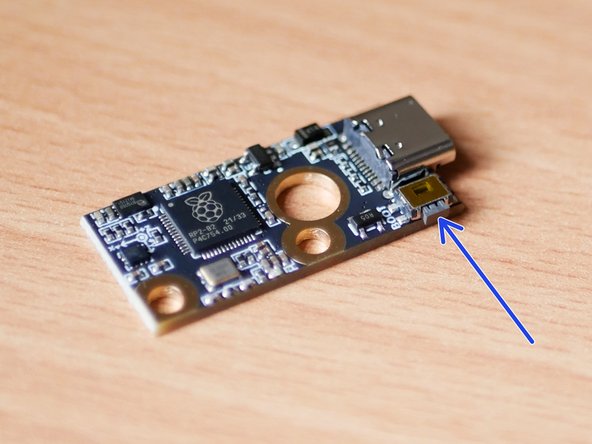
Whilst holding down the boot button connect the S2DW board to your computer via USB.
-
Copy the firmware.uf2 file (copied from the previous step) to the S2DW board.
-
The board should auto-eject, indicating it has been flashed.
-
-
-
Connect the S2DW to the Pi board - you can do this by plugging it into the USB port on the front of the printer.
-
You don't need to hold the boot button when doing this.
-
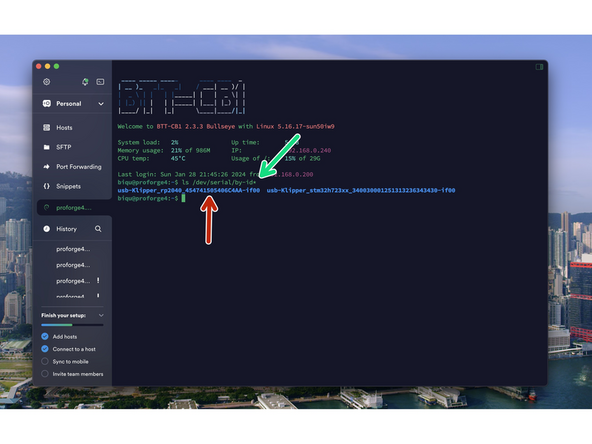
With the S2DW board connected to the Pi board, head back to Termius on your computer and send the following in order to find the boards unique ID:
-
ls /dev/serial/by-id*
-
The id should have RP2040 in its name. The other will be the Octopus control board.
-
Copy the ID to a text or word document for use later on.
-
If you don't have a device ID like this displayed, double check the USB cable. Try re-connecting it.
-
-
-
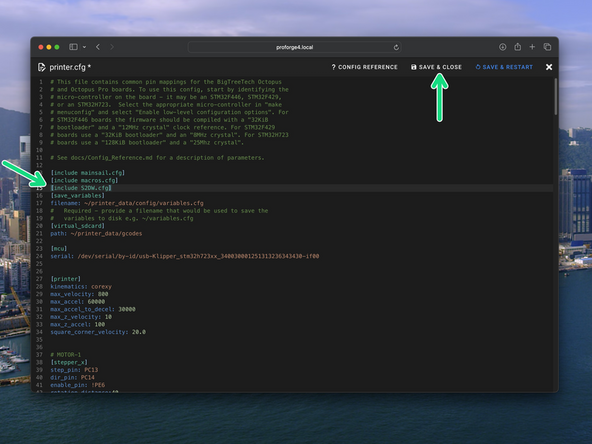
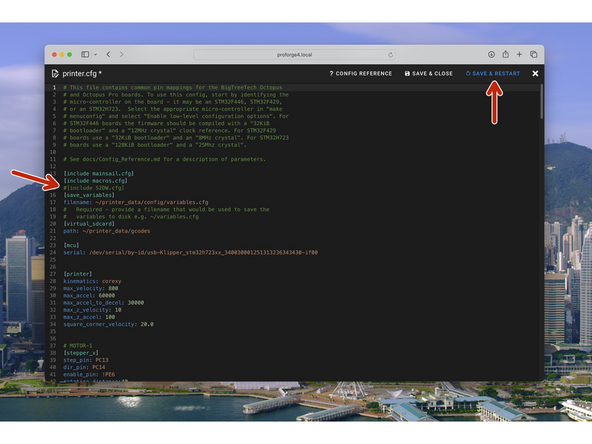
Go to the printer.cfg file and activate the board by uncommenting (removing the #) in front of [include S2DW.cfg]. Save & close to finish.
-
Download the S2DW.cfg file from here (if not already).
-
Upload it to Klipper here (if not already).
-
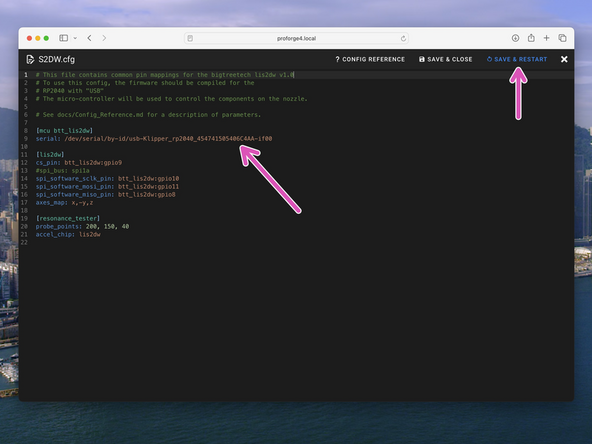
Copy and paste the ID from the previous step here into the S2DW.cfg file.
-
Save and restart when done.
-
If successful you should see it pop up as second CPU here. If not double check the serial ID has been correctly copied and entered. Check the format is similar to what we've shown here in the image.
-
-
-
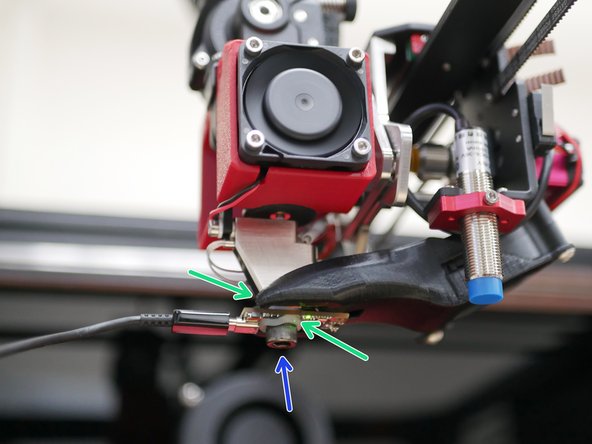
Home the printer and select a print head - if you've already done an offset calibration then use one of the print heads other than the first one, as then you can re-check the calibration for just that one. (Remember, offsets are relative to the first print head).
-
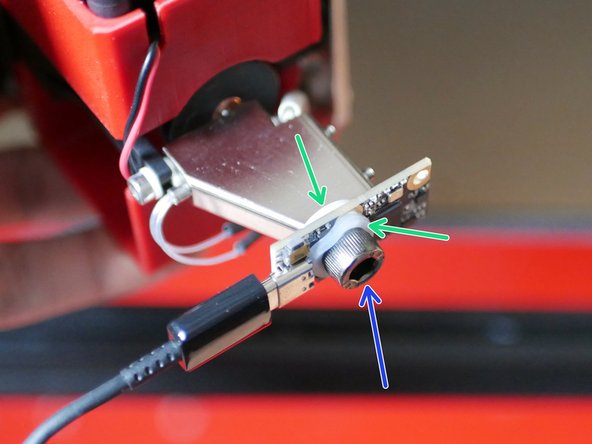
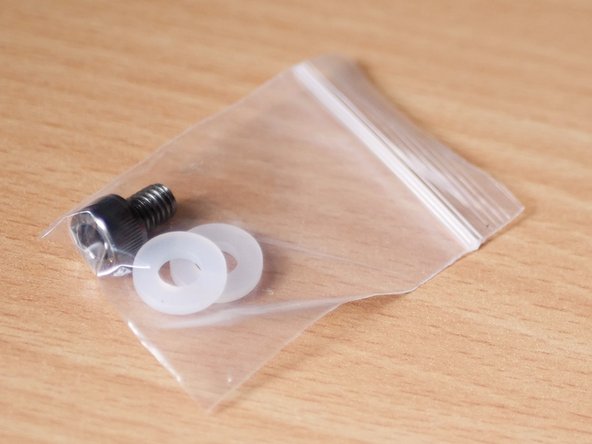
Use the Mainsail web interface or the touch screen to move the print head to roughly the centre and lower the print bed. Unscrew the nozzle and fix in its place the S2DW board using the included hardware.
-
M6 Bolt
-
Rubber Washer x2
-
Tighten enough so that the board is not loose - do not over tighten.
-
Orientate the board so that the USB C port is facing down and to the left, as shown.
-
-
-
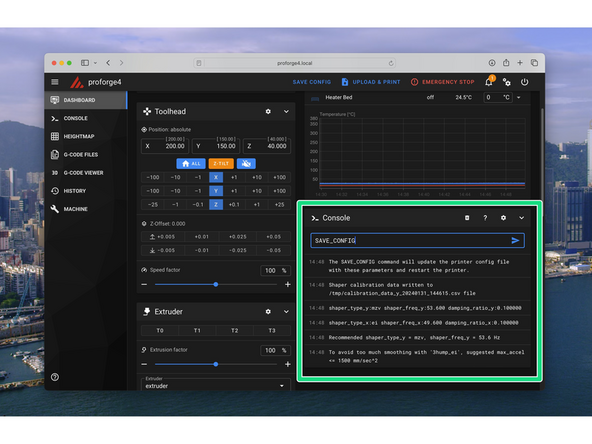
In the Console in Mainsail send the following commands:
-
SHAPER_CALIBRATE AXIS=X
-
SHAPER_CALIBRATE AXIS=Y
-
After completing the resonance tests for both axes send a SAVE_CONFIG command to the save the values.
-
Klipper should now restart and your optimal input shaping values will be entered into the bottom of the printer.cfg file.
-
-
-
When done calibrating, remove the sensor and replace the nozzle.
-
Make sure to also de-activate the sensor in your printer.cfg file by adding a # in front of [include S2DW.cfg]. Save and Restart when done.
-
Keep the sensor somewhere safe, it is a universal tool and can be used on other printer too if you wish.
-
The calibration process won't need to be done again unless the belts or print heads are adjusted/replaced.
-


![Go to the printer.cfg file and activate the board by uncommenting (removing the #) in front of [include S2DW.cfg]. Save & close to finish.](https://d3t0tbmlie281e.cloudfront.net/igi/makertech-3d/IZDJZkRvqOujMTUv.medium)
Cancel: I did not complete this guide.
7 other people completed this guide.
