Difficulty
Easy
Steps
24
Time Required
00:30:00 - 00:45:00
- Upgrade: Enclosure 24 steps

In Progress
This guide is currently being written. Reload periodically to see the latest changes.

Private
This guide will not appear in search results and can only be viewed by team members!
Quiz
0
-
-
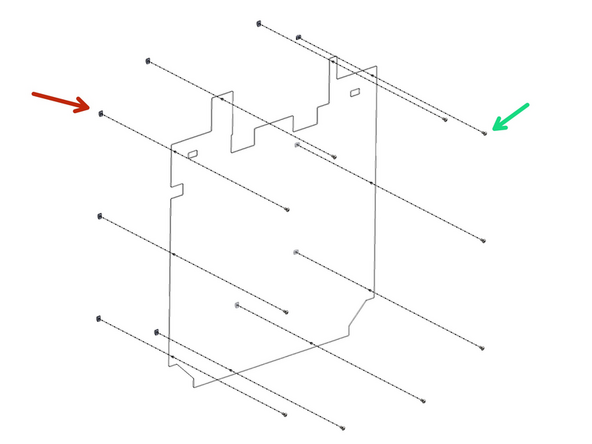
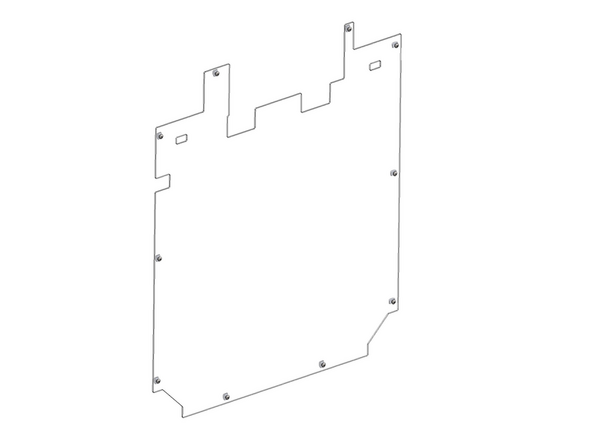
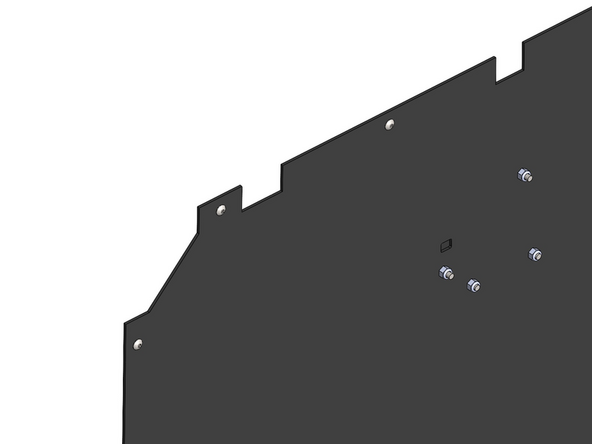
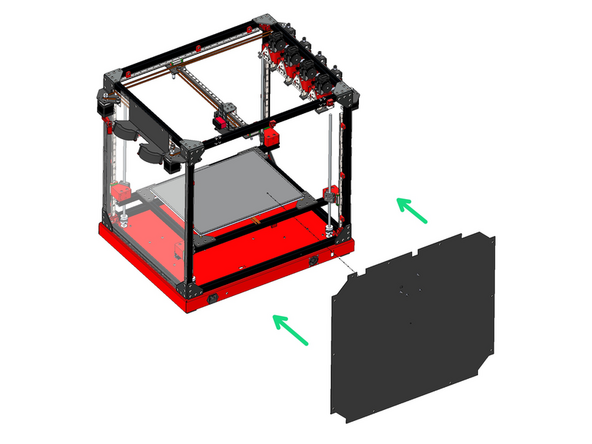
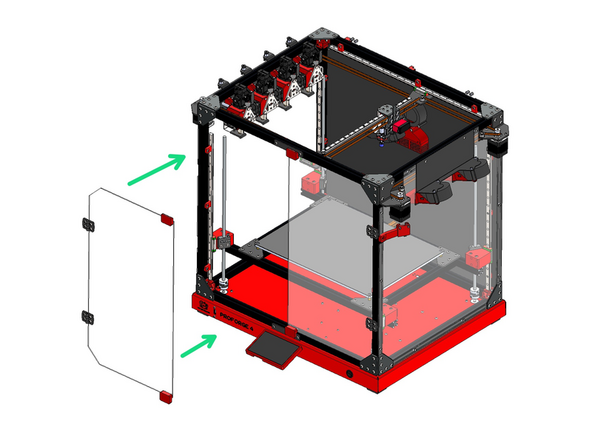
Take the left panel and remove the protective film from it.
-
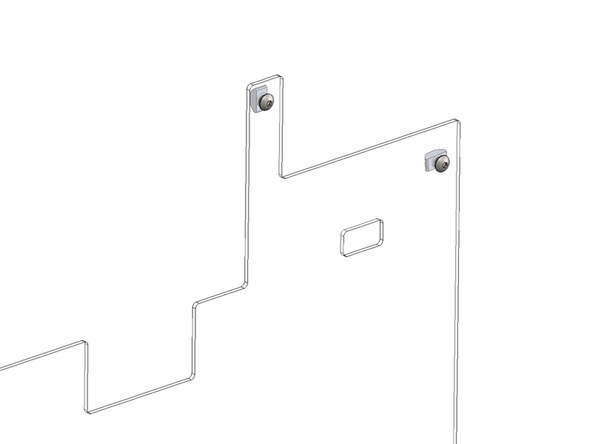
Prepare the panel by loosely adding onto it fasteners.
-
M4 x 8mm Bolt
-
M4 T-nut
-
Match the orientation as shown in the diagram about which side the bolts and nuts should be on.
-
-
-
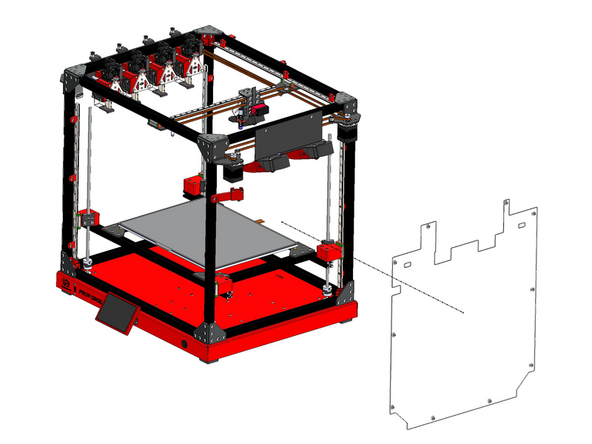
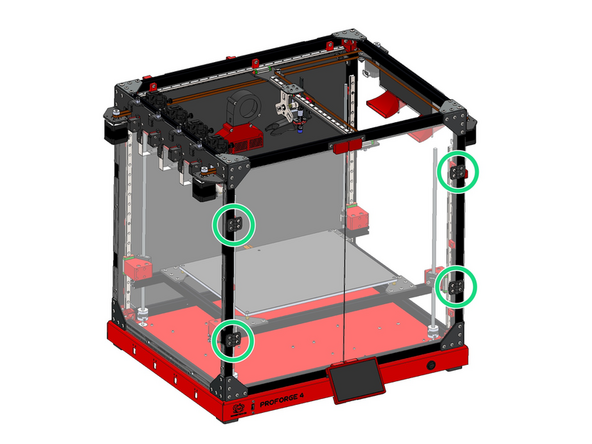
Install the panel to the left side of the frame by sliding it in from the front of the printer.
-
-
-
Take the right panel and remove the protective film from it.
-
Prepare the panel by loosely adding onto it fasteners.
-
M4 x 8mm Bolt
-
M4 T-nut
-
Match the orientation as shown in the diagram about which side the bolts and nuts should be on.
-
-
-
Install the panel to the right side of the frame.
-
-
-
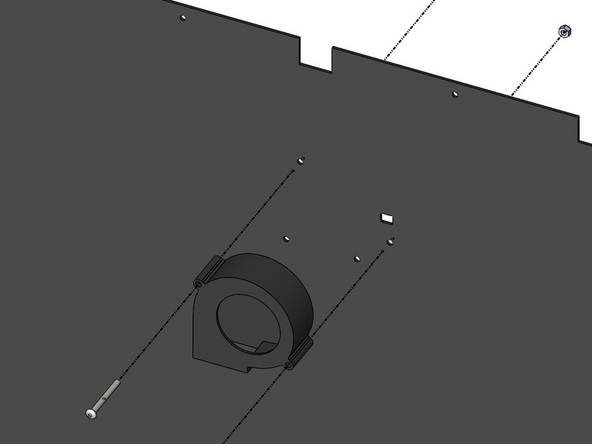
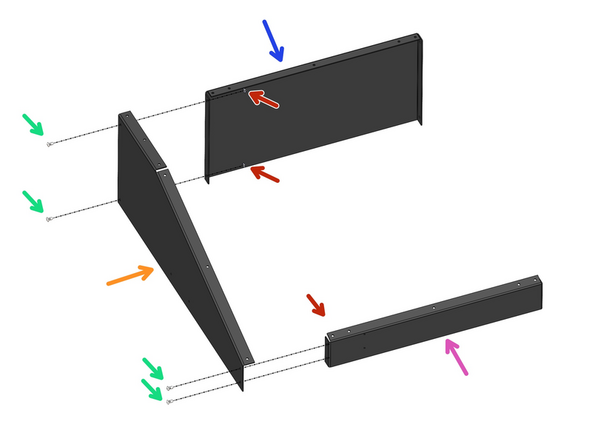
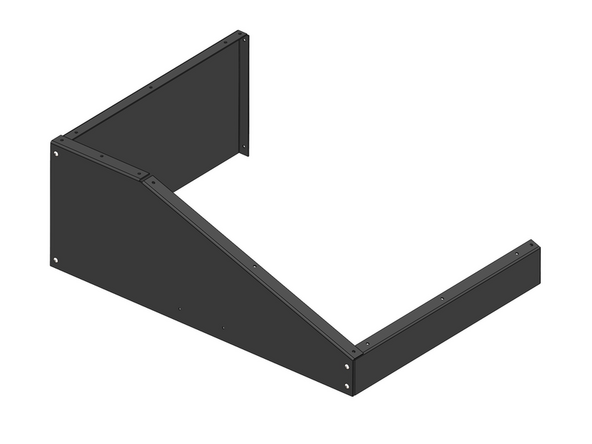
Take the rear panel and remove the protective film from it.
-
Take the 70mm blower fan and fix it to the panel.
-
M4 x 40mm
-
M4 Nyloc Nut
-
Make sure to install the fan on the side shown in the diagram.
-
-
-
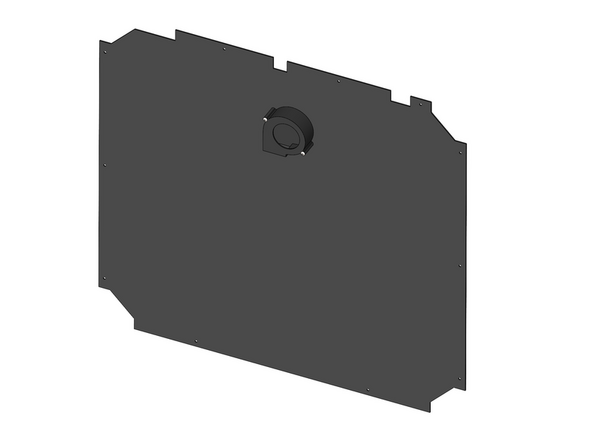
Install the 3d printer fume filter fan shroud.
-
M4 x 40mm Bolt
-
M4 Nyloc Nut
-
-
-
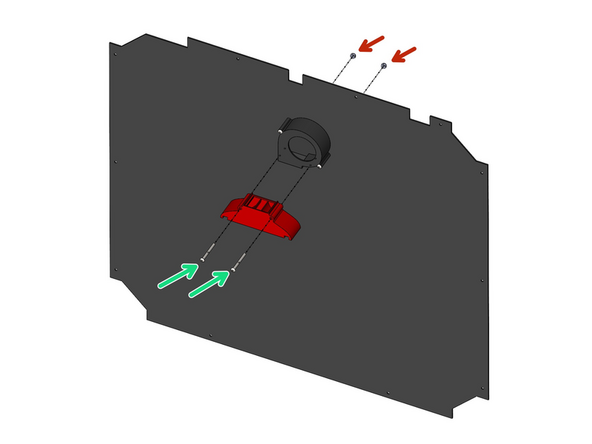
Prepare the panel by loosely adding onto it fasteners.
-
M4 x 8mm Bolt
-
M4 T-nut
-
-
-
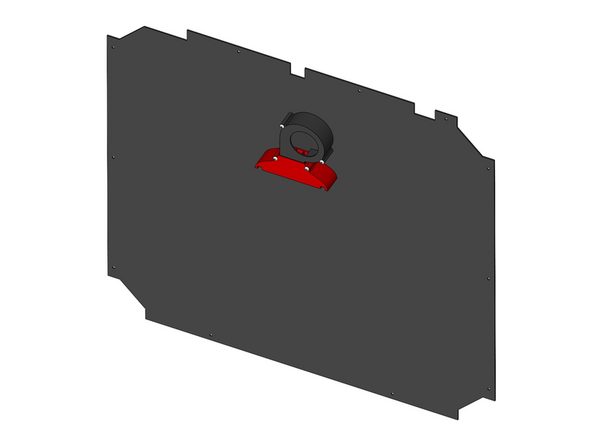
Install the rear panel as shown to the back of the printer.
-
-
-
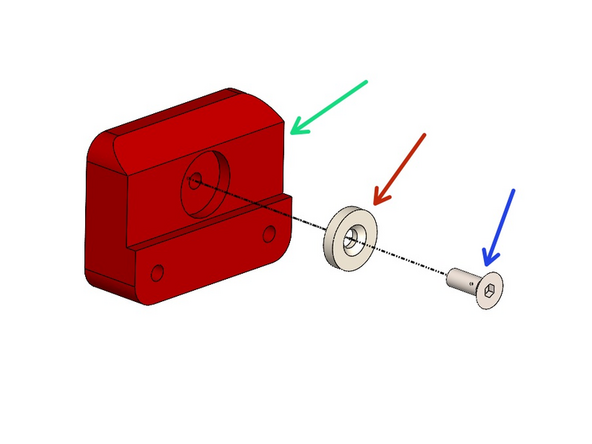
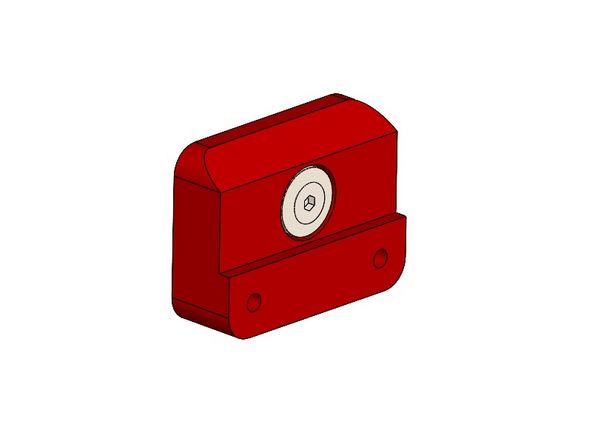
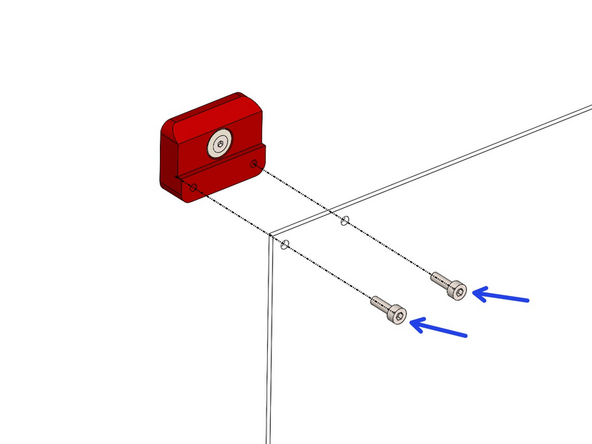
Prepare four 3d printed door handles:
-
3D printed Door Handle
-
M3x10x2mm Countersunk Magnet
-
M3 x 8 CS bolt
-
Self tap the bolt into the 3d printed part.
-
-
-
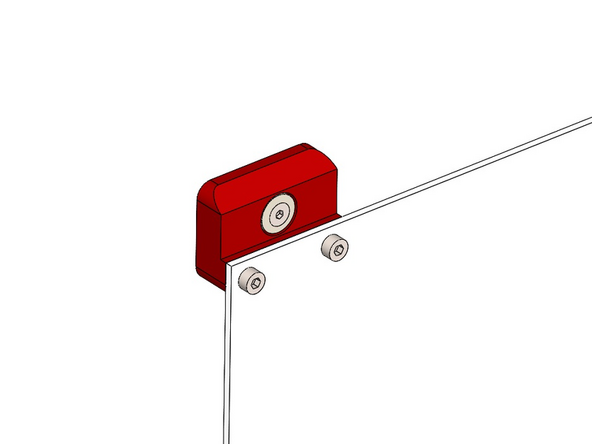
Take the two front door panels and remove the protective film from both of them.
-
Fix onto both door panels two handle assemblies as shown.
-
M3 x 10mm Bolt
-
Self tap the bolt into the 3d printed part.
-
-
-
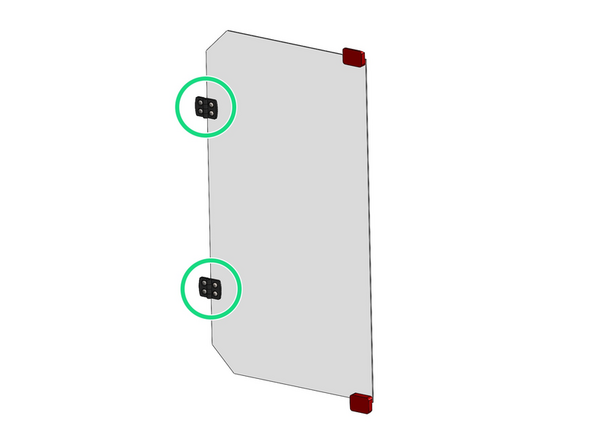
Fix two hinges onto each door panel as shown. The hinges should be installed on the front side of the panel.
-
Hinge
-
M4 x 10mm Bolt
-
M4 x 8mm Bolt
-
M4 Nyloc Nut
-
M4 T-nut
-
Fasten these on loosely.
-
-
-
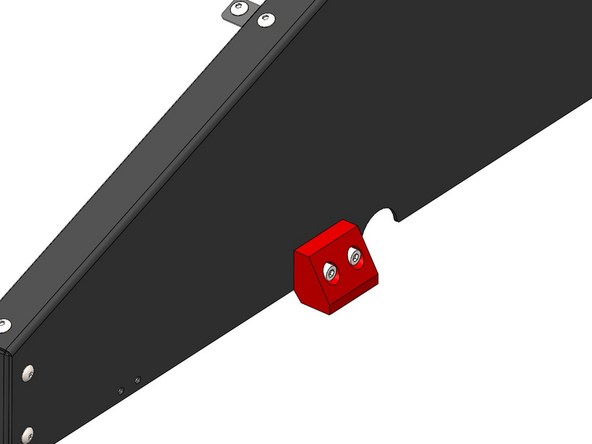
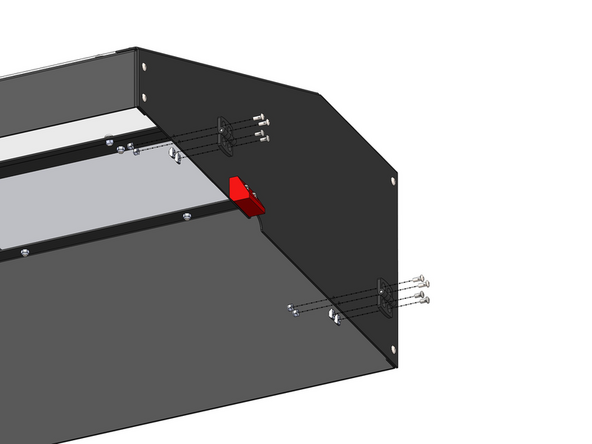
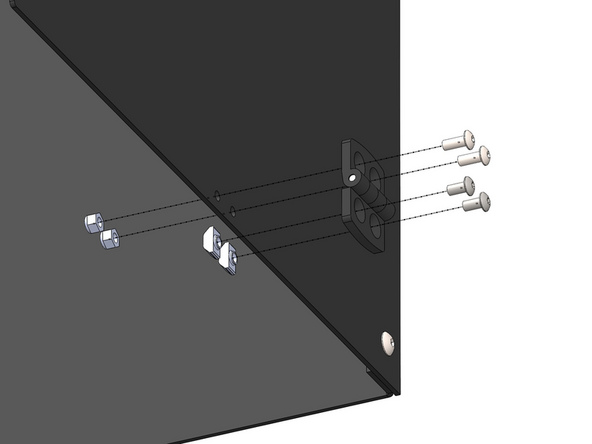
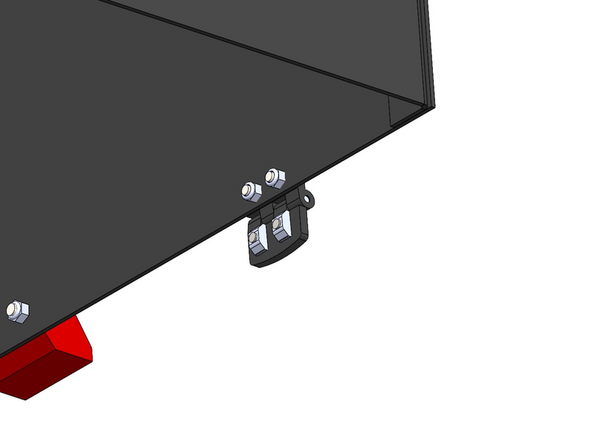
Fix the two door latch brackets onto the front of the frame as shown. Install them onto the centre of the frame.
-
Front door latch
-
M4 x 8mm Bolt
-
M4 T-nut
-
-
-
Fix the front doors onto the frame of the printer from the hinges.
-
-
-
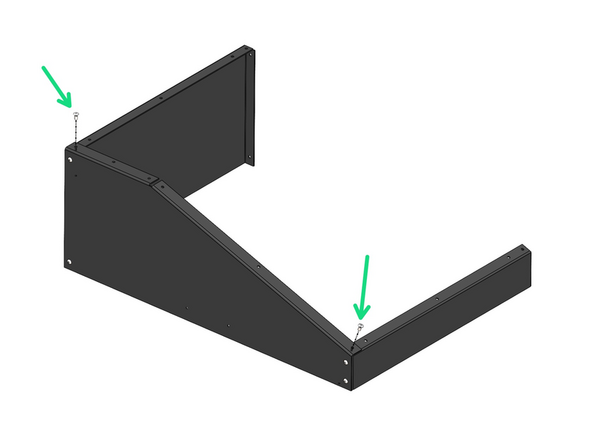
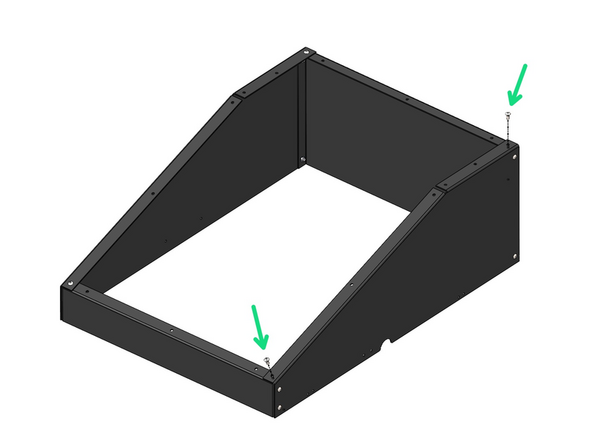
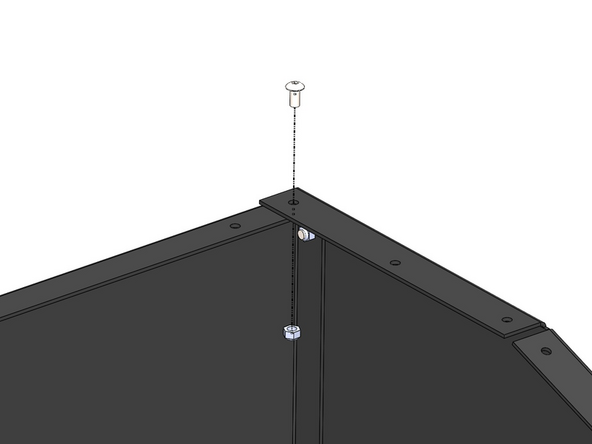
Begin by assembling the three roof panels as shown.
-
Roof Front Panel
-
Roof Left Panel
-
Roof Right Panel
-
M5 x 10mm Bolt
-
M5 Nyloc Nut
-
-
-
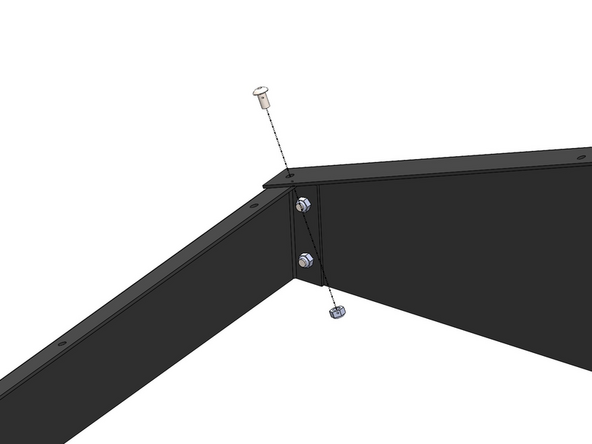
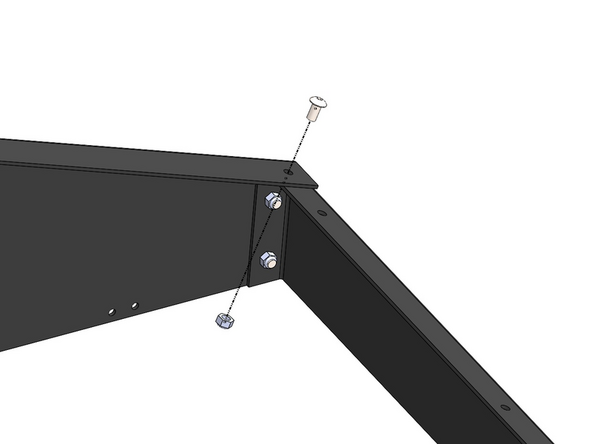
Fasten on two more M5 x 10mm Bolts and M5 Nyloc Nuts.
-
-
-
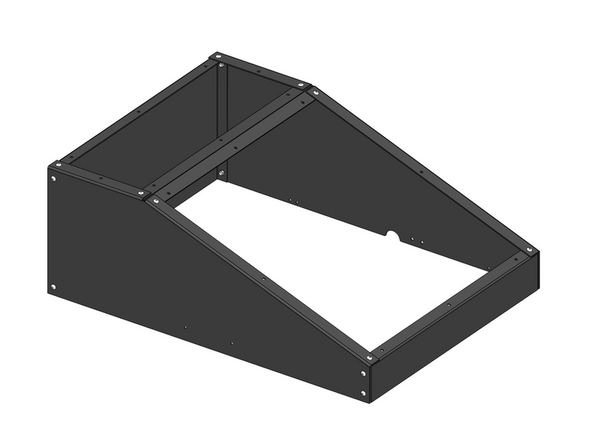
Install the rear panel to the assembly.
-
M5 x 10mm Bolt
-
M5 Nyloc Nut
-
-
-
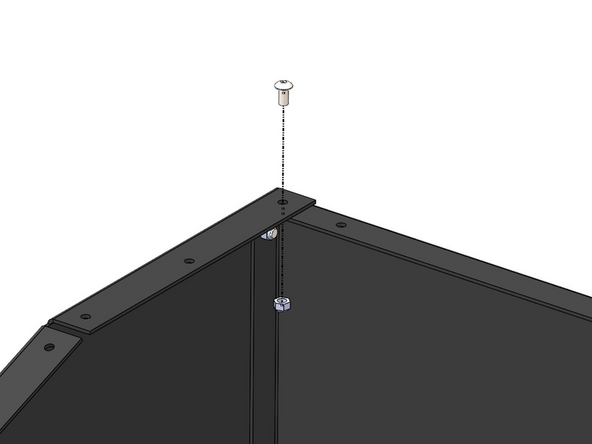
Add two more M5 x 10mm bolts and M5 Nyloc Nuts to the assembly as shown.
-
-
-
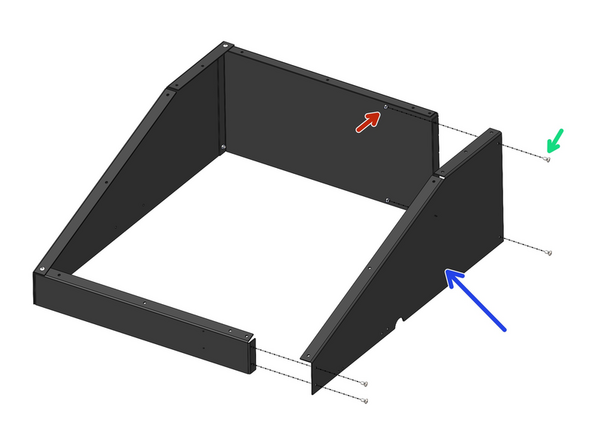
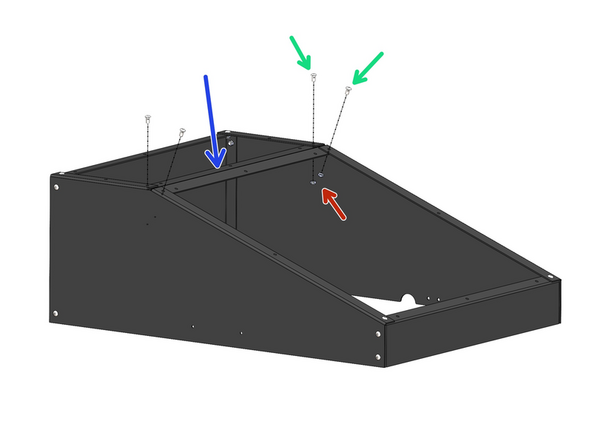
Add the support beam to the roof assembly.
-
M5 x 10mm Bolt
-
M5 Nyloc Nut
-
-
-
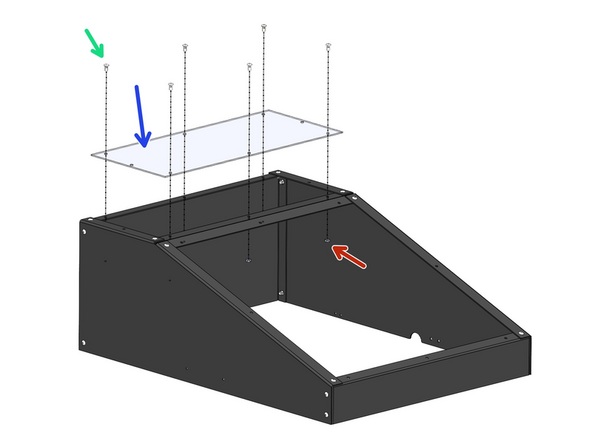
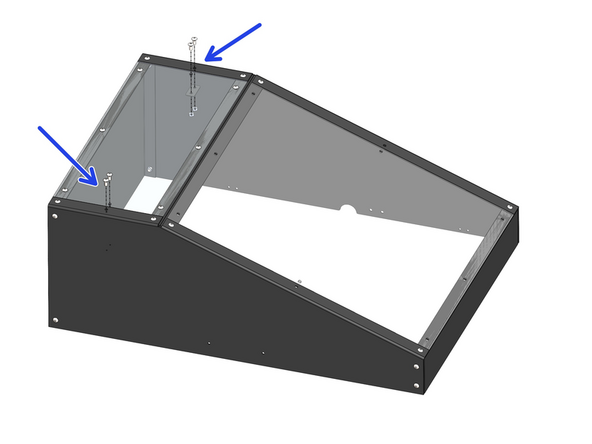
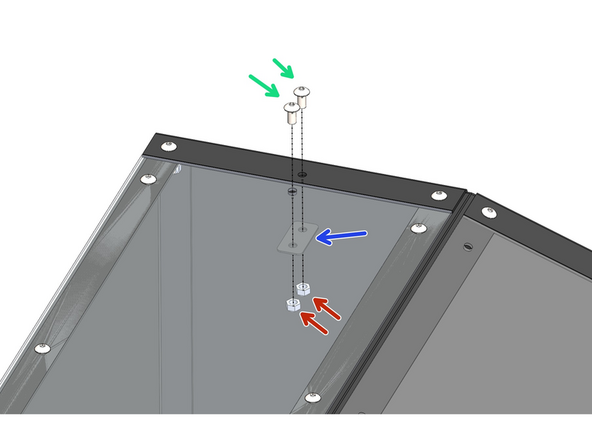
Fix the acrylic panel onto the roof as shown.
-
M5 x 10mm bolt
-
M5 Nyloc Nut
-
-
-
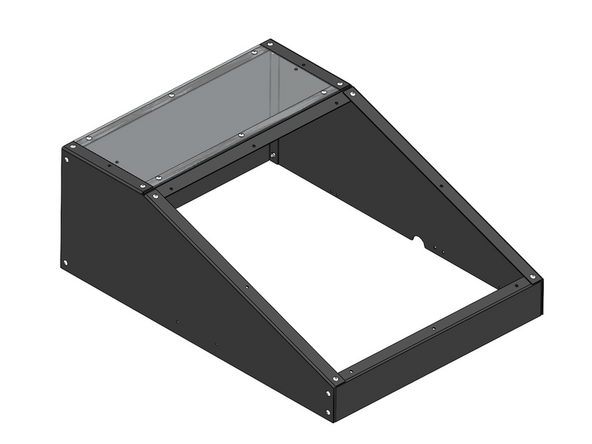
Fix on the support bracket as shown.
-
M5 x 10mm Bolt
-
M5 Nyloc Nut
-
-
-
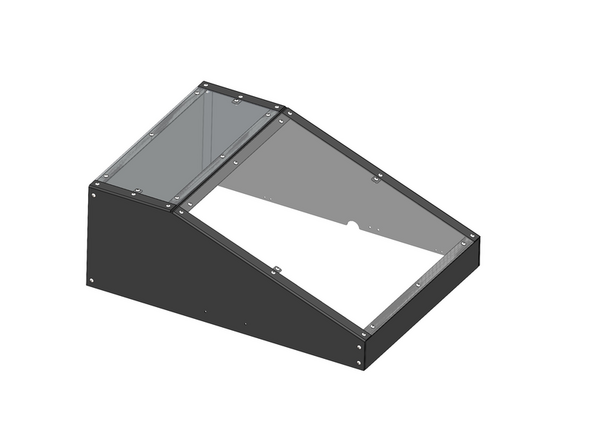
Repeat the process with the larger acrylic panel.
-
-
-
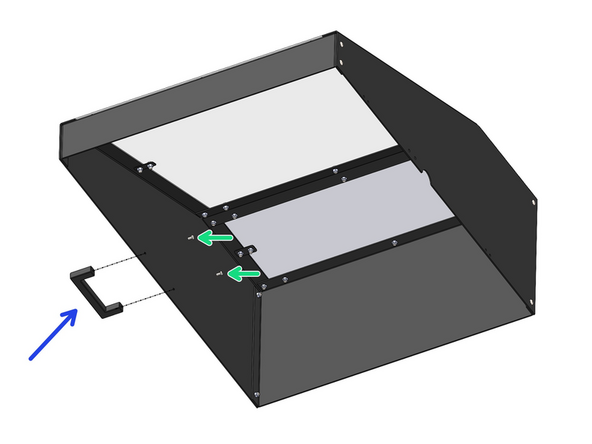
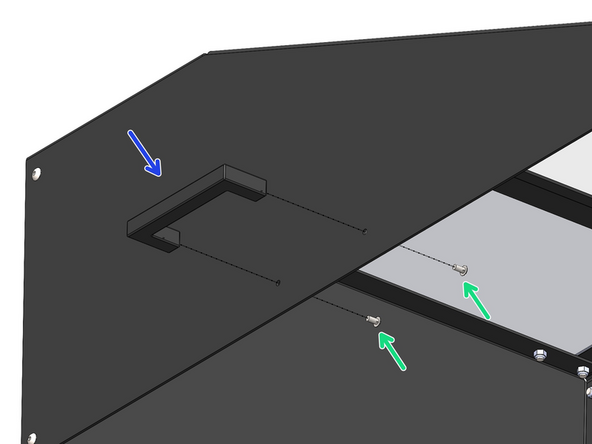
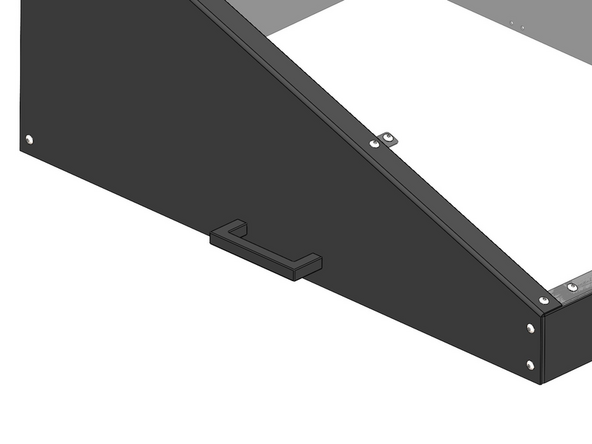
Mount the handle on the front of the roof assembly.
-
M4 x 8mm Bolt
-
-
-
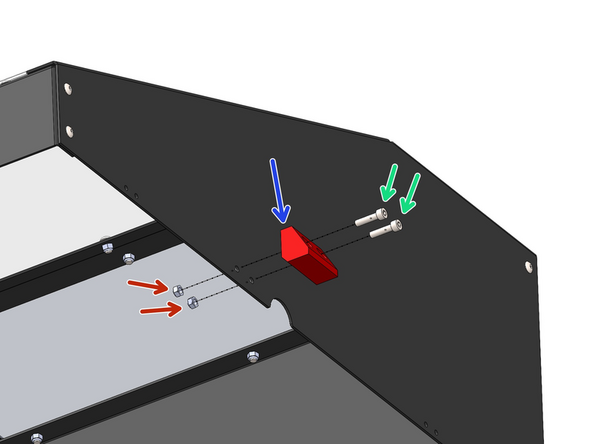
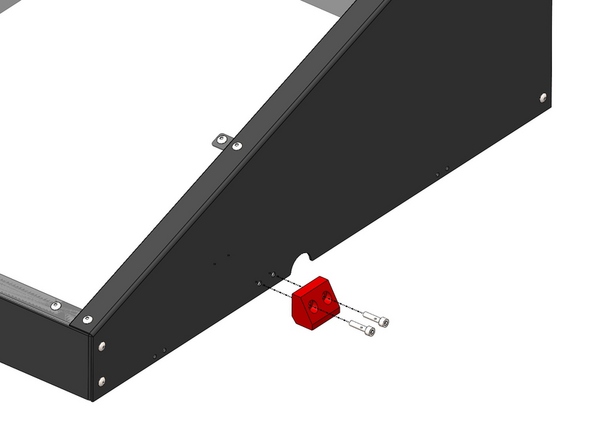
Fix the 3D printed Stopper to the roof assembly.
-
3D Printed Stopper
-
M5 x 20mm Bolt
-
M5 Nyloc Nut
-
-
-
Add to the rear of the assembly two hinges.
-
Hinge
-
M4 x 10mm Bolt
-
M4 x 8mm Bolt
-
M4 Nyloc Nut
-
M4 T-nut
-