
-
-
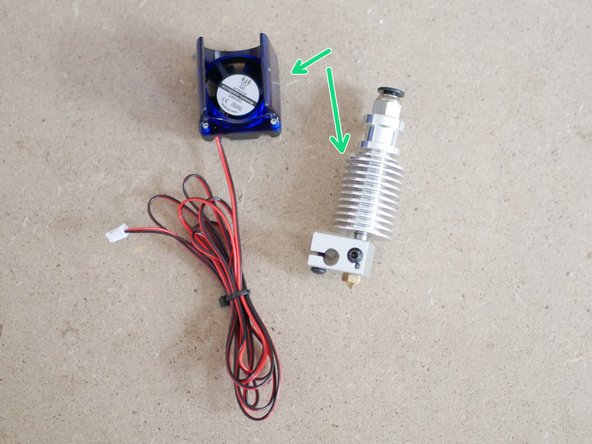
Check that you have all of the components photographed from the Hotend bag.
-
Allen Key
-
Thermistor and heater cartridge
-
PTFE Tubing
-
The tubing can be put to one side for now, also the included golden coupling is not used, you can remove it and keep it as a spare.
-
Hotend assembly with fan
-
-
-
A mistake was made by our supplier for a batch of the heater cartridge and thermistor (red and white cables) cable lengths. Their lengths should have been 1.2m, however some are only 1m long.
-
If you have cables that are 20cm too short you can (in order of quickest):
-
Solder, use cable blocks or crimp to add extra cable. For the heater cartridge you need to use 24AWG. For the thermistor you can use 28AWG.
-
Order a longer set locally. The heater cartridge is 24V, 40W, 6*20mm. The thermistor is a 100k NTC thermistor. They are both very common and cheap parts (little over a dollar each), you should be able to find them on sites like Amazon, eBay and Aliexpress:
-
-
-
Or get in touch with us by completing this form.
-
If you are waiting for a replacement you can still wire the shorter cables, you can get slightly more length by not including it in the main stem and routing it along the support beam instead, then plugging it in with the gantry lowered. For the mean time though this does result in a lower max z-height.
-
-
-
The fan mount assembly pops off the heat sink like shown.
-
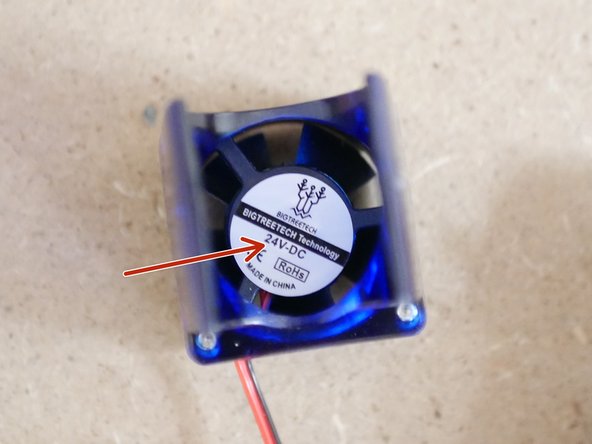
Check that you have a 24V fan.
-
-
-
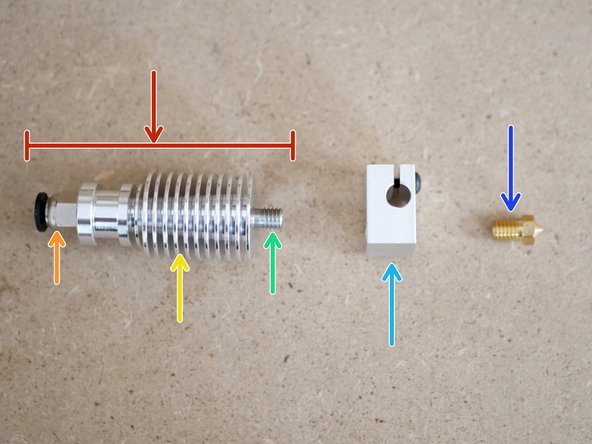
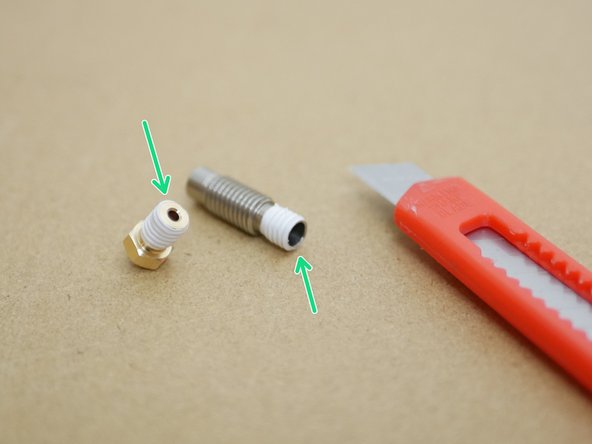
Disassemble the Hotend like shown.
-
Heatsink assembly
-
PTFE Coupling
-
Heatsink
-
Throat
-
Heater-block
-
Nozzle
-
-
-
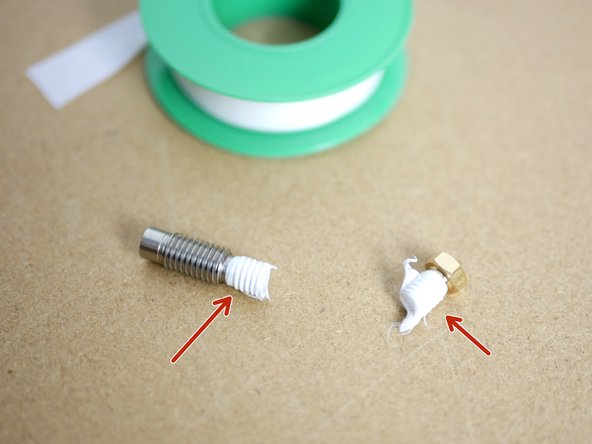
Wrap several layers of the included PTFE thread tape around the threads of the throat and nozzle as shown in the image.
-
The tape should be wrapped around the shorter part of the thread on the throat.
-
Use a craft knife to scrape away the excess PTFE tape.
-
Make sure that the openings are clear of the tape.
-
-
-
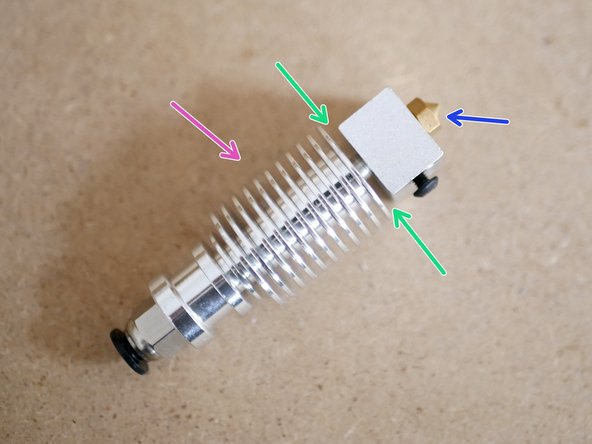
Reassemble the Hotend making sure that there is a gap between the heater-block and heatsink.
-
Begin by fastening on the Nozzle
-
Next screw on the heatsink assembly.
-
With the PTFE tape around the threads you may need to use a set of pliers to screw the nozzle and throat into the heater-block.
-
-
-
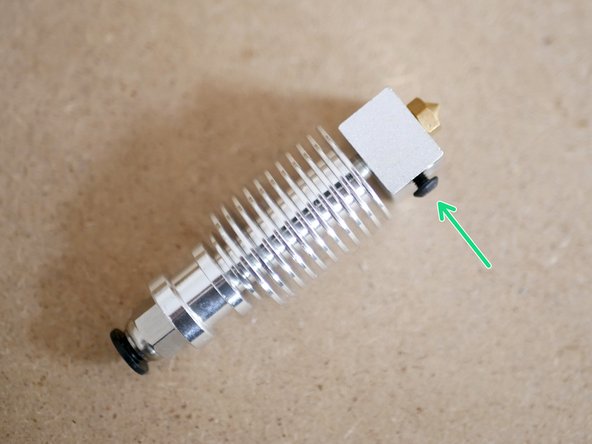
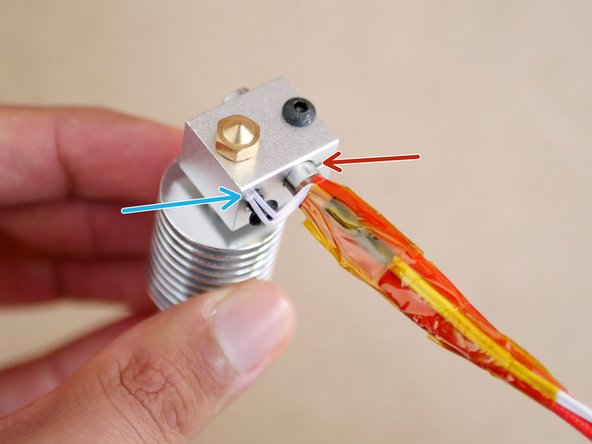
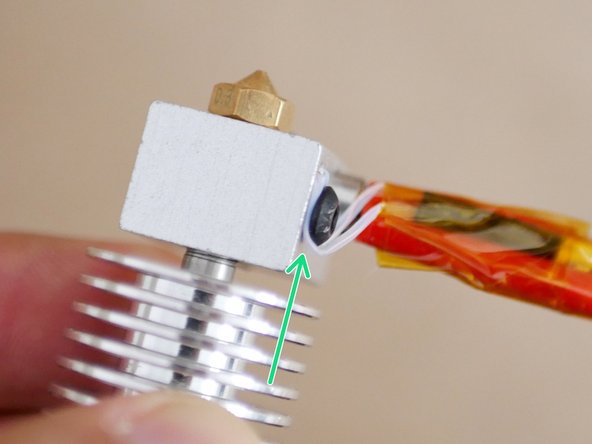
Unscrew the bolt on the side of the heater-block by a few millimetres.
-
Take the heater cartridge and thermistor cable assembly and push the heater cartridge into the large hole...
-
...and the thermistor into the smaller hole.
-
Position the Heater cartridge to the centre of the heater-block and fasten town firmly the bolt that clamps it in place.
-
Take care with thermistor bead, it is fragile!
-
-
-
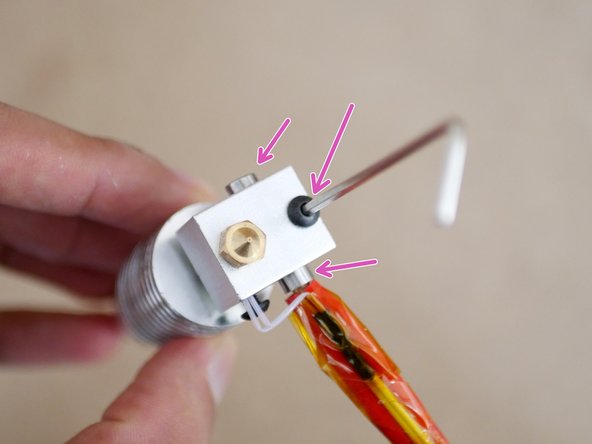
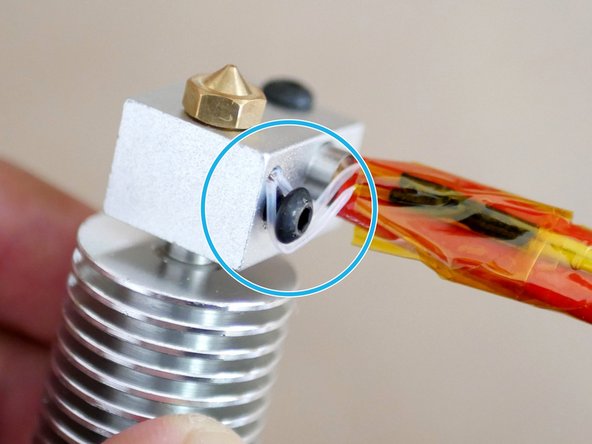
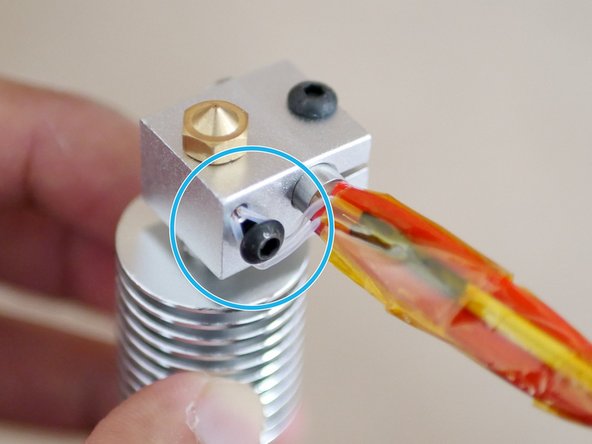
Carefully wrap the thermistor cables around the bolt head.
-
Carefully fasten the bolt down.
-
Do not fasten it down tightly, it just needs to hold the cables, fastening it down tightly will cause the wires casing to split and it's core to short on the block.
-
-
-
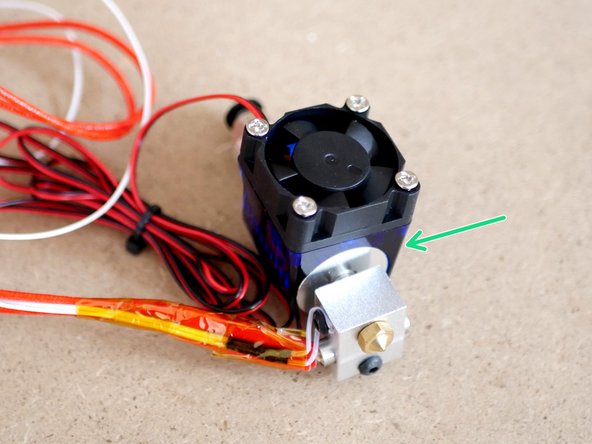
With everything assembled you can clip the fan back on.
-
Make sure that the flat side of the fan mount is flush with the bottom of the heatsink.
-

Cancel: I did not complete this guide.
21 other people completed this guide.

3 Comments
thermistor needs heat compound to make temp more stable and accurate.
Perrie iles - Resolved on Release Reply
If I knew that I would have to completely assemble it, I would not have backed it. I have arthritis in my hands and cannot hold the Allen wrench.
Howard Edidin - Resolved on Release Reply